Today, I started wiring the front panel.
Over the next several months I'll be building what is definitely
my most complex electronics project to date: the MFOS (Music From
Outer Space)
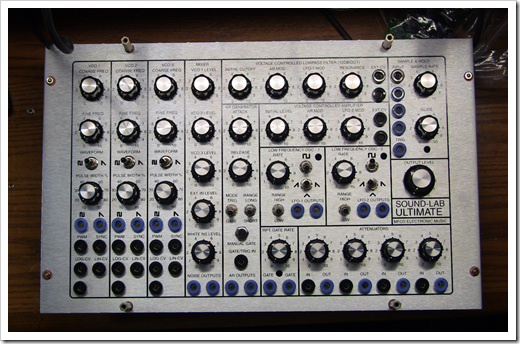
Sound Lab Ultimate,
Ultimate Expander and (if Santa brings one)
Sound Lab Mini-Synth Mark II, likely all in the same home-made
wooden case, side by side. The Ultimate and Expander are together a
3 oscillator monophonic true analog synthesizer with filters,
envelopment generator, ring modulator, sample and hold and more.
You patch between the different logical modules using banana
cables, so it's a bit of a self-contained modular synthesizer. The
Mark II is smaller, newer, and has a few fewer features, but a
sound of its own. You also patch that with banana cables, and can
integrate the two. This blog post is another in the series.
Previous posts include:
I received a shipment from Small Bear Electronics. They had the
24mm Alpha
1M and 100K audio taper pots back in stock, so I ordered a few.
I liked the smaller pots, but not how they wiggled in the holes no
matter how much I tightened the nuts. I didn't feel like making
spacers for them.
I also decided which control knobs I wanted to use. I was really
torn as I liked the violet
knobs both in size and style, but I really disliked how they
showed the pot washer and nut. It just looked too DIY with those
showing for each pot. Instead, I went with the other one I liked:
the same style that's on my Moog slim phatty.
At Small Bear, these are Synth
Pointer #4. I cleaned them out, and actually have a few on
backorder.
With all the potentiometers in place, I decided to start some of
the front panel wiring. Ray has a good diagram on his site showing
the wiring. I printed that out, and as he recommended in the build
notes, I took a marker and colored each wire as I completed it.
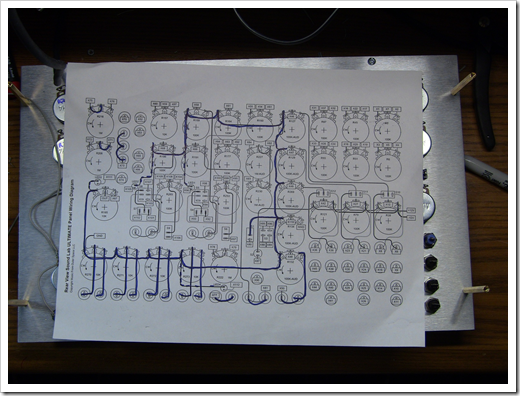
From the diagram, you can see, I've completed almost 1/2 the
rear panel wiring. Here's the panel.
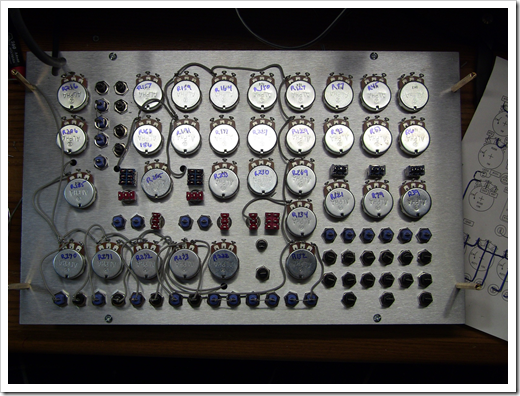
You can also see that I have a number of SPDT and DPDT where the
plans call for SPST and DPST switches. I simply couldn't find a
decent price on the latter, and just substituted the double throw
switches. I'll wire them as though they were ST.
I decided to have all the intra-panel wiring gray. I'll use
other color wires for connecting to the board, but the wires on the
panel are easy to trace by eye (I know, famous last words).
Before I can do too much more with the front panel, I need to do
the following:
- Fabricate and install a few brackets to hold the grounded
aluminum shield in place. Ray did this with the
Mark II build, and I really like the idea.
- Create a few LED holders (also like Ray did on the Mark
II)
The Mark II is Ray's latest creation. Being able to incorporate
some of the ideas from that into the Sound Lab Ultimate is
fortunate. I'll do the same with the expander and the Mark II, both
of which are waiting on my desk to be part of this one large
synthesizer.
Oh, and tried out some new solder today: the recommended one
from Kester. It smokes a lot more, but seems to let out less flux.
Folks seem to swear by it, but I don't see a lot of difference
right now. We'll see once I use it for component soldering.
