The .NET Micro Framework is a free and open source
version of the .NET Framework, created by Microsoft, and supported
by both Microsoft and the community. The current production version is
4.1 and supports C# development. The latest beta, version 4.2, adds
support for Visual Basic as well as several Microsoft-contributed
and community-contributed features.
The .NET Micro Framework, Apache 2.0 licensed, is a great open
source success story at Microsoft. It's also a great way to either
learn programming, or to leverage your current .NET skills to go
places you may not have previously considered.

In a nutshell, .NET MF is a CLR and set of libraries that runs
on tiny low-cost microcontrollers which have limited resources.
Many of these have memory measured in KB, as opposed to GB, and
processing speeds well under 100Mhz. Over 1.5 million devices,
commercial and hobby, are currently running the .NET Micro
Framework. This includes things like vending machines, and the various components
we'll talk about in this post.
You code for the .NET MF using either a free or retail version
of Visual Studio, and an SDK and drivers provided by the
microcontroller or board manufacturer. As each unique
microcontroller requires the .NET MF to be ported to it by those
vendors, they are the source for all the software you'll need.
Since it's open source, you could also port it to any processor of
your choice if you have the skill and time.
There are many ways to get started with the .NET MF, and there
are hundreds of boards available, ranging from tiny $30 chip-sized
designs all the way to full boards that resemble hand-held game
devices. In this post, I'll focus just on the Arduino-form-factor
devices, as those are the most popular.
Don't Feel Guilty
At MADExpo this week, we had a number of Micro Framework
sessions, and I had my robots and other stuff in the expo hall
(Chris Walker from Secret Labs/Netduino was also there, and we had
freebies from both Chris and GHI/FEZ). We also had sessions on
using the Kinect SDK. One thing that several attendees said was
that they feel guilty attending a fun session or two like that when
their employer let them go to this two day event.
I say: Don't Feel Guilty.
When you code for the .NET Micro Framework, you're continuing to
hone your .NET development skills. Perhaps more importantly, you're
leaning to code tight code that has to run on low power devices
with very little memory. As developers with gigs of RAM available,
we can get a bit lazy and write very inefficient code. Devices like
this help bring those skills back to us by forcing these
constraints. And, as I mentioned, it's all .NET and C#/VB.
Finally, stuff like this keeps you excited about development,
and motivated. Sometimes you need to mix it up a little to keep
from burning out.
Suggested Boards and Kits
Arduino is
an open source device and software (now a set of devices) which
have an ingenious physical layout which allows stacking "shields"
(add on boards) on top of each other to build a circuit. A huge
ecosystem has built up around Arduino, and a large number of
shields have been produced.
Several .NET Micro Framework board manufacturers have created
.NET MF-based boards which are physically compatible with the
Arduino shields (in most cases; there are some voltage differences
which trip you up once in a while as the Arduino uses 5v logic and
the .NET MF boards and most modern microcontrollers use 3.3v
logic). This allows immediate access to an enormous number of
components and add-on boards right from the start.
There are a number of players in the .NET Micro Framework space,
but the two most important ones in the Arduino-compatible market
are GHI and Netduino.
Secret Labs Netduino, Netduino Plus
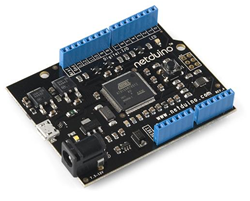
The Netduino and Netduino Plus are fully open source (hardware
and software) boards created by Chris Walker at Secret Labs. The
Netduino is the board that personally got me started with the .NET Micro Framework,
which then led me do doing things like parsing MIDI messages with the .NET Micro
Framework. The boards themselves are very inexpensive and come
in three versions. The Netduino+ is the flagship and includes onboard
Ethernet and SD card support. You'll typically find this for $60
retail. The Netduino - which was the first board released -
is just like the plus, but lacks ethernet and SD, and retails for
around $35. The Netduino Mini is a super tiny version, sized to
that of a Basic Stamp, and suitable for very small projects or
projects with tight space requirements. All the Netduino boards use
an Atmel microcontroller.
Netduino has a very active community and a growing number of
examples available on the web.
GHI Electronics FEZ Domino, Panda, Panda II, and Mini
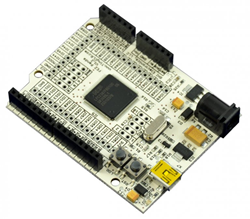
GHI Electronics manufactures a range of .NET MF boards including
several Arduino-compatible ones. The most commonly seen ones are
the Panda and Panda II. The Panda is a nice $35 board, similar in
capabilities to the Netduino. The Panda II for only $40 adds in SD card support,
analog audio playback, and a 40 pin header which provides access to
a lot of extra IOs. While neither of these boards include on-board
ethernet, they do offer a shield which adds that and their e-block ports
for $35. If selecting between the Panda and Panda II, I'd
personally pick the Panda II every time unless the extra space
taken up by the 40 pin header would get in the way. GHI also has
the more expensive FEZ Domino and a slim and trim FEZ Mini for
$40.
You can get started using either Netduino or FEZ boards
directly, and do things like blink an onboard LED or similar.
However, many will prefer to get started with an all-in-one kit of
one sort or another.
General and Sensor-Oriented Kits
The general electronics and sensor kits are a great way to get
started with the Micro Framework. With these kits, you can do
things like light up LEDs, take readings from sensors, send
information across the network or internet (like tweeting every
time you push a button), display information on LCD panels and
more.
MakerSHED Ultimate Microcontroller Pack
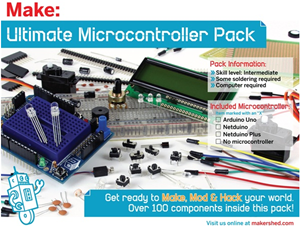
For $120, MakerSHED has the
"Ultimate Microcontroller Pack". This kit lets you pick the
controller you want (Arduino, Netduino or Netduino Plus - which
gives you ethernet support), and includes jumper wires, discrete
components, switches, LCD panel, several motors, tilt sensors, LEDs
and more. This kit will appeal more to the people who want to
tinker with the electronics side as much as the code side. I
essentially work with something like this, but I've built the parts
up over time from various sources.
FEZ Ultimate Kit
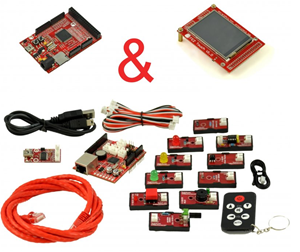
If you want to have sensors and other bits that are plug and
play, albeit with special (but easily obtainable) connectors, then
I recommend the FEZ
Ultimate Kit. For grins, I picked one of these up (also, in the
interest of full disclosure, FEZ gave me a coupon that covered a
large portion of the cost). Total retail cost of the kit is $150.
I'll have a full review and walkthrough in an upcoming post. This
is a great kit for people who don't necessarily want to whip out a
soldering iron or a prototyping board and simply want to get
started coding.
Robot Kits
One of the most exciting ways to get started with the .NET Micro
Framework is to build a robot. It's very exciting to write code
which makes your robot roll around in your hall, room, or office.
Once you add in interesting things like distance sensors, suddenly
you're able to make the robot perform basic collision avoidance,
maybe turning around and trying again. Or maybe you'd rather add on
a downward-facing color sensor and create a line-following robot.
The possibilities are endless.
There are lots of different ways to get started with .NET
MF-based robots. Let's start with the easiest: the all-in-one
kit.
FEZ Mini Robot Kit
GHI sells an all-in-one
robot kit which makes use of their FEZ Mini board. This has
everything you need to get started without having to source drive
systems and whatnot from different vendors. It would make an
excellent first robot, and should be really easy to assemble. Note
that, like most mouse-type robots, it's pretty small, probably a
bit smaller than a CD, so make sure you realize the scale before
get it shipped to you. One thing that's nice about this kit is that
it's .NET all the way down. Most beginning robot kits use other
microcontrollers (Basic Stamp or even Arduino).
Building a Robot From Chassis Kits
Most robots are built from different components from various
vendors. While many advanced builders will create their own chassis
by bolting or welding metal, many will start with a chassis kit and
build up from there.
One of my favorite robot sites, Robotshop.com, has a number of
different robot kits from the tiny $20 kits to the
computer-on-wheels $15k beasts. When piecing together your own kit,
you'll need to get:
- A chassis of some sort to hold everything together
- A set of drive wheels (typically 2 or 4)
- For two wheeled robots, a set of ball castors or similar for
the front and back (see above) unless you're going to get a
gyroscope and create a balancing robot as your first build :)
- For three wheeled robots, a third wheel or castor
- A motor for each drive wheel. Make sure the shaft is the right
size for the wheels
- A motor controller (or set of controllers) that can control as
many motors as you have
- Rechargeable batteries, or a holder for regular batteries, with
the correct voltage to drive the microcontroller and motors
Luckily, the base robot kits typically include the wheels,
castors, chassis and motors, so you know those are already properly
mated. Here are (by picture) some of the more interesting kits that
include all the right parts. All you then need to get are the motor
controllers (covered below) and your Netduino or FEZ board. If the
chassis kit says it is made for Arduino, that simply means that
it'll work with boards of that form factor, including Netduino and
FEZ Panda.
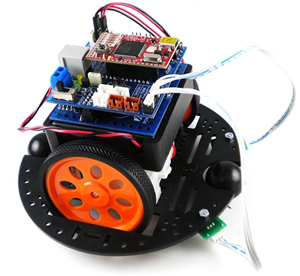
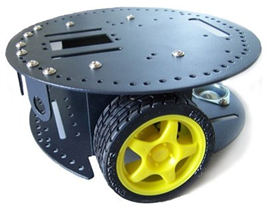
Chassis kits under $35
These kits are great starter kits if you don't want to go the
route of an all-in-one kit like the FEZ mentioned above. I tried to
pick kits here that look like they'd support the Netduino and FEZ
boards, but you may still need to be creative with stacking the
shields or controllers up a bit high, as these are usually pretty
small. I left out the ones that were obviously too small. When in
doubt, check for Arduino compatibility, as that typically means
they are sized correctly and have compatible mounting holes (note
that I also left out robots that have an Arduino-compatible board
built directly into the body, as that will be of no use to you in
learning the .NET Micro Framework).
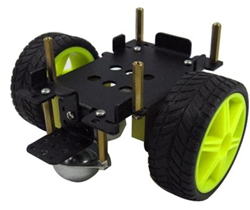
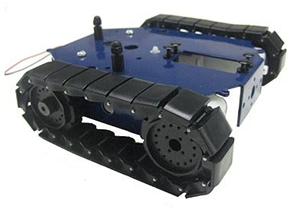
Chassis kits $36 to $65
Kits in this range tend to be a good compromise. They're not
typically 4wd (which is fine), but they're large enough for you to
mount components and boards without having to create the Tower of
Pisa robot shield stack.
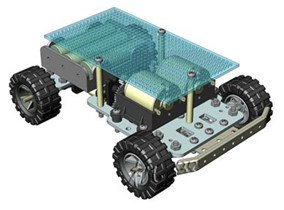
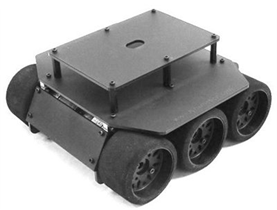
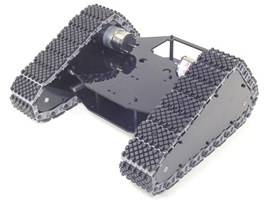
Chassis kits $66 to $100
Kits in this range tend to be a bit larger, with more room for
additional sensors. Some are also 4wd, although keep in mind that
the additional two motors typically means you'll need additional
motor controllers, or higher capacity controllers.
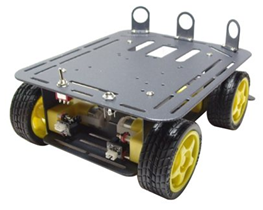
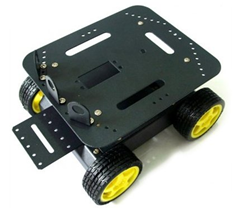
The 4wd DF Robot chassis kit above is one of the ones I own, and
is the one seen in this video on YouTube. In Fairness, the wheels
are truly awful (don't like to sit straight on the motors, treads
tend to twist a bit too) if you're expecting something with
any precision. In fact, I'm not sure I'd get any of the three kits
shown here that use those yellow wheels. Of course, for the price,
you can't really get better; you're well into the next price range
when the wheels, hubs, and motors are kick up a notch or two.
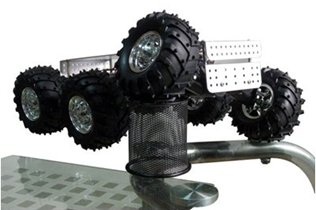
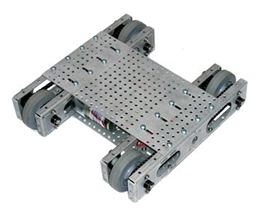
Chassis kits well over $100, but still somewhat in the realm of
sanity, kind-of… Ok, under $500
Now you start getting into kits with some quality and
ruggedness. Of course, you're in big dollar-wise and these also
tend to be more complex, so I recommend starting small before
jumping here. Also, I recommend shopping around on price for these,
as there can be significant difference between the various retail
sites, especially when you consider sales. These are where you'll
find the kits with good wheels and motors, though. In truth, I like
the very inexpensive mouse-sized kits, and the kits in this
section. The mid-range tends to have the worst of both.
Motor Controllers
When you purchase a chassis kit, you need to get motor
controllers as well. These provide the interface between your
microcontroller running .NET MF, and the motors themselves. You
don't want to hook motors directly to the microcontroller as it
typically can't handle the voltage or amps required to drive a
regular motor. In addition, you want a level of isolation between
your motor and microcontroller so stalling your motor doesn't blow
up your microcontroller. There are also issues with EMF noise etc.
Just trust me here: get a motor controller. :)
Almost all motors used in the chassis kits are brushed DC
motors. Most of them are also low-power (although in the > $100
kit range, you'll need to verify that yourself, as some of those
are battlebot-ready medium to high amp motors). When selecting a
motor controller, you need to match up:
- Number of motors with what you have (you can use more than one
controller, if you have enough logic signal ports available)
- Controller logic interface mode (must be something you can
support from your microcontroller. Examples include I2C, PWM, and
Serial)
- Motor voltage and amp requirements
- Controller logic voltage levels
I mention the last one as some are expecting 12v control
signals, making use from a .NET MF (or Arduino board) much more
complicated. In addition, some require 5v signals as that is what
the Arduino puts out. All the .NET MF boards use 3.3v logic which
often, but not always, works with the 5v boards.
The boards I found to be compatible with most of the smaller
robots are the DFRobot 2A Dual Motor Controllers. I have two
of them powering my robot in the video above. I'll have more info
in my article on building that robot. The 2A motor shield from DFRobot may also
work, but I'm unsure if the 5v/3.3v difference will mess it up
(likely). I haven't bought one to try.
If you have a smaller robot, I recommend the DC Motor Shield from GHI. This is compatible
with the Netduino and FEZ boards, supports the right signal levels,
and has enough power for small robot motors. For the smaller
robots, this also has the huge advantage of being a shield, which
allows you to stack it above your microcontroller thus taking up
far less room than the separate DFRobot controllers.
My recommendation for getting started with .NET MF
Robotics
If I was looking for the easiest way to build my first robot,
I'd probably go with the GHI FEZ Mini Robot kit. With that kit, you
don't need to worry about pairing up the various components, and
you get a robot that you can build and start coding for in an
afternoon.
Get Started
So pick out the board or kit you find interesting, and go build
something today. This can be fun to do by yourself, or as a family
activity with your spouse or kids. Once you start designing and
coding for these little microcontrollers, you'll find you suddenly
have tons of ideas on where you can take them (home automation and
security, monitoring, small electronics projects, synthesizers,
robots, video games, fun gadgets, automated fish tanks,
self-propelled lawn equipment, computer room water and temperature
alerts and more).
