In this post, I'm starting to build the front panel for my MFOS
Sound Lab Ultimate analog synthesizer.
Over the next several months I'll be building what is definitely
my most complex electronics project to date: the MFOS (Music From
Outer Space)
Sound Lab Ultimate,
Ultimate Expander and (if Santa brings one)
Sound Lab Mini-Synth Mark II, likely all in the same home-made
wooden case, side by side. The Ultimate and Expander are together a
3 oscillator monophonic true analog synthesizer with filters,
envelopment generator, ring modulator, sample and hold and more.
You patch between the different logical modules using banana
cables, so it's a bit of a self-contained modular synthesizer. The
Mark II is smaller, newer, and has a few fewer features, but a
sound of its own. You also patch that with banana cables, and can
integrate the two. This blog post is another in the series.
Previous posts include:
Ok, I lied. I wasn't going to do any more on this board, but I
had a number of packages waiting for me today, including a
wonderful box from Small Bear Electronics. They had the best prices
for Alpha potentiometers. They were out of a couple of the audio
taper ones in the larger size, so I substituted the smaller pots.
If the action on those is significantly different, I may just bite
the bullet and order the larger sized ones elsewhere, but I'd
rather not. In the same order, I picked up an assortment of knobs
to see which ones I would like the best on the synth before
ordering the 82 knobs the three modules (plus the Volts/Octive
calibrator) would use.
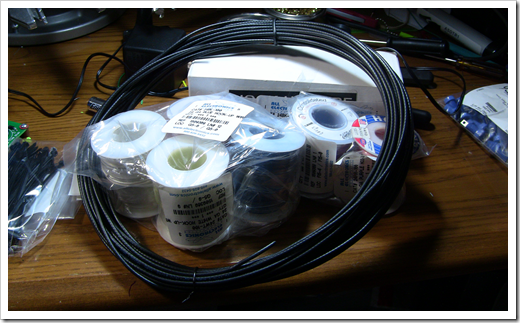
Also, to connect all those wonderful pots and the jacks and
switches, I needed a bunch of wire. All my hookup wire is either
high (thin) gauge solid wire, or low (thick) gauge stranded. I
needed a bunch of 24 or 26 gauge stranded so it would remain
flexible, and as many colors as I could dig up. I'm not a fan of
working with stranded, but when you have something that's going to
flex, it really helps to keep things from breaking. I ordered
all that from All Electronics. I also needed a little thin coax for
some of the more sensitive wiring, as recommended by Ray Wilson
(owner of MFOS).
If you're curious as to just how much wire gets used in this
project, check out these builds from other folks. Also keep in mind
these show only one of the three primary panels.
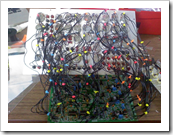
You can see more photos on
Ray's facebook group. The wiring can get a bit nuts. When you
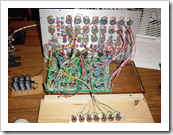
consider that the circuit board looks like this:
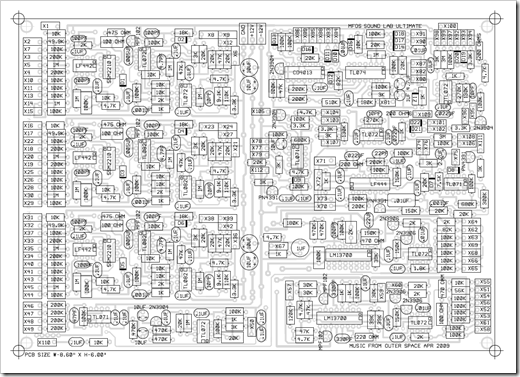
…and that all those X spots are wires going to the panel, you
begin to see how it can quickly get out of hand. I'm considering
wiring things into a few pluggable (locking) headers and going from
there, but you really want every wire to be as short as you can
reasonably get it, so I'm not sure. I may still do it to clean it
all up a little and make it easier to work on the whole thing. In
fact, if I have those headers in there, I can keep the wires
shorter anyway, because I wouldn't require the slack to be able to
work on the board. hmmm.
At this point, I'd like to mention how great Ray from MFOS has
been. I've only been into electronics for the past year, and this
is my first large kit where I had to source all the parts. In the
past, the kits (like my two SammichSID kits and the MeeBlip) came
with all the parts included and with very detailed step-by-step
instructions. That's simply not practical with a kit this large.
Ray has been great answering my questions, many of which clearly
show that I fall into that disclaimer on the top of his page where
he doesn't recommend these boards for electronics newbies :)
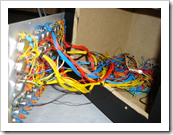
In any case, I'll investigate doing something
about that wiring, as the other builds I've seen just make me
cringe with that pile of spaghetti in there. Nothing wrong with
that, especially if you're keeping the runs as short as possible,
but it makes my eyes hurt.
Potentiometers
Small Bear had the best prices by far on the pots, so I ordered
a bunch of them from there. I originally wanted to go with all nice
conductive plastic Bourns pots, but at around $10 each at normal
prices, no way. Together, the four projects (Ultimate, Ultimate
Expander, V/O Calibrator, and Mini Synth Mark II) use 82
potentiometers. 82 x $10 might as well equal
double.PositiveInfinity as it's not going to happen.
Unfortunately, small bear was out of the audio taper pots in the
larger 24mm size. They had them in the smaller 16mm size though, so
I used those.
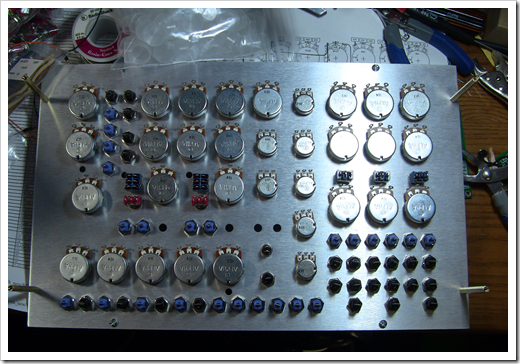
The shaft of the 16mm pots doesn't quite fill the panel hole, so
aligning them (and keeping them aligned over time) is a bit fiddly.
However, I actually prefer the feel of those pots in use to the
24mm. That's something to keep in mind for future projects. I've
heard the 16mm pots don't last as long and/or aren't as consistent,
but that just smells like FUD to me.
Near the top of the panel, you can also see a bag of plastic
caps for the 16mm pots. I'll install those after the soldering is
done - they'll help keep any dust out of the pots. I'm not sure why
they don't make any for the 24mm pots. Perhaps the 16mm are more
prone to dust (perhaps the source of the FUD?)
Turns out people do make covers for 24mm potentiometers.
Here's one, but holy crap that's way over priced, unless it's
for like 100 of them. Here' I see another
list with the same ones, but $0.95 each. That's a bit better,
but still more than I'd expect them to be. I may just have to
resort to a bit of tape or something as the price of the seal plus
the original pot price starts getting high enough to count, or I
might just say forget it, and make sure I have some pot cleaner
hanging around 5 years from now :). (BTW, turns out tubesandmore.com (Antique
Electronic Supply) is also a great source for knobs, pots, and
other pieces. Reasonable prices too.
Knobs
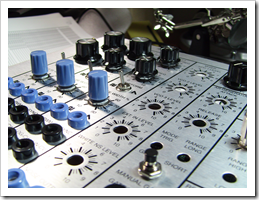
You can't have pots without knobs. I auditioned a number of
control knobs purchased from Small Bear Electronics, as well as
several I had on hand. No matter how I photograph them, no matter
what light I use in here, I can't get the violet to come out as the
knobs and jacks all end up looking blue. Seems like a poor spot in
the digital camera CCD sensitivity, or maybe I need to switch to
different lights or photograph this guy outside. These look more
blue, but they're actually a violet color.
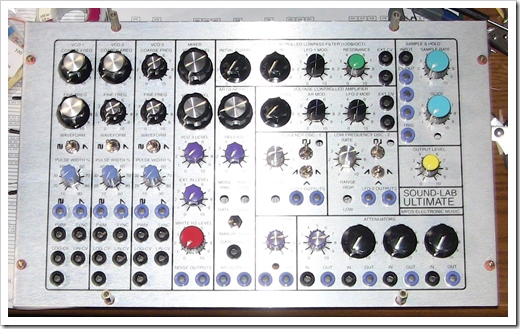
The first photo shows the color of the jacks and knobs a little
better, but still not spot on. The second photo shows the color of
everything else correctly.
You can see from these photos, that the knobs sit at various
heights above the panel as well.

I haven't yet made up my mind. My wife and children are partial
to the violet knobs (the ones that are the same color as the banana
jacks, not the more purple ones). I was really hoping the three
large knobs on the top left would work, as they match my Moog Slim
Phatty, but they're really too big and they actually make the pots
hard to turn, even with space around them. The smaller ones next to
them are nice, but they're too short and therefore difficult to
use. My wife also likes the aluminum colored ones on the right. I
really don't care for the looks of the black skirted ones with the
large position line in white. In general, all the large 1" knobs on
the board are simply way too big, and the knobs that are only 1/2"
tall are way too small. In terms of usability as well as
aesthetics, I'm torn between the black knurled aluminum ones on the
right, and the violet ones on the bottom left. However, I would
have preferred a skirted knob like on my Moog, as I hate to see
washers and nuts under them.
Here are my Moog and Roland racks for comparison:
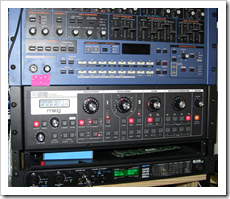
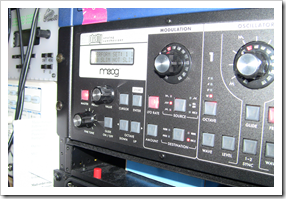
The smaller skirted Moog knobs are actually a little longer than
the small ones I tried out, giving your fingers more to purchase.
Before I commit to a set, I'm going to make sure those aren't
something I can find either at Small Bear or elsewhere. I think the
Synth Pointer #4 at Small Bear may be what I had in mind. Looks
like one more round of samples (good thing I can use these on other
projects!) before I make a final decision. Since I'll be away most
of the week, today's a good day to put in an order. Done. :)
Next Up
I'll post about the switches I ended up using in an upcoming
post. I had to make a few simple substitutions that anyone else
building this synth will likely have to make. In the photos above,
I don't yet have those switches in place as I hadn't yet made the
decision to swap out. More on that next time.
