With the latest update to Visual Studio 2012, the mechanism for
specifying and verifying DPI-aware images has just gotten
easier.
I've written and spoken about automatic DPI-aware image assets
in Windows 8 apps in my book Windows 8 XAML in Action, and also at
events. Here are the details, but in a nutshell, if
you use a specific naming convention for images in your Windows
Store app, for example logo.scale-100.png and logo.scale-180.png,
your code can simply reference the root name (logo.png) and the
runtime will handle pulling in the correct image for that DPI.
Specifying images
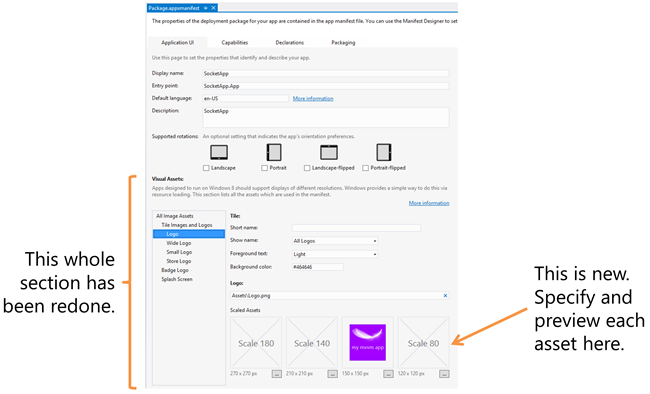
In base Visual Studio 2012, the file picker in the app manifest
didn't quite understand this convention. To pull in DPI-aware
images, you had to simply type the root file name in the textbox.
Everything worked beyond that. In Update 1, the appxmanifest
designer has been updated to better support these types of image
assets:

Another nice change is that the "store logo" entry has been
moved from the last tab to the first tab. This is a huge deal as
the latest version of WACK now checks to make sure you
have that logo in place. Those X logos you see in the Windows
Store? That's from folks forgetting to update this logo. With it
now on the first tab, it's much more "in your face".
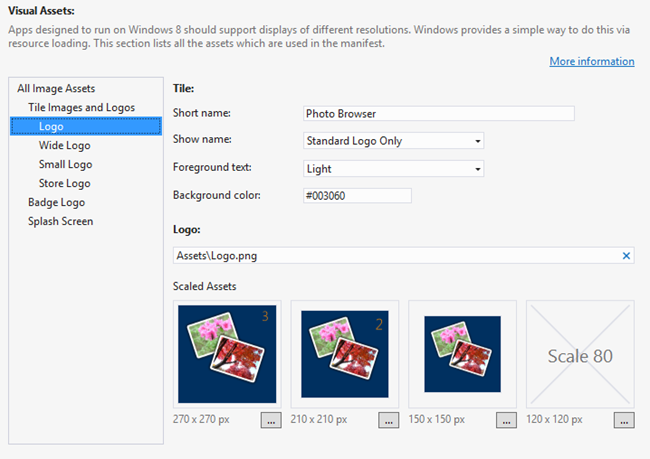
Here's one of the examples from my book, created with the base
Visual Studio 2012, and brought into Update 1 without me changing
anything. It just works (the .scale-80 image was left out by me).
the small numbers at the top right of the logo are to illustrate
which image is chosen when run in the simulator.

Note that the appxmanifest itself only includes an entry for the
base file name:
<?xml version="1.0" encoding="utf-8"?>

<Package xmlns="http://schemas.microsoft.com/appx/2010/manifest">

  <Identity Name="7bb30b0f-fd80-4ea2-a0e6-c619d20c83fe" Publisher="CN=Pete" Version="1.0.0.0" />

  <Properties>

    <DisplayName>PhotoBrowser</DisplayName>

    <PublisherDisplayName>Pete</PublisherDisplayName>

    <Logo>Assets\StoreLogo.png</Logo>

    <Description>PhotoBrowser</Description>

  </Properties>

  <Prerequisites>

    <OSMinVersion>6.2.1</OSMinVersion>

    <OSMaxVersionTested>6.2.1</OSMaxVersionTested>

  </Prerequisites>

  <Resources>

    <Resource Language="x-generate" />

  </Resources>

  <Applications>

    <Application Id="App" Executable="$targetnametoken$.exe" EntryPoint="PhotoBrowser.App">

      <VisualElements DisplayName="Photo Browser by Pete"

                      Logo="Assets\Logo.png"

                      SmallLogo="Assets\SmallLogo.png"

                      Description="Photo Browser sample app for my book Windows 8 XAML in Action"

                      ForegroundText="light"

                      BackgroundColor="#003060"

                      ToastCapable="true">

        <DefaultTile ShowName="logoOnly"

                     WideLogo="Assets\WideLogo.png"

                     ShortName="Photo Browser" />

        <SplashScreen Image="Assets\SplashScreen.png"

                      BackgroundColor="#003060" />

      </VisualElements>

    </Application>

  </Applications>

</Package>
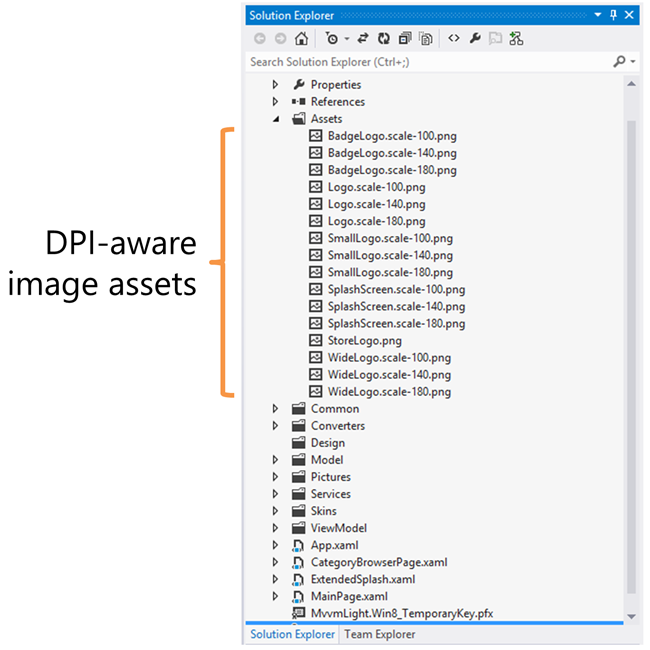
In the project itself, I have images named with the
system-recognized naming convention.

Testing your images
If you have multiple machines with different DPI screens, that's
a great way to test, as you'll see exactly what the images look
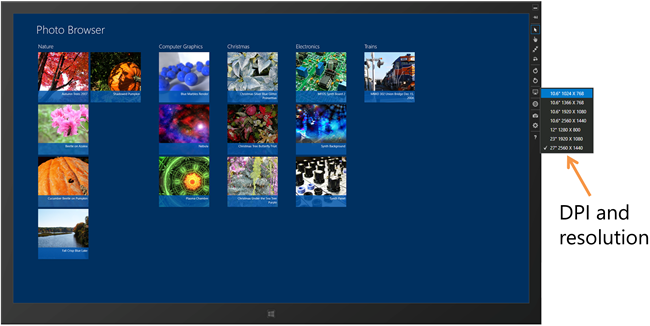
like. For most people, however, that's not the case. To test out
the images, use the simulator. The simulator will do its best to
show what the images will look like, but of course, without the
available DPI on the host machine, the level of detail won't be the
same.

It's a small change to Visual Studio 2012, but a welcome one. As
a result of this, I expect to see more developers using dpi-aware
images, and fewer developers leaving out the store logo.
Related links
