We homeschool our two children. Ben, is kindergarten age, Abby
is pre-school age. My wife does, by far, most of the work there,
including trucking them to specialized classes (art, music,
gymnastics, karate, our homeschool group single day school, etc.)
plus all the playdates with the other kids, and special events.
Melissa even teaches several of the classes at the home school
group. I generally deal with reading, since I'm in charge of story
time with my son. Lately, we've split our time between him reading
stories to me (I'm proud to say he's at about a 2nd grade level -
you have to love personal tutoring) and me reading The Hobbit to
him in preparation for the movie this Christmas. (JRR Tolkien is
far wordier than I remember.)
Melissa and I also split science duties. I've brought Ben to the
Banneker planetarium for a customized class
arranged for our homeschool group in concert with one of the
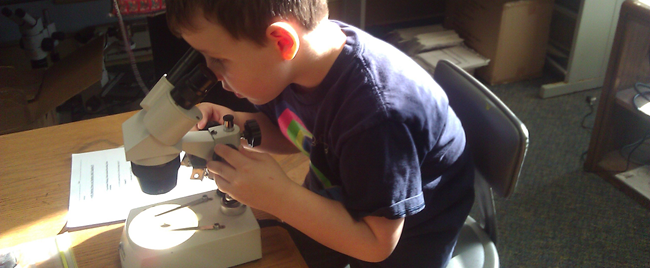
astronomy professors. I often bring Ben to SERC (Smithsonian
Environmental Research Center) for their bi-weekly homeschool
science class. It's nice to leave close to centers like that. Even
in the 5-7 year old group, they do serious science. They worked
with Microscopes to analyze feathers to explain what holds them
together, learned about the scientific method, dissected something
(unfortunately we missed that one), searched through oysters shells
on the bay looking for shrimp, jellies, and fish, and much
more.
There are certain things that I allow the kids pretty much as
much as I can afford (within reason): decent books and LEGO. The
educational value of them both is apparent the minute the child
starts interacting with them. Unlike TV, the computer (the kids
share my old netbook), or Leapster (or Nintendo DS in the case of
Ben), we don't limit the children's time on either of these. In
addition, we keep a cabinet full of paper, markers, glue, paints,
stickers, and other craft supplies which the kids can play with
pretty much whenever they want. We like to keep things around that
encourage creativity. We're not perfect by any means, but we've
found that making this stuff easily accessible encourages
experimentation (and large paint and glue stains on our kitchen
table, and random things stuck together that you may not actually
want stuck together).
I tell you all this just to give you an idea of where we are
with education in my family, and how important I consider it.
Of course, none of these things are exclusive to
homeschooling or to us. I'm proud of what we've done so far, but we
just happen to be fortunate enough to live in an area with lots of
free museums and programs geared towards home school students. Many
others take advantage of these museums and programs as well, they
just have to do it on the crowded weekends :).
Note also that we generally teach both children the same
things, although they follow their own interests. I tend to focus
on Ben in this article not because we're teaching only him
electronics and science, but because his age makes these things
more appropriate right now.
Electronics and programming
One thing I've been trying to find a good way to teach
is electrical/electronics basics and boolean logic. Not
only is this an area of interest for me, but boolean logic forms
the foundation of everything you do on a computer. I want my kids
to have an understanding of this to complement their ability to use
the computer (yes, both kids can use a mouse or track pad, Ben can
type, albeit not quickly, as well). I've also found boolean logic
just about the simplest math/logic you can get. I have no idea why
I wasn't exposed to it formally until college (the only math class
I've ever aced, besides 10th grade Geometry).
Programming is great, but I know from my own experience, that making
something happen *outside* a computer is far more impactful and
memorable.
One day, I had Ben in my home office and together we stuck a
resistor and an LED in a little breadboard. Ben then touched the
wire leads to a 3v battery pack I had around. He thought it
was awesome that he could make an LED blink (again with the blinking LED, the gateway drug of electronics
<g>). I thought this was great too. However, this
type of approach won't go far with a 6yo or 3yo, as it's too easy
to let out the magic blue smoke. It doesn't encourage
experimentation at their level.
For my two kids, I found the snap circuits kits a little too
fine grained in what they do. It's much easier to connect the
components compared to discrete leaded components and a breadboard,
but you can still connect them incorrectly. The snaps are also bit
difficult for the kids to work with, and you're really working with
just an easier form factor for discrete components. Getting
from empty to blinking LED is just as much work as it is with
discrete components. There's still lots of value to these,
however, so the set Santa brought for Christmas will simply stay
around for a few years until the kids grow into it.
As much as the kids like LEGO, the engineering and programming
involved in the Mindstorms kits is also well above them right now.
It's marked "10+" as a recall, so we still have time :)
I'm not trying to turn my kids into computer programmers,
although I think basic programming is as necessary a skill
as any other for their generation. Recently, I ran across
a project that started on Kickstarter, and then became its own
company.
littleBits
littleBits is
a company and a collection of kid-friendly hardware modules
("bits", do a mental substitution ever time I say "modules") that
can be connected together to form simple electrical circuits. The
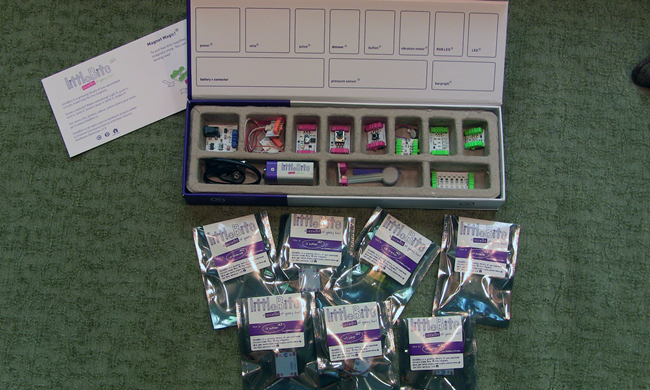
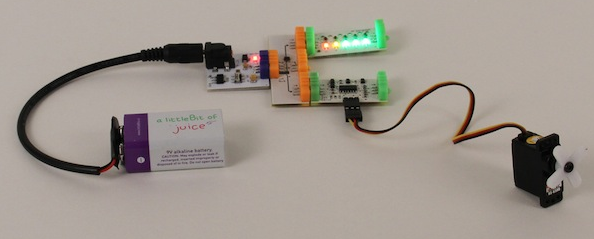
starter kit comes with a number of bits including a power module,
button, potentiometer, LED bar graph, and more. Shown below is the
little bits kit along with seven additional modules I purchased. I
ordered the kit from makershed, and the
additional bits directly from littleBits.
The overall design is Open Source Hardware, with the schematics available on github.
The connectors are custom fabricated modules which each contain
three pins (or three pads) and a set of magnets. The pins are the
typical Ground, Voltage, and Signal trio, with +5V as the standard
high level. The polarization of the magnets prevents the modules
from being connected incorrectly. Modules can be easily pulled
apart, but the magnets are generally strong enough to stay
connected during use (more on the connectors after I describe a few
more things).
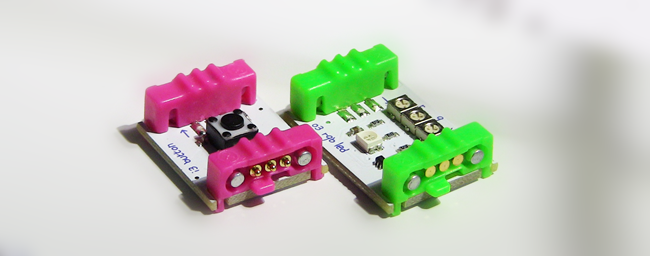
Each module is classified as either Input, Output, Power or
Wire, and color-coded by its type (input: pink, output: green,
power: blue, wire (and logic gates/routing): orange). Each is also
supplied with Ground, +5V and the signal through the pins on those
colored connectors. Three wires may not seem like much in the way
of control, but there's a thriving
community doing cool things with this simple standard.
With perhaps the exception of the buzzing motor module (which
has the vibrating motor attached with a few thin wires), everything
is extremely robust and able to stand up to the use of kids of
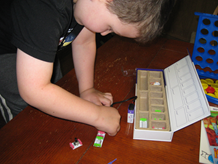
various ages. Both my son and daughter enjoyed playing with
them.

(the photos aren't instagrammed, they just have poor
lighting)
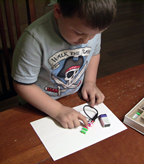
Obviously the children each got something a little different
from the process. Both enjoyed connecting them up and making
something happen. Ben was able to understand the basic flow of
electricity, and even a little about "AND" and "OR" logic gates.
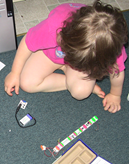
Abby enjoyed connecting all the pieces in a long chain, but also
liked when she was able to test her strength against the pressure
sensor (power + pressure sensor + LED bar graph == strength
tester).
Ben also liked trying to connect every possible module to make
something giant. However, after playing with it a third time,
he started to understand a very important aspect of
software and hardware design: build in small steps and test after
each step. I can think of a number of professional
developers who could benefit from this :)
My son's attention span is about the same as mine: 20 minutes.
After that, he tends to get pretty antsy. (This is why you
generally don't find me attending sessions by other speakers, or
you see me sitting in the back and bailing when the session is half
over. Nothing personal!) The littleBits did keep him engaged that
entire time. More importantly, in the two days I've had
these, he has played with them three times. Over time,
they will likely only hold his attention if we add on newer modules
that do different things. Kids are all about doing, not learning.
The way to get them to learn is to get them to do, and the way to
get them to do, is to find something that makes it dead simple to
do something right off the bat. The littleBits definitely fit the
bill here.
During the third time playing with the bits, Ben really started
to grasp the concept of the flow of electricity. He wanted to know
what exactly it was. I found the water analogy good enough for our
discussion here, especially since it helps explain the
potentiometer and buttons very well. He even figured out, on his
own, how the pressure sensor conceptually works.
Logic
Once you have the basics of electricity down, you can start
messing with logic. I had ordered both an AND and an OR module.
Each module takes two inputs and has a single output. As you would
expect, both inputs must be powered for AND to produce output, and
only one in the case of OR.
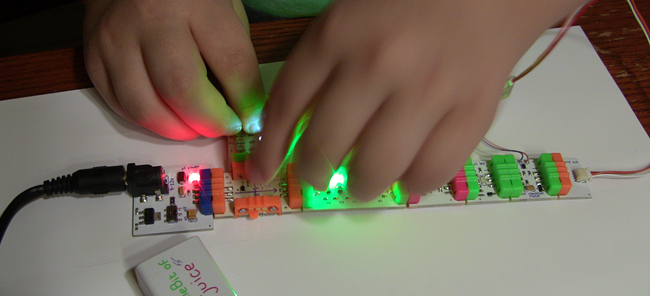
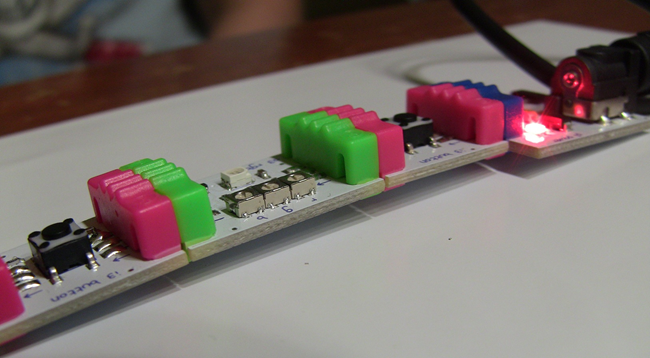
Here's a simple AND gate made using: Power module, branch
module, button and wire modules on top, button and wire modules on
the bottom, and then the AND module and an LED module on the other
ends of the wires. It demonstrates a logical "AND". That is, the
LED will light only if both buttons are pressed.

The other circuits shown have been built by Ben or Abby. In this
case, I built this circuit for Ben to show logic. I wouldn't
necessarily expect him to come up with it on his own, although he
was able to grok the concept of AND very easily from this.
This is far more interactive, visual, and intuitive when
compared to a truth table.
One issue with littleBits
littleBits isn't without issues, however. There's one
design issue which, to me, prevents this from being the perfect
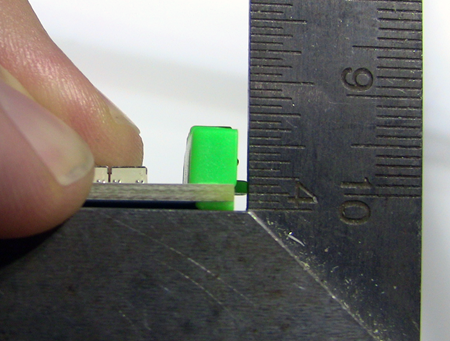
learning tool. Their pin design doesn't have much
compensation for poorly aligned connectors. Sprung, semi-pointed
pins on one side contact flat pads on another. The pins are sprung,
but the tolerance for a good connection is still pretty tight, as I
found that even a slight amount of deviation from square on
multiple modules can lead to connection issues for the circuit.
This very slight deviation from square, as shown here, is enough
to cause those connection issues:
Unfortunately, these connectors are rigidly connected to the
boards, presumably in some sort of mass manufacturing process. As
anyone who has ever developed boards with connectors knows,
not all these connectors will be perpendicular to the boards once
assembled. In the worst case (which happens to be in the set I
have), you end up with a situation that looks like this:
Notice how the boards sit off above the table, arched like a
bridge. Right to left, there's the power module, a button module,
the RGB LED module, another button module and (off picture) a
regular LED module. If you press either of those two button
modules, it causes the module to flatten to the table top, and
disconnects the connection at the RGB module. Either I got a
particularly bad batch, or this is a common issue. Like bank rounding errors famously making a crook
rich, the problem compounds based on the alignment of the
modules in a given circuit and the number of modules with this
problem.
Generally, the impact here is really only with the
button modules, and a little with the potentiometer module, and
only when you have a few offending modules in a chain. It's the
downward pressure required for the button that causes the
problem. You can still have lots of fun without the
buttons, or perhaps even put a folded bit of paper under the high
module. You can also, for smaller circuits, simply pick it up and
squeeze the button between your thumb and finger.
With modules this small size, the main issue isn't any warpage
on the PCB itself, but the mounting of the plastic connector to the
PCB base. The connectors aren't really deep enough to keep square
during factory assembly.
If these modules were some inexpensive chinese thing from ebay
(they're not. They're designed and assembled in the USA), I'd have
expected this. However, at the prices of these modules (I'm in
about $230 right now), this is an unexpected and surprising flaw.
My RGB module, in particular, is really sensitive to this.
For the ones that are particularly bad, I'm going to
request replacements. It may be that some slipped through
production in the batch I have. Or it could simply be early
production issues from a startup company trying to meet higher than
expected demand. I would expect littleBits to make it right for any
that are like this; they seem like an upstanding type of
company.
Note that the littleBits site seems to show this issue with what
I assume is a prototype kit in the slide show on the main page:
If you tried to connect something else downstream from that LED
bargraph, you'd run into alignment issues. (In this case, the LED
bargraph appears to have a connector incorrectly alignment, but
leaning inward instead of outward as mine do).
Caveats of the connectors aside, I still think this is a
great kit to get for you and your children, and I do not hesitate
to recommend it as a way to teach the things I've mentioned
here. My recommendation is to simply check alignment when
you get the kit, and ask for replacement of any bits that are
particularly out of tolerance. Sometimes you can only tell once you
connect them up a few different ways and get the compounded issue
of multiple misaligned parts.
Building your own bits
Little bits has been taking ideas on their dreamBits
page for some time now. The list sometimes gets overtaken by
joke entries (they seem to clean those up regularly), but there are
also some good ideas there. But what do you do if you want to just
build the bits yourself?
littleBits has been saying for a bit (haha! I crack me up) that
they will have their connectors available for sale soon. I have no
idea how much they cost, but I'm pretty sure I'll pick up at least
a few to try creating my own modules/bits. There are lots of
interesting components you could build out, including interfaces to
microcontrollers to kick things up to the next level, should you
wish.
Once they release the connectors, I'll probably give a few ideas
a shot, and not just to show the kids how you can create your own
stuff. Why not? The grown-ups can have fun (and learn) too
:)