In every project, there comes a part you just dread doing. It's
always the part you put off until the very end. When programming,
maybe it's that exception logging, or security interface. With most
house projects, it's painting.
With carpentry/cabinetry, well, I hate building cabinet
doors.
There. I said it. I love woodworking, but BOY do I hate doors. I
know the appropriate tricks for squaring them up and for adjusting
the squareness once they are assembled, but it seems they always
bite me in the end. Bah!
Well, I couldn't have yet another set of cabinets without doors
(ask my wife about the kitchen), so I decided to build the four
doors for the living room window bench seat cabinets. These doors
go on the lower cabinets underneath the bookcases on either side of
the bench seat.
Want to see more of this project including the full view of the
bench seat and cabinets? Here's the recap I wrote in October.
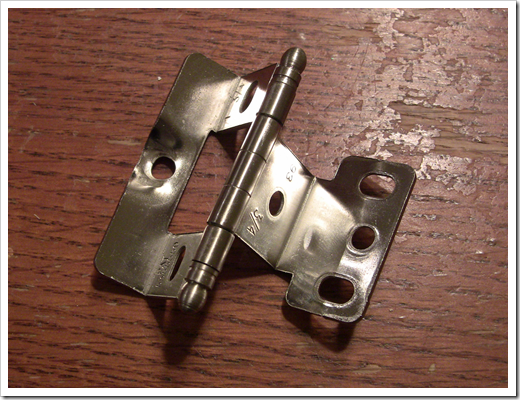
I may hate making doors, but I hate looking at ugly doors even
more. So, I went and made these flush inset doors, but compromised
on the hinge. It's a nice hinge, but unlike the maple cabinets in
the kitchen, these painted poplar cabinets use simple 1/16" spacing
no-mortise surface mounted hinges. No mortising means these doors
won't be quite so fiddly to hang.
I took some basic measurements, dug up all the wood, and headed
out to the shed with my scribbled notes in hand.
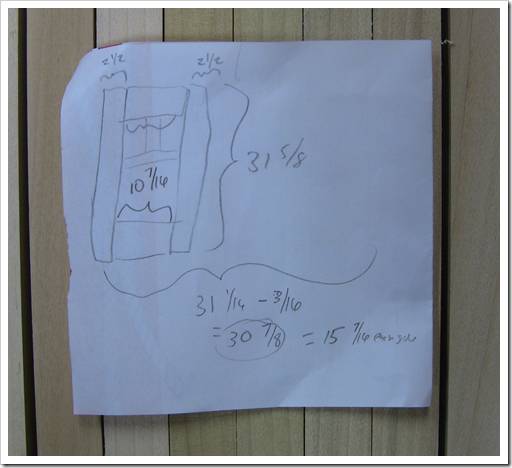
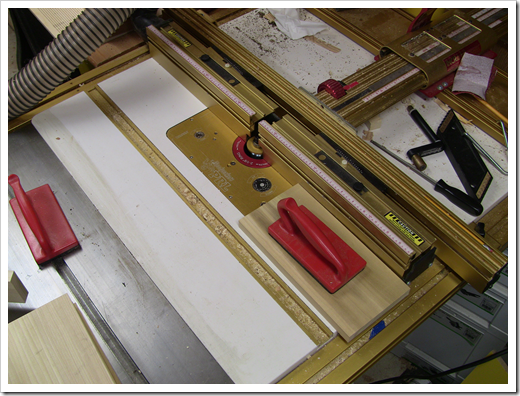
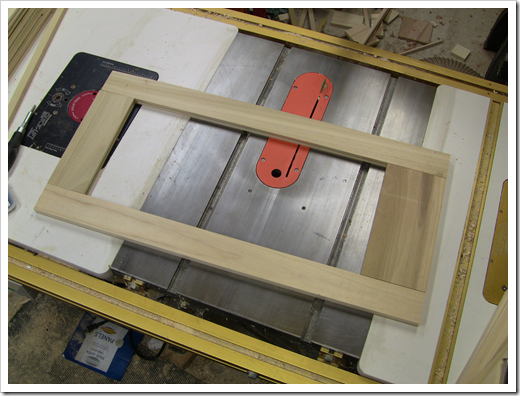
The stiles are 1x3 (3/4" x 2 1/2") poplar while the top rail is
1x4 (3/4" x 3 1/2") and the bottom rail is cut to 1x5" (3/4" x 5"
exactly) from larger stock.
The core of each door is 1/4" thick plywood, glued into 1/4"
routed grooves 1/2" deep in the rails and stiles, offset 3/8" from
the front of the door. As is always the case, the plywood was
warped, so I had to fight that during assembly.
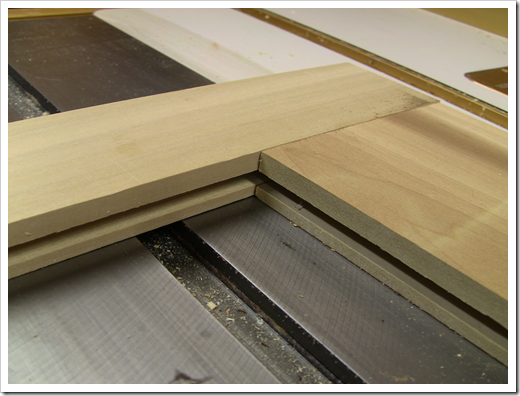
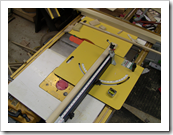
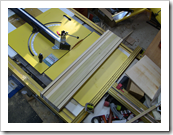
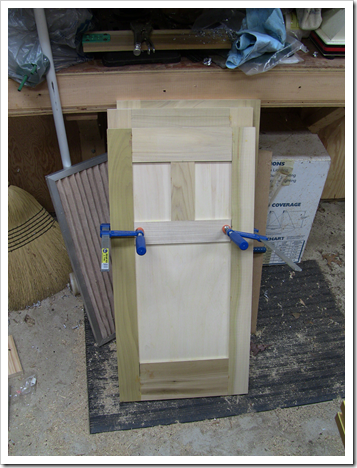
The rail and stile joints are reinforced with 8x50 dowels using
my Festool Domino. I've had that tool since it
first came out in 2007ish, and have used it over and over again.
It's really a huge help when it comes to this type of assembly.
FWIW, I cut the mortises in the rails to the exact width, and used
the wider setting when cutting the mortises in the stiles. This
gives me a little wiggle room during assembly.
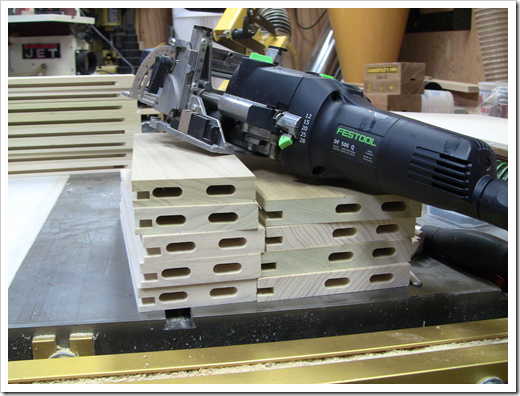
It's humid year-round here in the mid-atlantic, so I had to
microwave the domino tenons to get them to fit reasonably well.
Microwaving helps remove some of the moisture that swells the wood.
I had them stored in a plastic bag inside a Festool systainer, but
it was outside in my work shed.
The detail in the center of the door is 1/4" x 2 1/2" poplar
simply glued in place on the plywood.
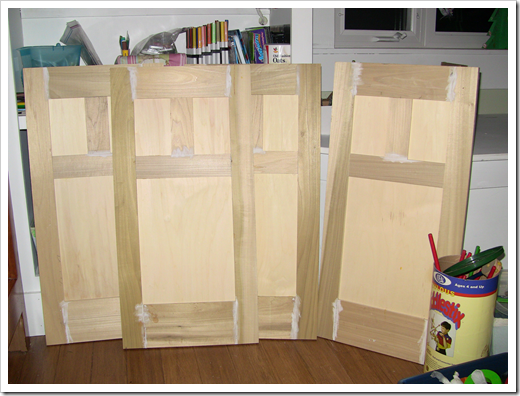
The joints came out horribly. But honestly I didn't fuss over
them that much as the doors will simply be painted. I'm just happy
to have the doors done :) Between the glued-in plywood (it's
plywood, so you can glue it in. Don't do that with solid wood) and
the eight big 8x50 dominos used on each door, they should hold up
to quite a bit of use…maybe even to what my kids dish out. I'm not
so sure about the overlays in the middle, though. Only time will
tell there, but as they rely on the stability and quality of the
plywood (ha!), I can see them popping off with the top skin of the
plywood going with them. I hope not, but it seems plausible.
The next step was into the house to have wood filler put on the
defects and bad joinery. After that, because they're ever so
slightly oversize (something I did on purpose), I'll trim them on
the table saw and do a final squaring up at the same time. Here are
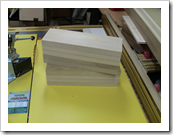
all four doors in front of one of the cabinets. As you can see, the
cabinet is already being put to good use.
From there, it will be final sanding and then painting. They
look horrible right now, but once sanded and painted, no one will
ever know of my sins. Well, except all of you :)
What do you know? I might actually have doors on these cabinets
in time so Santa doesn't have to see all our messy craft and
homeschool supplies.
