I just received a bunch of packages from both Secret Labs and
GHI Electronics. The Secret labs packages contained their brand new
Netduino GO. The GHI package contained the FEZ Cerebus Starter kit
I ordered.
This post looks at the new Netduino GO and briefly compares it
to the .NET Gadgeteer (Cerebus and others). I also build a couple
simple example applications using the Netduino GO kit.
The Hardware
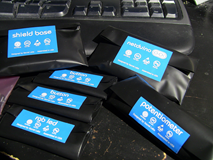
the hardware came in a number of classic Netduino Blue boxes,
with each board and module inside packaged in quality ESD-proof
bags. Secret Labs has always had a good unboxing experience. I've
also really like these bags as they just seem to be quality.
Disclosure: These bits were provided to me
free, from Secret labs. I also purchased $150 worth of GO modules
from Nwazet using my own money.
You may remember them from the PIX-6T4
and my game: Sixty4Racer. The Nwazet modules, including a touch
screen, should arrive later this coming week.
Also, keep in mind that although I work for Microsoft, Microsoft
doesn't make a dime off any of these devices. It is all free
and open source (Apache licensed). The .NET Micro Framework 4.2 is
actually 40% community contributed as well.
Here are some photos of the packaging and modules.
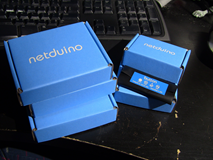
The downside to the packaging is you end up with a lot of blue
boxes hanging around. I haven't yet figured out a good use for
those, although I employ one or two on my bench to hold loose
screws and whatnot. I'm not sure how Secret Labs plans to package
up kits, but it would probably be more environmentally friendly to
put all the individually wrapped modules in a single box for
shipping.
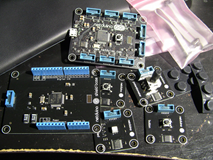
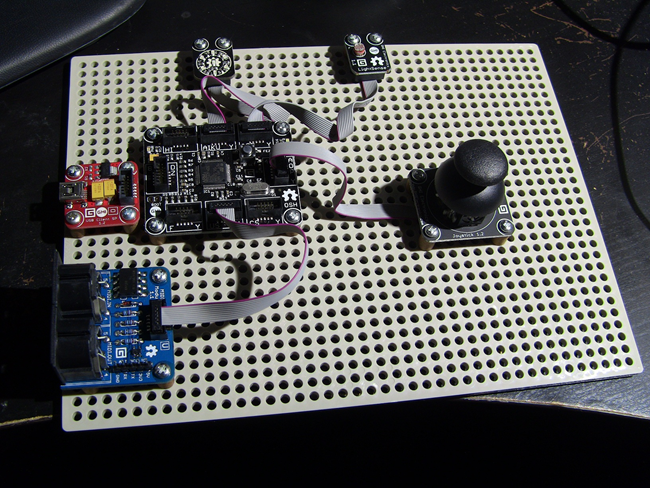
The Netduino GO modules have their mounting holes on 5mm
centers, just like the Gadgeteer. So, I was able to use a Tamiya 70172
Universal Plate (Large) as a home for everything.
Top to bottom, left to right:
- RGB LED Module
- Netduino GO main board
- Netduino Shield Base (for using arduino/netduino shields with
the GO)
- Button module
- Button module
- Potentiometer module
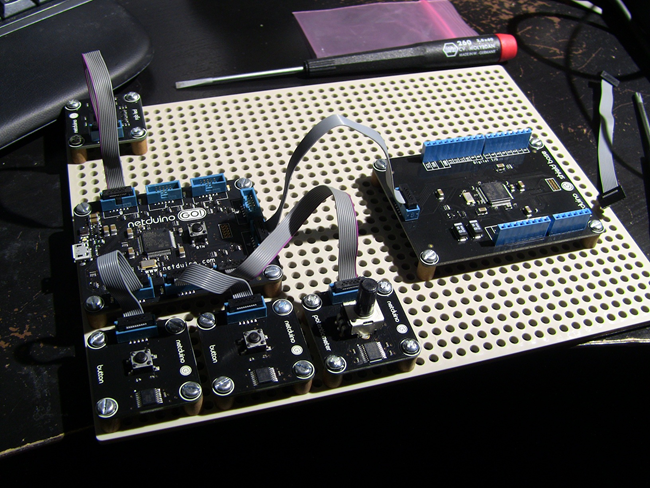
The Netduino GO board came with a couple 10 wire cables, but the
modules themselves did not. The ribbon cables with the red stripes
on them are extras from my Gadgeteer cables. I'm a bit torn in that
I think each module should come with a cable, but at the same time,
those cables tend to be expensive, and I do have an awful lot of
extras lying around because each Gadgeteer module comes with a
cable. I'd be interested in your thoughts and expectations
here.
In any case, make sure you order some extra cables if you plan
to hook up more than a module or two at a time.
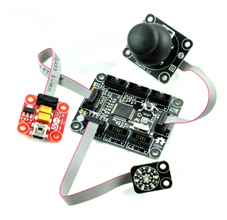
If you look closely at the modules on my dev board, it looks
suspiciously like Gadgeteer. In fact, here's a GHI Cerebus on the
same type of mounting board:
Also shown in this picture is my MIDI
module (I plan to release a version for the Netduino GO as
well)
Superficially, they look almost identical. The connectors are
the same 10 pin micro IDC connectors. On the Gadgeteer, they're
black, on Netduino, they're blue, but otherwise they are identical
parts. Orientation is also 180 degrees different, but that's not
really a functional difference. Here's a side x side of the Cerebus
and the GO in kit form. (the kits are not equivalent in price or
functionality. I just used the photos the two vendors have on their
sites)
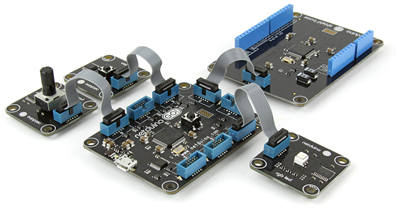
It's hard to really see it from this photo, but the Netduino GO
main board is just a bit than the FEZ Cerebus main board. GHI also
has several
other Gadgeteer main boards and kits (like the Spider and the
Hydra). The Cerebus is just the latest offering. The Hydra and
Cerebus are open source hardware and software, as is the Netduino
GO.
The Netduino currently has provision only for USB power
(although I understand there may be an adapter coming), provided
directly on the main board. The Gadgeteer always has the power
provided by a separate module, always colored red. The source of
that power can be an adapter, USB, batteries, or something
else.
Module-wise, the GO modules tend to be a bit larger as well. It
appears there are a few reasons for this:
- GO modules (so far) always have their connector on the top. To
save board size, many small Gadgeteer modules have the 10 pin
connector on the bottom
- GO modules include a coprocessor chip (or module controller, or
whatever you'd like to call it).
The second item brings us to the main difference in the
approaches. The architecture.
The Architecture
The real difference between .NET Gadgeteer and the Netduino GO
is the way the modules communicate with the main board.
Let me start by saying that I strongly believe there is merit in
both approaches. I like the socket-type approach on Gadgeteer, and
I also like the GO!bus approach used by the Netduino. I'm not
picking sides here, just describing how they work. This is the kind
of stuff holy wars are made from. Let's not go there.
Design Approach
The .NET Gadgeteer uses a socket identifier approach. Each main
board surfaces a number of sockets, each of which is assigned a
socket type. For example, socket type "U" is for UART (serial)
communications. Socket type "A" supports analog communications.
There's pin sharing and whatnot behind the scenes, all managed by
the board code, but in essence, you are surfacing the MCU's
different pins in the form of sockets. If a main board has, at most
6 analog inputs, you cannot get more than that without adding a
co-processing board with its own MCU with its own analog inputs,
communicating to the main board over serial, I2C, SPI, DaisyLink
(more on that in a moment) or something else. This approach is a
simplification and formalization of the pin-based approaches we've
seen starting with Arduino and others.
The Netduino uses the GO!bus protocol (discussed below). The
main board only provides digital communications with modules. It
doesn't surface any specific pin types, and all sockets are (to the
best of my knowledge) equivalent. Therefore the modules own
all capabilities and the main board serves only to
run your code and communicate with the modules themselves.
Communications Protocols
On the Netduino, all modules communicate with the main board
using the digital GO!bus protocol. This is a chip-to-chip SPI
protocol (I believe it also can work over serial if you prefer) of
varying speed. I've seen mentioned speeds up to 40MHz. The
on-module chips that provide this functionality are pretty cheap
($0.30 each in quantity), but have a number of capabilities. I've
ordered a bunch from Digikey to experiment with. They're small
format surface-mount components, though, so not exactly
breadboard-friendly without a breakout board. (
Appropriate breakout boards can be ordered from Seeed and other
places. Be sure the pin pitch matches the chip you're experimenting
with). Secret labs is also looking to potentially expand the
universe of supported (meaning they provide GO!bus code) chips to
ones like AVR and more, making it easier for DIY folks to
experiment.
The .NET Gadgeteer also has an I2C-based module communication
protocol called Daisylink. Its primary purpose is to allow chaining
a number of modules together, but it is a digital protocol
implemented by a few modules including the multicolor LED module. I
haven't seen any vendor-provided Daisylink module code, but some
folks in the community have been working on that. Daisylink is, by
far, not the most common way to create modules for the Gadgeteer,
however. Most use X/Y socket types, serial, SPI, or something
else.
Aside: the on-module processor approach
Before the GO was introduces, I was looking at creating a number
of modules for the .NET Gadgeteer (I still am). In each case, those
modules requires an on-module processor to handle things like
multiplexing many inputs, handling some logic specific to the
board, or something else. The on-module processor approach is
actually one of the best ways to scale out a solution whether
you're using the Netduino or the .NET Gadgeteer. The Netduino GO
approach simply formalized it and provides tested code you can use
to get started.
Using this approach, you can, for example, create a module that
can be wired up to 64 buttons, or have 16 analog potentiometers, or
which can control a large LED array, or a bunch of servos or
anything else. It's a very valid (and sometimes necessary) approach
regardless of which board you use.
Another example is my MIDI module. At its heart, it's a very
simple module. However, there are certain MIDI functions, like MIDI
soft thru, clock/sync generation, active sense mode, message
filtering, and more which would be best implemented in native C
code on an on-module processor. I may create a version of the MIDI
module which works with the GO, but also provide firmware options
(either different firmware or an on-module jumper or something) to
enable it to communicate with the Gadgeteer as well.
Finally, the Netduino GO does allow you to use X, U, or S
Gadgeteer modules in compatibility mode. Unfortunately, this ties
up a number of sockets to make it work, so I suspect it will be
good for emergency use only; you wouldn't want to design modules
around it. You would need to create a special driver for the GO
anyway, as all the Gadgeteer code infrastructure isn't there on the
board firmware.
Enough of the comparison. Let's take a look at the experience of
building a simple Netduino GO demo application.
Netduino GO Installation
I previously had installed the .NET MicroFramework 4.2 SDK, so I
didn't have to mess around with that. I won't cover much of
installation here, as the full Netduino GO SDK wasn't yet ready
when I got the hardware.
Worth noting was that I didn't need a special driver for the GO.
Instead, I plugged it into my machine, and it was recognized as a
Netduino. It just worked.

Hello World: Lighting up the RGB LED
As I mentioned, I didn't have an official SDK yet, instead, I
created a regular Netduino project, changed its framework version
to 4.2, and then added a reference to the Netduino GO libraries
sent to me by Chris at Secret labs. Presumably, with the new SDK,
the experience will be File->New->Netduino GO
Application.
using System;

using System.Threading;

using Microsoft.SPOT;

using Microsoft.SPOT.Hardware;

using SecretLabs.NETMF.Hardware;

using SecretLabs.NETMF.Hardware.NetduinoGo;

using NetduinoGo;


namespace NetduinoGoFirstApp

{

    public class Program

    {

        public static void Main()

        {

            var led = new RgbLed((GoBus.GoSocket)8);

            led.SetColor(255, 40, 0);

        }


    }

}
Plug the RGB LED into any socket on the main board. (Netduino GO
doesn't require you to match socket IDs or letters or anything). I
used socket 8 in the example here. If you choose a different
socket, just indicate that in the code.
Deploy and run that application, and you'll see a bright orange
color from that LED. Those multicolor LEDs are very nice. They have
excellent colors and are super bright, even at their default 33%
brightness (100% would be insanely bright).
Here's the same code showing the LED in blue.
using System;

using System.Threading;

using Microsoft.SPOT;

using Microsoft.SPOT.Hardware;

using SecretLabs.NETMF.Hardware;

using SecretLabs.NETMF.Hardware.NetduinoGo;

using NetduinoGo;


namespace NetduinoGoFirstApp

{

    public class Program

    {

        public static void Main()

        {

            //var led = new RgbLed((GoBus.GoSocket)8);

            //led.SetColor(255, 40, 0);


            var led = new RgbLed();

            led.SetColor(0, 0, 255);

        }


    }

}
Note that in this case I didn't specify a socket
ID. I only have one RGB LED module, so it
identified itself to the main board using the GO!bus, and
it just worked. I really do like that particular feature of the
GO!bus as it means you can move modules around without changing
code. This is great flexibility, especially if you're providing
something that will go into an enclosure.
Each socket has an LED next to it on the main board. The socket
being used for communication glows blue when the module is used
from code.
If you have more than one identical module connected, it appears
that the GO!bus just picks the first one it finds.
Varying the LED color with a potentiometer
Time to kick it up a notch. The kit I received has a
potentiometer module and two buttons. I want to make it so the
potentiometer can be used to change the color of the LED by varying
the R, G, and B components independently. Ideally this would have
three potentiometers, but as I have just the one, I decided to make
it so the button cycles between R, G, and B, and the potentiometer
changes one component at a time.
Here's the code.
using System;

using System.Threading;

using Microsoft.SPOT;

using Microsoft.SPOT.Hardware;

using SecretLabs.NETMF.Hardware;

using SecretLabs.NETMF.Hardware.NetduinoGo;


namespace NetduinoGoFirstApp

{

    public class Program

    {

        private static NetduinoGo.RgbLed _led;

        private static NetduinoGo.Button _button;

        private static NetduinoGo.Potentiometer _potentiometer;


        // r, g, b in an array

        private static byte[] _colorValues = new byte[3];

        private static int _colorIndex = 0;


        public static void Main()

        {

            _led = new NetduinoGo.RgbLed();

            _button = new NetduinoGo.Button();

            _potentiometer = new NetduinoGo.Potentiometer();


            _button.ButtonReleased += OnButtonReleased;


            _led.SetColor(0, 0, 0);


            while (true)

            {

                _colorValues[_colorIndex] = (byte)(255 * _potentiometer.GetValue());

                UpdateLedColor();


                Thread.Sleep(100);

            }


        }


        // switch between R, G, and B

        static void OnButtonReleased(object sender, bool buttonState)

        {

            _colorIndex = (_colorIndex + 1) % _colorValues.Length;

        }


        // set the LED color to the current selections

        private static void UpdateLedColor()

        {

            _led.SetColor(_colorValues[0], _colorValues[1], _colorValues[2]);

        }

    }

}
That was pretty simple to develop. A polling loop checks the
potentiometer value 10 times a second, and updates the LED at the
same time. Press the button to cycle between R, G and B
components.
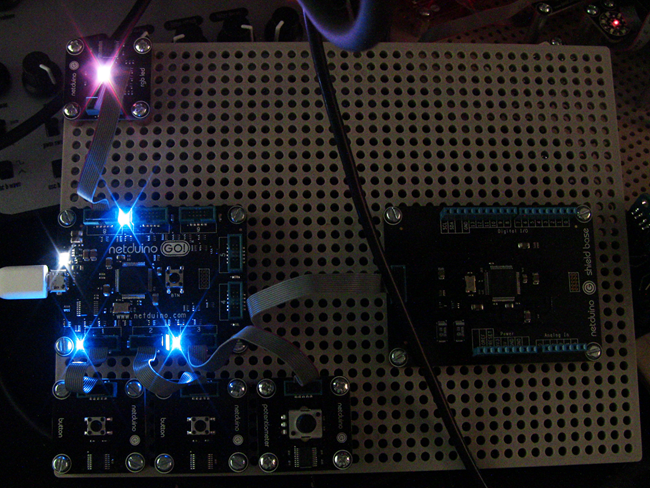
In this picture, note how the Netduino has blue LEDs lit next to
each active socket. This helps you visually confirm which socket
your drivers are using. The tiny blue LEDs aren't as bright as they
appear in this photo, that's just my camera being annoying.
Conclusion
Secret Labs has come up with an interesting new platform here.
I've only begin to scratch the surface, and haven't gotten into
using the shield base for Arduino/Netduino classic shields, or
described the process of creating a module from scratch. I'll write
about those more in the future as I play with the devices more.
Should you go with Netduino GO or Gadgeteer?
That's a tough question for sure.
Right now, the decision is going to come down to what you want
to do with the devices. The .NET Gadgeteer has, by far, a much
richer ecosystem of modules by GHI and Seeed. Netduino may get
there, but as it was just launched this week, it's not going to
happen overnight. If you want the most immediate prototyping
opportunities, using an existing set of plug-and-play modules,
you'll probably do better with .NET Gadgeteer right now.
The Netduino supports existing Arduino-style shields just as it
always has, but just as you had to before, you'll need to write (or
find code for) drivers to make those work.
Long-term, I would expect the Netduino GO to also have a very
rich ecosystem of modules. Plus, the potential of those individual
modules is, in my opinion, greater, as the reall processing all
happens on-module.
I'm really impressed with what Secret Labs has come up with, and
believe it has some real potential. I like the formalization of the
on-module logic design, and the fact that Secret Labs standardized
on inexpensive chipsets with free compilers, making it easier for
DIY folks to create their own modules. You can count me among the
people who will take a stab at creating modules or module kits for
this device.
I'll show off the Netduino GO, along with the Gadgeteer
main boards and modules, in my talk at the
free Online p&p Symposium on April
24th. Please register.
