What follows is a raw excerpt (before copy editing or final tech
reviews) from chapter 20 in my book, Silverlight in
Action. This is just a small portion of chapter 20, which
covers the media element, streaming, using IIS Smooth streaming,
using the Silverlight Media Framework, creating raw video and
audio, and using the webcam and microphone APIs. I've blogged bits
and pieces on this topic before, but it's such a fun topic, I
thought it would be great to provide the whole raw video/audio
generator here in one posting.
Note that in the print edition, the #A #B etc. letters are
replaced by graphic cueballs and the numbered ones (#1, #2
etc.) are replaced by inline side-note text in the listing
I'm feverishly working to wrap the book up; my initial chapters
will all be turned over for final editing before July 1. This has
been an exciting (and long <g>) book to write. I hope you
enjoy it as much as I have. :)
20.6 Working with raw media
Silverlight has a strong but finite set of codecs it natively
supports for audio and video playback. If you want to use a format
not natively supported, such as the WAV audio file format, or the
AVI video format, you had no choice, until the Media Stream Source
(MSS) API was added.
The MSS API was included in Silverlight 2, but that version
required you to transcode into one of the WMV/WMA/MP3 formats
natively supported by Silverlight. In Silverlight 3, the MSS API
was augmented to support raw media formats where you send the raw
pixels or audio samples directly through the rest of the pipeline.
This made its use much easier as it required knowledge only of the
format you want to decode. For the same reason, it is more
performant, as an extra potentially CPU-intensive encoding step is
avoided.
The MediaStreamSource API supports simultaneous video and audio
streams. In this section, we'll look at creating raw video as well
as raw audio. In both cases, we'll use algorithmically derived data
to drive the raw media pipeline.
20.6.1 A Custom MediaStreamSource Class
To implement your own custom stream source, derive a class from
MediaStreamSource. As the name suggests, this class will be used as
the source for a MediaElement on the page. Table 20.10 shows that
MediaStreamSource has several methods that you must override in
your implementation.
Table 20.10 MediaStreamSource Virtual Methods
|
Method
|
Description
|
|
SeekAsync
|
Sets the next position to be used in GetSampleAsync. Call
ReportSeekCompleted when done.
|
|
GetDiagnosticAsync
|
Used to return diagnostic information. This method can be a
no-op as it is not critical. If used, call
ReportGetDiagnosticCompleted when done.
|
|
SwitchMediaStreamAsync
|
Used to change between configured media streams. This method can
be a no-op as it is not critical. If used, call
ReportSwitchMediaStreamCompleted when done.
|
|
GetSampleAsync
|
Required. Get the next sample and return it using
ReportGetSampleCompleted. If there is any delay, call
ReportGetSampleProgress to indicate buffering.
|
|
OpenMediaAsync
|
Required. Set up the metadata for the media and call
ReportOpenMediaCompleted.
|
|
CloseMedia
|
Any shutdown and cleanup code should go here
|
One thing you'll notice about the functions is that many of them
are asynchronous. The pattern followed in those methods is to
perform the processing and then call a ReportComplete method, the
name of which varies by task, when finished.
The async nature of the API helps keep performance up, and keeps
your code from slowing down media playback.
Listing 20.4 shows the skeleton of a MediaStreamSource
implementation, including the methods described above. We'll
continue to build on this throughout the remaining raw media
sections.
Listing 20.4 The Basic MediaStreamSource
Structure
public class CustomSource : MediaStreamSource
{
  private long _currentTime = 0;
  protected override void SeekAsync(long seekToTime)
  {
    _currentTime = seekToTime;
    ReportSeekCompleted(seekToTime);
  }

  protected override void GetDiagnosticAsync(
                    MediaStreamSourceDiagnosticKind diagnosticKind)
  {
    throw new NotImplementedException(); #1
  }

  protected override void SwitchMediaStreamAsync(
                    MediaStreamDescription mediaStreamDescription)
  {
    throw new NotImplementedException(); #1
  }

  protected override void GetSampleAsync( #2
                    MediaStreamType mediaStreamType)
  {

    if (mediaStreamType == MediaStreamType.Audio)
      GetAudioSample();
    else if (mediaStreamType == MediaStreamType.Video)
      GetVideoSample();
  }

  protected override void OpenMediaAsync() { } #A
  protected override void CloseMedia() { }
  private void GetAudioSample() { } #B
  private void GetVideoSample() { } #B
}
#1 No-op methods
#2 GetSampleAsync
The most important methods for our scenario are the
OpenMediaAsync method #A, and the two methods #B that are used to
get the next sample. Those two methods are called from the
GetSampleAsync method whenever an audio or video sample is
requested.
Once we have the CustomSource class created, we'll need to use
it as the source for a MediaElement on a Silverlight page. Listing
20.5 shows how to wire this up using XAML for the user interface
and C# code for the actual wire-up.
Listing 20.5 Using a custom MediaStreamSource
class
XAML
<Grid x:Name="LayoutRoot" Background="White">
  <MediaElement x:Name="MediaPlayer" #A
                AutoPlay="True"
                Stretch="Uniform"
                Margin="10" />
</Grid>
C#
public partial class MainPage : UserControl
{
  public MainPage()
  {
    InitializeComponent();
    Loaded += new RoutedEventHandler(MainPage_Loaded);
  }

  CustomSource _mediaSource = new CustomSource(); #1

  void MainPage_Loaded(object sender, RoutedEventArgs e)
  {
    MediaPlayer.SetSource(_mediaSource); #B
  }
}
#1 Custom MediaStreamSource
In this listing, I first create a MediaElement #A that will span
the size of the page, then assign the CustomSource instance to the
source property #B using the SetSource method of the MediaElement.
Once that has completed, the MediaElement is set to play and will
start requesting samples from the CustomSource class.
Right now, our CustomSource class does not return any samples,
so running the application would show nothing. We'll modify the
class to return both video and audio, starting with video.
20.6.2 Creating raw video
Being able to create video from raw bits is pretty exciting - it
opens up all sorts of scenarios from bitmap-based animation to
custom video codecs. I first played with raw video when I created
my Silverlight Commodore 64 emulator (mentioned in chapter 5). I
tried a few different video presentation approaches before I
settled on generating the video display in real-time as a 50fps
MediaStreamSource video at 320x200.
For this video example, we're simply going to generate white
noise, much like you see on an analog TV then the signal is lost.
When complete, the application will look like figure 20.8. If you
lived in the US prior to cable TV, this is what you saw after the
national anthem finished playing.
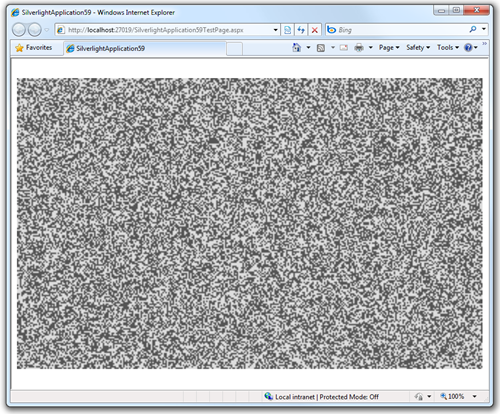
Figure 20.8 The completed white noise video generator. When
I was a boy, I used to imagine I was watching an epic ant battle
from high overhead. Well, until I saw Poltergeist, which forever
changed the nature of off-air white noise on the TV.
We'll start with the logic required to set up the video stream,
and follow it up quickly with the code that returns the individual
frame samples.
Setting up the video stream
When creating raw video, the first step is to set up the video
stream parameters. The parameters include things such as the height
and width of the frame, the number of frames per second, and the
actual video format.
Silverlight supports a number of different video formats, each
identified by a FourCC code. FourCC is a standard four character
code that is used to uniquely identify a video format. In addition
to all of the existing formats (for example, "H264" for h.264
video), two new formats were added specifically for use raw media
and the MediaStreamSource API. Those are listed in table 20.11.
Table 20.11 Supported Raw Media FourCC codes in
Silverlight
|
FourCC Code
|
Description
|
|
RGBA
|
Raw, uncompressed RGB pixels with an alpha component.
Silverlight currently ignores the alpha component during
processing.
|
|
YV12
|
YUV 12. This is a common media output format used in many
codecs.
|
In the example in this section, we'll use the RGBA format to
push raw pixels without any special processing or encoding. It's
the easiest format to use, requiring no algorithm other than
providing a single pixel with a single color. Listing 20.6 shows
the video setup code for our simple white noise generator.
Listing 20.6 Setting up the Video Stream
private int _frameTime = 0;
private const int _frameWidth = 320, _frameHeight = 200;
private const int _framePixelSize = 4;
private const int _frameBufferSize = _frameHeight * _frameWidth * _framePixelSize;
private const int _frameStreamSize = _frameBufferSize * 100;
private MemoryStream _frameStream = new MemoryStream(_frameStreamSize);
private MediaStreamDescription _videoDesc;

private void PrepareVideo()
{
  _frameTime = (int)TimeSpan.FromSeconds((double)1/30).Ticks; #1

  Dictionary<MediaStreamAttributeKeys, string> streamAttributes =
                  new Dictionary<MediaStreamAttributeKeys, string>();

  streamAttributes[MediaStreamAttributeKeys.VideoFourCC] = #C "RGBA";
  streamAttributes[MediaStreamAttributeKeys.Height] = #D _frameHeight.ToString();
  streamAttributes[MediaStreamAttributeKeys.Width] = _frameWidth.ToString();

  _videoDesc = new MediaStreamDescription( #E
              MediaStreamType.Video, streamAttributes);
}

protected override void OpenMediaAsync()
{
  Dictionary<MediaSourceAttributesKeys, string> sourceAttributes =
              new Dictionary<MediaSourceAttributesKeys, string>();

  List<MediaStreamDescription> availableStreams = #A
              new List<MediaStreamDescription>();

  PrepareVideo();

  availableStreams.Add(_videoDesc); #A

  sourceAttributes[MediaSourceAttributesKeys.Duration] = #2

  TimeSpan.FromSeconds(0).Ticks.ToString(
              CultureInfo.InvariantCulture);

  sourceAttributes[MediaSourceAttributesKeys.CanSeek] = false.ToString();

  ReportOpenMediaCompleted(
            sourceAttributes, availableStreams); #B
}
#1 30 frames per second
#2 "0" is infinite time
Listing 20.6 shows two functions: OpenMediaAsync and
PrepareVideo. They've been broken up that way because
OpenMediaAsync will also need to support audio later in this
section.
When the class is wired up to a MediaElement, Silverlight will
first call the OpenMediaAsync function. In that function, you need
to tell Silverlight what streams are available #A, a single video
stream in this case. Then you need to set up some attributes for
the duration of the video, infinite in our case, and whether or not
you allow seeking. Finally, you take that information and pass it
into the ReportOpenMediaCompleted method #B to tell Silverlight
you're ready.
The PrepareVideo method sets up some variables that will be used
when we generate the samples. First, we identify the amount of time
per frame. This can vary over the course of the video, but it'll be
easier on the developer if you pick a constant frame rate. Then we
set up a dictionary of attributes that identify the format of the
video #C, and the dimensions of each frame #D. Finally, that is all
packed into a MediaStreamDescription #E to be used when we start
generating frames.
Once the video stream is set up, the next thing to do is to
start pumping out frames to be displayed.
Returning the sample
The main purpose of a MediaStreamSource implementation is to
return samples. In the case of video, a sample is one complete
frame, ready to be displayed. Listing 20.7 shows the GetVideoSample
function, called by GetSampleAsync.
Listing 20.7 Returning the Video Frame
Sample
private int _frameStreamOffset = 0;
private Dictionary<MediaSampleAttributeKeys, string> _emptySampleDict =
           new Dictionary<MediaSampleAttributeKeys, string>();

private Random _random = new Random();
private byte[] _frameBuffer = new byte[_frameBufferSize];

private void GetVideoSample()
{
  if (_frameStreamOffset + _frameBufferSize > _frameStreamSize)
  {
    _frameStream.Seek(0, SeekOrigin.Begin); #1
    _frameStreamOffset = 0;
  }

  for (int i = 0; i < _frameBufferSize; i+= _framePixelSize)
  {
    if (_random.Next(0, 2) > 0)
    {
      _frameBuffer[i] = _frameBuffer[i + 1] =
      _frameBuffer[i + 2] = 0x55; #A
    }
    else
    {
      _frameBuffer[i] = _frameBuffer[i + 1] =
      _frameBuffer[i + 2] = 0xDD; #A
    }

    _frameBuffer[i + 3] = 0xFF; #2
  }

  _frameStream.Write(_frameBuffer, 0, _frameBufferSize); #B

  MediaStreamSample msSamp = new MediaStreamSample( #C
         _videoDesc, _frameStream, _frameStreamOffset,
         _frameBufferSize, _currentTime, _emptySampleDict);

  _currentTime += _frameTime;
  _frameStreamOffset += _frameBufferSize;

  ReportGetSampleCompleted(msSamp);

}
#1 Rewind when at end
#2 Alpha value 0xFF = Opaque
The GetVideoSample function first checks to see if we're
approaching the end of the allocated video buffer. If so, it
rewinds back to the beginning of the buffer. This is an important
check to make, as you don't want to allocate a complete stream for
every frame, but a stream cannot be boundless in size.
Once that is done, I loop through the buffer, moving four bytes
at a time (the size of a single pixel in the buffer) and generate a
random pixel value. The pixel will either be almost white or almost
black. #A When playing with the sample, I found that pure black and
white was far too harsh, and these two slightly gray values looked
more natural. While not obvious here, when setting the pixel values
you need to do so in Blue, Green, Red, Alpha (BGRA) order.
The next step is to write the buffer to the stream #B. In this
simple example, I could have written the bytes directly to the
stream and eliminated the buffer. However, in anything more complex
than this, you are likely to have at least two buffers (a read-from
and a write-to buffer), and even more likely to have a queue of
frame buffers used for pre-loading the individual frames.
Once the stream is populated, I then create the media stream
sample, increment our time counters and then call
ReportGetSampleCompleted to return the sample to Silverlight.
One interesting note in this is how sample time is used rather
than frame numbers. The use of a time for each frame allows
Silverlight to drop frames when it starts to lag behind. This was a
key reason I chose MediaStreamSource over other approaches in the
Silverlight C64 emulator. When the user's machine is busy, or in
case it is too slow to run the emulator at full frame rate, I
continue to chug along and let Silverlight skip frames it doesn't
have time to show. This helps keep everything in sync time-wise,
very important when you're also creating audio.
20.6.3 Creating raw audio
In the previous section, we created a white noise video
generator. Let's take that all the way and add in white noise
audio. Surprisingly, audio is somewhat more complex to set up than
video. This is due to the number of options available to you: audio
can have different sample bit sizes, be mono or stereo, have
different sample rates and more.
All this information is stored in a class known as WaveFormatEx.
In order to fit the listing into this book, I'm going to use a
greatly simplified, but still functional, version of this class.
Listing 20.8 below shows the class. Create this as a separate class
file in your project.
Listing 20.8 A simplified WaveFormatEx
Structure
(listing omitted as it was shortened just for print. For a
better version of this structure, visit the synthesizer page and download the source
code)
The WaveFormatEx class is simply a way to specify the format to
be used for PCM wave data in Silverlight. It's a standard
structure, forming the header of the .WAV file format, which is why
you get some oddities such as the big to little endian format
conversions. The class-based version here includes a single helper
utility function AudioDurationFromBufferSize which will be used
when we output the PCM samples.
There are more complete implementations of WaveFormatEx to be
found on the web, including one in my Silverlight Synthesizer
project at . Those implementations typically include a validation
function that makes sure all the chosen options are correct.
With that class in place, we'll turn our eye to the actual
stream setup.
Setting up the wav media source
The first step in setting up the sound source is to modify the
OpenMediaAsync function. That function currently includes a call to
PrepareVideo followed by adding the video stream description to the
list of available streams. Modify that code so that it also
includes the audio description information as shown here:
...

PrepareVideo();
PrepareAudio();

availableStreams.Add(_videoDesc);
availableStreams.Add(_audioDesc);

...
Once those changes are in place, we'll add the PrepareAudio
function to the class. The PrepareAudio function is the logical
equivalent to the PrepareVideo function; it sets up the format
information for Silverlight to use when reading our samples.
Listing 20.9 shows the code for that function and its required
class member variables and constants.
Listing 20.9 The PrepareAudio Function
private WaveFormatEx _waveFormat = new WaveFormatEx(); #1
private MediaStreamDescription _audioDesc;
private const int _audioBitsPerSample = 16; #A
private const int _audioChannels = 2; #A
private const int _audioSampleRate = 44100; #A

private void PrepareAudio()
{
  int ByteRate = _audioSampleRate * _audioChannels *
                 (_audioBitsPerSample / 8); #B

  _waveFormat = new WaveFormatEx();

  _waveFormat.BitsPerSample = _audioBitsPerSample;
  _waveFormat.AvgBytesPerSec = (int)ByteRate;
  _waveFormat.Channels = _audioChannels;
  _waveFormat.BlockAlign =
          (short)(_audioChannels * (_audioBitsPerSample / 8)); #C
  _waveFormat.ext = null;
  _waveFormat.FormatTag = WaveFormatEx.FormatPCM;
  _waveFormat.SamplesPerSec = _audioSampleRate;
  _waveFormat.Size = 0; #2

  Dictionary<MediaStreamAttributeKeys, string> streamAttributes =
          new Dictionary<MediaStreamAttributeKeys, string>();

  streamAttributes[MediaStreamAttributeKeys.CodecPrivateData] =
          _waveFormat.ToHexString(); #D

  _audioDesc = new MediaStreamDescription(
          MediaStreamType.Audio, streamAttributes);

}
#1 WaveFormatEx
#2 Must be zero
Arguably the most important parts of this listing are the
constants controlling the sample format #A. For this example, we're
generating 16 bit samples, in two channels (stereo sound), at a
sample rate of 44,100 samples per second: CD quality audio.
Once those constants are established, they are used to figure
out almost everything else, including the number of bytes per
second #B and the block alignment #C. Once the WaveFormatEx
structure is filled out with this information, I set it as the
Codec Private Data #D using its little-endian hex string format.
Finally, I create the audio description from that data, to be used
when reporting samples back to Silverlight.
Creating Sound Samples
The final step is to actually output the audio samples. This
requires generating the individual samples and returning them in
chunks of pre-defined size. We'll use a random number generator to
generate the noise, much like we did with video. Listing 20.10
shows how to fill a buffer with audio and return those samples to
Silverlight.
Listing 20.10 Outputting Audio Samples
private long _currentAudioTimeStamp = 0;
private const int _audioBufferSize = 256; #1
private const int _audioStreamSize = _audioBufferSize * 100;
private byte[] _audioBuffer = new byte[_audioBufferSize];
private MemoryStream _audioStream = new MemoryStream(_audioStreamSize);
private int _audioStreamOffset = 0;
private double _volume = 0.5;

private void GetAudioSample()
{
  if (_audioStreamOffset + _audioBufferSize > _audioStreamSize) #A
  {
    _audioStream.Seek(0, SeekOrigin.Begin);
    _audioStreamOffset = 0;
  }

  for (int i = 0; i < _audioBufferSize; #B
            i += _audioBitsPerSample / 8)

  {
    short sample =
            (short)(_random.Next((int)short.MinValue, #2
            (int)short.MaxValue) * _volume);

    _audioBuffer[i] = (byte)(sample & 0xFF00); #C
    _audioBuffer[i + 1] = (byte)(sample & 0x00FF); #C
  }

  _audioStream.Write(_audioBuffer, 0, _audioBufferSize);

  MediaStreamSample msSamp = new MediaStreamSample( #D
          _audioDesc, _audioStream, _audioStreamOffset, _audioBufferSize,
          _currentAudioTimeStamp, _emptySampleDict);

  _currentAudioTimeStamp +=
          _waveFormat.AudioDurationFromBufferSize((uint)_audioBufferSize);

  _audioStream = new MemoryStream(_audioStreamSize);

  ReportGetSampleCompleted(msSamp); #E

}
#1 Internal buffer size
#2 Sample Randomizer
The process for generating the white noise audio sample is very
similar to generating the frames of video. However, instead of
having a fixed width x height buffer we must fill, we can generate
as long or as short a sample as we want. This is controlled by the
audio buffer size set in code. In general, you want this number to
be as low as possible, as larger numbers typically introduce
latency as well as skipped video frames as the system is too busy
generating audio to show the video frame. Set the number too low,
however, and the audio will stutter. If you find the white noise
stuttering on your machine, up the buffer to 512 or so and see how
that works for you.
TIP
To help with latency, you can also play with the
AudioBufferLength property of the MediaStreamSource class. In most
cases, you won't be able to get that below 30ms or so, but that
value is itself very hardware dependent. That property is my own
contribution to the class, as I was the only one insane enough to
be writing a Silverlight-based audio synthesizer at the time. I ran
into problem after problem with the triple-buffering (my buffer,
plus Silverlight MSS buffer plus underlying DirectX buffer), to the
point where all audio was delayed by about 2-3 seconds. The team
worked with me to identify where the issues were, and then added
this knob into the base class to help tweak for latency-sensitive
applications like mine.
Once the buffer size is established, I perform the same stream
overrun check #A that we did for video, and for the same reasons.
Then, I loop through the buffer, two bytes (16 bits) at a time, and
generate a white noise sample. Once the sample is generated, I get
the two bytes from it using a little bit-masking #C, and then write
those bytes into the buffer. Once the buffer is filled, it is
copied into the stream and the sample response built #D. After
incrementing the time counters, the last step is to report the
sample to Silverlight.
If you run the application at this point, you should have a
short delay while the startup code is executed and the Silverlight
internal buffers filled, followed by simultaneous audio and video
white noise. On the surface, this may not seem impressive. However,
when you consider that the video and audio is completely computer
generated, it is considerably more impressive.
Raw audio and video is also gateway to allow you to display any
type of media for which you can write a decoder. Much of the IIS
Smooth Streaming client for Silverlight, for example, is written
using a custom MediaStreamSource implementation. While writing a
typically hardware-implemented 1080p HD codec in managed code may
not lead to good performance, there are many other popular formats
which don't have native Silverlight support, but which would
benefit from a custom MediaStreamSource implementation.
So far, we've seen a number of ways to get video and audio into
Silverlight. The easiest, of course, is to use a video format
Silverlight supports and just point the MediaElement to it. Another
way was to use the MediaStreamSource class to implement your own
managed codec. One final way to get video and audio into
Silverlight is to use the webcam and microphone APIs. A segment of
the API, especially the VideoSink and AudioSink classes is
conceptually similar to the MediaStreamSource code we've completed
in this section, but thankfully much simpler. We'll cover those in
the next section.
If you enjoyed this excerpt, please be sure to
order a
copy of my book. My book is set to be
published later this summer, but you can receive copies of the
chapters as they are completed by signing up for the Manning Early
Access Program (MEAP).