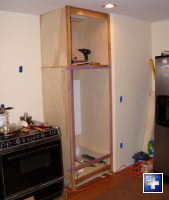
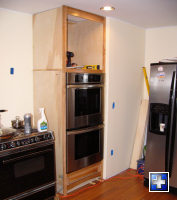
I scribed the wall oven cabinet to the wall and permanently
installed it today. After that, Melissa and I hefted that oven into
the cabinet. It wasn't an easy task. I have had it sitting on a
wheeled furniture mover (basically four pieces of maple with carpet
over two of them and four wheels under it. I picked it up at
Lowes.) We wheeled it in front of the cabinet, protecting the floor
with masonite. Once it was in position, I lifted up the rear and
front one at a time while Melissa put 2x4s under it. After about 4
boards in both the front and back, it was high enough to get into
the cabinet. It was a perfect on-spec fit, so it took some effort
to walk it into the cabinet; there was only a little side-to-side
room to play with.
We're both happy to have that hulking appliance in place and out
of the way of the rest of the work. Plus, it looks pretty nice
there against that figured maple :)


Melissa talked me out of painting the cabinet interiors green.
We went with clear on that. The green will be used on thin poplar
to cover the plywood toe kick, behind the toe kick arches. The
finish used on the interiors is General Finishes High Performance Water-Based
Polyurethane. The exterior finish is two coats of Zinsser Bulls Eye Seal Coat (a super blonde
de-waxed shellac), wiped on with a rag, followed up by three
to four coats of the poly. I sanded between all coats, and sanded
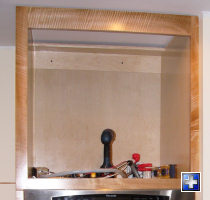
to 320 prior to finishing. The shellac really brings out the
figure and adds just a hit of color to the maple (see the third
photo). No finishing was done in the oven cavity.
Drawer fronts and doors will come later. I'm scrambling to get
the base cabinet carcasses and face frames all done so we can get
the granite folks in to measure/template. There's usually 3-6 weeks
of wait after they do that.
When the cabinets are complete, none of the plywood with be
visible from the exterior. The side near the old oven will have a
panel that covers the areas not covered by the other base cabinets
and the wall cabinets.