This week I put together a bookcase for the baby room. The case is mainly poplar, with two plywood shelves. It will be painted, likely white. Like most other built-ins, It will be permanently attached to the wall and will have the floor trim continued around its base.
This is the first time I used some new bits from Sommerfeld tools. Except for the dados for the two fixed plywood shelves (which used a plywood dado bit), all the joinery was done with pocket hole screws, glue, and the new tongue and groove system from Sommerfeld. This was my first time using that type of joinery, so I would do some things differently next time, but overall it came out really well. The system made aligning parts a snap. In fact, it was much quicker to assemble the case using the T&G system instead of straight pocket holes. The main reason is that the system allows for better dry-fitting, and also helps keep everything joined while you put things together. It held well enough that the only place I ended up actually using pocket holes is in the face frame.
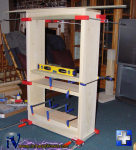
Here's the glue-up. The top is not yet fixed into place (one of the things I would handle differently next time). The face frame is assembled with pocket screws, and joined to the carcase using grooves. The two fixed shelves and both sides of the case have a 1/4" tongue cut in them which fit into a groove cut into the face frame. This keeps the frame aligned to the tops of the shelves and the sides of the case with almost no effort on my part. I did have an issue where I could not get a good tight fit on those pieces, but Sommerfeld is sending me a few extra shims to take care of that problem.
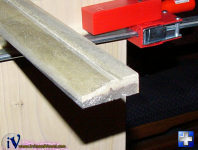
I cut the molding (seen here in close up, before sanding) using the Sommerfeld Shaker set (with the back cutter removed) and a simple v groove bit. This will be applied to the case once I have the top fixed into place.
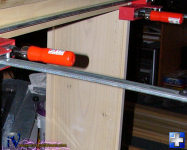
I cut the shelf pin holes using a simple plastic and wood shelf pin jig I picked up at a woodworking show. The jig is suprisingly accurate, and includes a self-centering bit which makes quick work of drilling these tedious holes. In this shot, you can also see the groove cut for the 1/4" plywood rear panel. I offset that from the rear a little to allow room for scribing the case to the wall. That rear groove also served as the location for the nailing cleat (at the top rear of the unit); I simply cut it to size and routed a tongue on each end. It is held in with glue.
Oh, and this is why I need to hurry up and order the rest of the ductwork for my Dust Gorilla (there's that much more in my lungs *cough*):
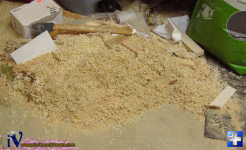
Those raised panel bits can really raise the dust!
All the router work was done using my Milwaukee 5625 router in the Woodpeckers precision router lift on my frankensaw. The fence used is the Incra TS-LS.
[ Completion Update: You can see the finished bookcase here. ]
