One of my favorite design features added to WPF 4 is the
ability to use easing functions with animation.
Easing functions provide a way to liven up what would otherwise
be pretty flat and boring animation. They provide
acceleration/deceleration, and even bounce or spring to the
approach into or departure from a key frame in an animation.
Let's take a look at how to use easing functions with
storyboards in your WPF 4 projects. We're going to do everything
from xaml here so you get a taste of what is happening under the
covers when you work in a tool like Expression Blend.
Basic Animation
In Visual Studio 2010, create a new Windows Application - WPF.
Open up the MainWindow.xaml and add a rectangle sized 20x20 to the
grid.
To the rectangle, add a single ScaleTransform named
"Transform"
Then add a button somewhere on the same grid and name it
"StartAnimation". Wire up an event handler for the Click event. The
xaml in your window should look something like this:
<Grid>
    <Rectangle Height="20"
               Width="20"
               RenderTransformOrigin="0.5,0.5"
               Fill="BlueViolet">
        <Rectangle.RenderTransform>
            <ScaleTransform x:Name="Transform" />
        </Rectangle.RenderTransform>
    </Rectangle>

    <Button x:Name="StartAnimation"
            Click="StartAnimation_Click"
            Content="Start"
            HorizontalAlignment="Center"
            VerticalAlignment="Bottom"
            Margin="5" />
</Grid>
The key items in there are the ScaleTransform named "Transform"
and the button to start the animation.
You should end with a window that looks something like this:
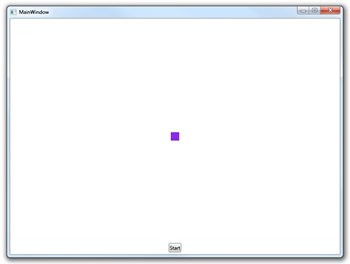
I sized my window to 800x600 in order to better support other
types of transforms. Your window will be smaller if you stayed with
the defaults.
Create the Storyboard
Next, we'll add the storyboard that will contain the animation,
as well as the shells of the two animations we'll be using.
In your Window, add a Window.Resources section and add a single
storyboard named "AnimateTarget". That storyboard will have two
DoubleAnimationUsingKeyFrames animations: one will target the
ScaleX property of the Transform, and the other will target
ScaleY.
<Window.Resources>
    <Storyboard x:Key="AnimateTarget">
        <DoubleAnimationUsingKeyFrames Storyboard.TargetName="Transform"
                                       Storyboard.TargetProperty="ScaleX">
            <!-- We'll add key frames here -->
        </DoubleAnimationUsingKeyFrames>
        <DoubleAnimationUsingKeyFrames Storyboard.TargetName="Transform"
                                       Storyboard.TargetProperty="ScaleY">
            <!-- We'll add key frames here -->
        </DoubleAnimationUsingKeyFrames>
    </Storyboard>
</Window.Resources>
Wire Up the Event Handler
Before we add the keyframes, crack open the codebehind and find
the StartAnimation_Click event handler. If that isn't present,
check your button's xaml and make sure you specified the Click
event handler and allowed Visual Studio to create it for you. If
not, just wipe out the Click="…" bit and recreate it. Optionally,
you could wire up the event handler in the constructor of the
window.
Once you have the event handler wired up, we'll put in a single
line of code which will start the animation.
private void StartAnimation_Click(object sender, RoutedEventArgs e)
{
    ((Storyboard)this.Resources["AnimateTarget"]).Begin();
}
There are multiple ways to handle that ranging from behaviors to
commands to the approach we took here. Use whatever you are
comfortable with.
Add Key Frames
Without key frames, the animation doesn't yet do anything
useful. A key frame is a specified value at a specified point in
time. The animation system will interpolate all the other frames in
between the key frames you provide. Typically, this is done in a
linear fashion, as we'll see when we first run this.
Next we'll add the key frames to our two animations. We'll use
EasingDoubleKeyFrames, but won't put the easing functions in just
yet. The animation will take the size of our shape and scale it
from 0 to 2x its size on both the X and Y axes.
<Storyboard x:Key="AnimateTarget">
    <DoubleAnimationUsingKeyFrames Storyboard.TargetName="Transform"
                                   Storyboard.TargetProperty="ScaleX">
        <EasingDoubleKeyFrame KeyTime="0:0:0"
                              Value="0.0" />
        <EasingDoubleKeyFrame KeyTime="0:0:3"
                              Value="2.0" />
    </DoubleAnimationUsingKeyFrames>
    <DoubleAnimationUsingKeyFrames Storyboard.TargetName="Transform"
                                   Storyboard.TargetProperty="ScaleY">
        <EasingDoubleKeyFrame KeyTime="0:0:0"
                              Value="0.0" />
        <EasingDoubleKeyFrame KeyTime="0:0:3"
                              Value="2.0" />
    </DoubleAnimationUsingKeyFrames>
</Storyboard>
Test the Animation
Save the project and run it. You'll see the shape expand as
though it is flying towards you. The animation is linear, though.
That is, the frames are interpolated using a constant ratio of
value vs. time. The end result is something which looks very
computer-generated, and not at all interesting.
Making the Animation Pop - Easing
We'll start with one of the more dramatic easing functions: the
ElasticEase. The elastic easing function interpolates the value
over time using a formula that simulates elastic motion. That is,
the element in this case, appears to be suspended from a rubber
band.
<Storyboard x:Key="AnimateTarget">
    <DoubleAnimationUsingKeyFrames Storyboard.TargetName="Transform"
                                   Storyboard.TargetProperty="ScaleX">
        <EasingDoubleKeyFrame KeyTime="0:0:0"
                              Value="0.0" />
        <EasingDoubleKeyFrame KeyTime="0:0:3"
                              Value="2.0">
            <EasingDoubleKeyFrame.EasingFunction>
                <ElasticEase EasingMode="EaseOut" />
            </EasingDoubleKeyFrame.EasingFunction>
        </EasingDoubleKeyFrame>
    </DoubleAnimationUsingKeyFrames>
    <DoubleAnimationUsingKeyFrames Storyboard.TargetName="Transform"
                                   Storyboard.TargetProperty="ScaleY">
        <EasingDoubleKeyFrame KeyTime="0:0:0"
                              Value="0.0" />
        <EasingDoubleKeyFrame KeyTime="0:0:3"
                              Value="2.0">
            <EasingDoubleKeyFrame.EasingFunction>
                <ElasticEase EasingMode="EaseOut" />
            </EasingDoubleKeyFrame.EasingFunction>
        </EasingDoubleKeyFrame>
    </DoubleAnimationUsingKeyFrames>
</Storyboard>
Note that I applied the easing function only to the final
keyframe in both animations, and I used the EaseOut parameter. If
you change EaseOut to EaseIn, you'll see the elastic action happen
at the start of the animation instead of the end. It will appear to
hesitate to get going. The result, in this case, is pretty
unnatural, but the elastic ease is one of the easiest to use to
identify what happens in EaseIn vs. EaseOut. Note also that you can
use EaseInOut which will perform the easing both at the start and
the end.

(Image source: MSDN)
Controlling the Easing
The ElasticEase function takes a few parameters, you can set the
springiness, as well as the number of oscillations. For a crazy
effect, set the Oscillations parameter high.
<ElasticEase EasingMode="EaseOut"
             Oscillations="25" />
I don't recommend using values like that in your own apps,
though, or you'll have legions of end-users and interactive
designers marching up your driveway with pitchforks and
torches.
Another parameter this particular easing function recognizes is
Springiness. The higher this value, the stronger the
spring/eslastic and therefore the less dramatic the bounce. Low
values, like 1, give you a really weak spring that bounces all
over. High values like 8 result in a super-stiff spring. The
default value is 3.
<Storyboard x:Key="AnimateTarget">
    <DoubleAnimationUsingKeyFrames Storyboard.TargetName="Transform"
                                   Storyboard.TargetProperty="ScaleX">
        <EasingDoubleKeyFrame KeyTime="0:0:0"
                              Value="0.0" />
        <EasingDoubleKeyFrame KeyTime="0:0:3"
                              Value="2.0">
            <EasingDoubleKeyFrame.EasingFunction>
                <ElasticEase EasingMode="EaseOut"
                             Oscillations="3"
                             Springiness="8" />
            </EasingDoubleKeyFrame.EasingFunction>
        </EasingDoubleKeyFrame>
    </DoubleAnimationUsingKeyFrames>
    <DoubleAnimationUsingKeyFrames Storyboard.TargetName="Transform"
                                   Storyboard.TargetProperty="ScaleY">
        <EasingDoubleKeyFrame KeyTime="0:0:0"
                              Value="0.0" />
        <EasingDoubleKeyFrame KeyTime="0:0:3"
                              Value="2.0">
            <EasingDoubleKeyFrame.EasingFunction>
                <ElasticEase EasingMode="EaseOut"
                             Oscillations="3"
                             Springiness="8" />
            </EasingDoubleKeyFrame.EasingFunction>
        </EasingDoubleKeyFrame>
    </DoubleAnimationUsingKeyFrames>
</Storyboard>
Animating other Transforms
If you want to animate something other than a ScaleTransform,
like a TranslateTransform (affects location/movement) simply swap
out the transform in the Rectangle.RenderTransform section, add
your own in, and then change the Storyboard.TargetProperty to
affect the appropriate value, and the Value in the key frame to
reflect something more appropriate.
Here's an example using a TranslateTransform. It animates the
position from the middle of the window to the bottom right:
<Window.Resources>
    <Storyboard x:Key="AnimateTarget">
        <DoubleAnimationUsingKeyFrames Storyboard.TargetName="Transform"
                                       Storyboard.TargetProperty="X">
            <EasingDoubleKeyFrame KeyTime="0:0:0"
                                  Value="0.0" />
            <EasingDoubleKeyFrame KeyTime="0:0:3"
                                  Value="202.0">
                <EasingDoubleKeyFrame.EasingFunction>
                    <ElasticEase EasingMode="EaseOut"
                                 Oscillations="3"
                                 Springiness="8" />
                </EasingDoubleKeyFrame.EasingFunction>
            </EasingDoubleKeyFrame>
        </DoubleAnimationUsingKeyFrames>
        <DoubleAnimationUsingKeyFrames Storyboard.TargetName="Transform"
                                       Storyboard.TargetProperty="Y">
            <EasingDoubleKeyFrame KeyTime="0:0:0"
                                  Value="0.0" />
            <EasingDoubleKeyFrame KeyTime="0:0:3"
                                  Value="202.0">
                <EasingDoubleKeyFrame.EasingFunction>
                    <ElasticEase EasingMode="EaseOut"
                                 Oscillations="3"
                                 Springiness="8" />
                </EasingDoubleKeyFrame.EasingFunction>
            </EasingDoubleKeyFrame>
        </DoubleAnimationUsingKeyFrames>
    </Storyboard>
</Window.Resources>

<Grid>
    <Rectangle Height="20"
               Width="20"
               RenderTransformOrigin="0.5,0.5"
               Fill="BlueViolet">
        <Rectangle.RenderTransform>
            <TranslateTransform x:Name="Transform" />
        </Rectangle.RenderTransform>
    </Rectangle>

    <Button x:Name="StartAnimation"
            Click="StartAnimation_Click"
            Content="Start"
            HorizontalAlignment="Center"
            VerticalAlignment="Bottom"
            Margin="5" />
</Grid>
For More Information
I'll have a video version of this post, with full source code,
available on windowsclient.net soon.
Both WPF 4 and Silverlight include a number of easing
functions you may use in your animations. The best way to
understand them is to use the interactive Silverlight Easing Functions Explorer. The
functions are the same as those available in WPF 4.
You can also create your own easing functions - a topic I'll
cover in another post.
Update 11/25/2009 The video is located here.
