The .NET Gadgeteer (I'll call it the Gadgeteer throughout this
post) is an open source (Apache 2.0) software and creative
commons-licensed standardized hardware platform based on the .NET
Micro Framework (NETMF, also Apache 2.0 OSS). You've seen me talk
about NETMF before, creating projects using the Netduino and FEZ
Panda, among others. Those board follow the Arduino standard
layout, and make use of shields for expansion. Beyond using NETMF,
there is no standardization for software or communication.
The Gadgeteer lets you prototype devices quickly, without
worrying about soldering connections or dealing with different
types of connectors.
The Gadgeteer is the brainchild of Microsoft Research. Being
both a hardware and software standard, it describes both the form
factor for as well as the communications between modules. It also
includes IDE support for Visual Studio. This video explains the
Gadgeteer concept
And here is a video showing a simple Snake game built using the
Gadgeteer
As was the case with other .NET Micro Framework boards, you use
your existing .NET skills (C# typically, but VB is also supported
in NETMF 4.2 and above), along with the commercial or free versions
of Visual Studio, to build and debug applications on the hardware.
Once your application is loaded on to the device, you no longer
need the PC connection, so you can build interesting things like
robots. Here's a simple robot I built using a Netduino. You could
create a similar robot using Gadgeteer, although all the sensors
are not yet available in Gadgeteer format (hey, it can't all be
plug-and-play simple!)
Ok, enough of all that. Show, how do you get one?
Where to get one
First, you'll need a main board and some number of modules. You
can start off with the full kit like that offered from GHI or
Sytech, or simply get a main board and a module or two, adding more
as you learn more. The Gadgeteer is very new (just launched this
month) so there are only a few vendors with offerings. Here are the
ones I've found so far:
The photos below (copyright by their respective companies) show
the GHI FEZ Spider on the left, and the Sytech Designs NANO main
board. These main boards form the heart of a Gadgeteer system; they
have the micro controller and support electronics on-board.
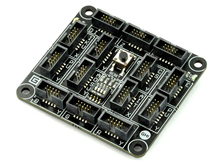

Note how the connectors are identical on the two. Yes, that's
part of the standard as well. Because of that, and the software
communications standards, you can use modules from different
vendors.
This is by no means a comprehensive comparison, and the
information below is only as complete and accurate as it was on the
vendors' web sites as of October 24, 2011. That out of the way,
here's a list of main features for the two main boards.
| Feature |
FEZ Spider |
Sytech NANO |
| Processor type |
ARM7 |
Freescale ARM920T |
| Processor speed |
72MHz |
200MHz |
| Flash |
4.5MB |
8MB |
| RAM |
16MB |
8MB |
| Total Gadgeteer Sockets |
14 |
10 |
| I2C |
Yes |
Yes |
| UART |
Yes: 4 |
Yes: 2 |
| SPI |
Yes: 2 (8/16 bit) |
Yes: 2 |
| USB Host |
Yes |
? |
| LCD Controller |
Yes |
Yes |
| Touch Controller |
Yes |
Yes |
| Ethernet Support |
Yes |
Yes |
| SD Support |
Yes |
Yes |
| Price |
$120 |
apx $112 (70 ukp) |
Both vendors took the approach of using an existing module they
already sell (EMX in the case of GHI and what looks to be a
Meridian i.MXL in the case of Sytech. Truthfully, I hadn't seen a
200MHz Freescale processor in that package until now, just the 100MHz i.MXS), and adapting that to the
Gadgeteer form factor and software.
As an aside, the Freescale I.MX processor I've drooled over in
the past is the Topaz i.MX25 400MHZ processor. That thing's a
real beast, fast, runs Windows CE, Linux and NETMF. Someone needs
to tack that on to a Gadgeteer form factor board. When you start
talking 400MHz things get interesting.
Note that many of the features require the respective modules.
For example, there's no on-board ethernet jack on either main
board, but both vendors offer an ethernet module. I also caution
about making too much of an assumption regarding the speed
difference. Past experience shows me that speed doesn't become a
significant factor for NETMF until you start looking at 5-10x or so
improvements, at least when compared to the 48MHz and 72MHz boards
I've used in the past. That's not to say it isn't a factor at all -
that really does depend on what exactly you're doing.
In addition to the main board, you'll need a power supply and
USB interface. Unlike Arduino-style modules, those ports are not
built into the main board. Again, FEZ on the left and Sytech on the
right.
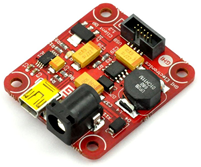
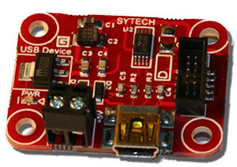
The power modules are functionally equivalent, both offering USB
power plus dedicated DC inputs. The only real physical difference
here is whether or not you prefer a terminal block like the Sytech,
or a barrel plug as shown by GHI. Note that I can't guarantee that
they are interchangeable as there is some difference in voltage/mA
ratings. In general, pick the power supply recommended by your
board manufacturer.
Notice how both boards are red? Yep, that's part of the
Gadgeteer standard as well: power boards must be red
The USB input on the boards can be used for power and also for
communication with the device. Just as we did with the Netduino and
other NETMF boards in the past, you'll load your software onto the
device using USB.
What I got
I ordered the GHI FEZ Spider starter kit. At $250, it seems
somewhat expensive until you add up everything that you get. Just
the camera and color touch LCD alone are typically very expensive
add-ons for traditional NETMF boards. Remember, with both main
board vendors, you can get a kit or jut order them part by part. To
start, at least get the main board and the power supply, and maybe
a couple switches and LEDs. You can add the more expensive
components later if you wish.

At the same time, I also ordered the eBlock expansion module to enable me to use all
the eBlocks I have from my FEZ Panda Ultimate kit, as well as a few
extra Extender Modules so that I can take a swipe at
creating my own Gadgeteer modules without having to fiddle with
those surface mount connectors (more on that in a future post).
Finally, I added a Potentiometer Module so that I can mess around
with a pot. I'm actually somewhat surprised the potentiometer
module doesn't come with the starter kit, but I guess they can't
include everything.
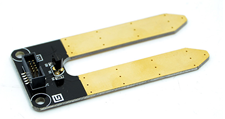
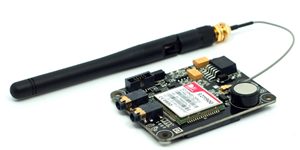
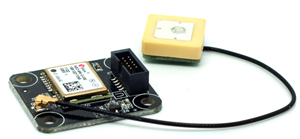
Seeed Studio has some other unique modules which I may order in
the future. They've always been big on different types of sensors,
and they've brought that to the Gadgeteer. In addition to moisture
sensors, barometers, compasses, accelerometers, and GPS, you can even get cellular radio and a Pulse Oximeter! I've run into the commercial
ones at the doctor's office before, but seriously, I have no idea
what I'd do with that. However, it's totally awesome, so it will
probably show up on my desk some day.

It's great to see so many modules available on day 1 of the
Gadgeteer launch. As is often the case, it's the ecosystem that can
make or break a product. Looks like this one has a bright future
:)
Software Setup
The software comes in a few parts. First, of course, you need a
version of Visual Studio. You can use the free Visual C# 2010 Express, or use Visual Studio
2010 Pro or Ultimate if you're already developing other .NET
applications.
Once you have the IDE installed, you'll need to install the NETMF SDK. This is common across all versions
of the Gadgeteer. Once the vendors complete their ports to NETMF
4.2, you'll be able to use that instead (and also use Visual
Basic). If you're already using the Netduino or FEZ Panda, you
almost certainly already have the SDK installed - you don't need to
install it again, but it won't hurt anything if you do.
Next, you need to install a vendor-specific package. This
includes the drivers for the main board and modules they provide.
The APIs, while similar, will be different from vendor to vendor,
just as different control vendors on the desktop offer different
versions of, say, a Grid control or ListBox control.
For the GHI FEZ Spider, all the downloads are located here. Install their
Gadgeteer package (it's a zip file with a setup file and some
documents). That will install the drivers mentioned, as well as
required support files, and the USB driver so Visual Studio can see
your Gadgeteer.
I left the defaults on for the installation even though I
already had the GHI NETMF SDK installed due to having used their
FEZ Panda and Panda II in the past. Make sure Visual Studio is
closed when you do this.
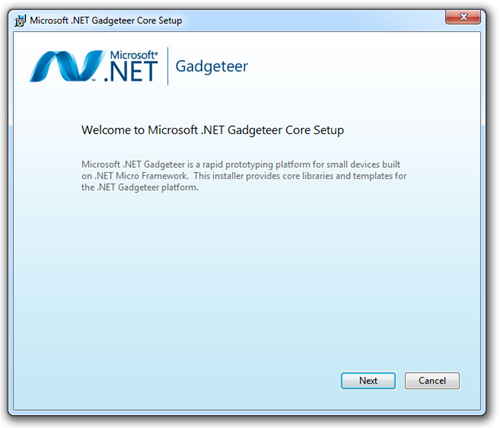
Next, the .NET Gadgeteer code setup is run. This installs the
files that are outside of NETMF, but are common across all
Gadgeteer implementations.
After that completes, you'll get the GHI Gadgeteer setup. This
setup installs the things that aren't common to other GHI NETMF
boards, and aren't common to other Gadgeteer boards. In other
words, this has all the special drivers you'll need for the main
board and modules offered by GHI.
Finally, the USB drivers will be installed. I already had these
installed from my experiments with the Panda/Panda II. The
installer gave the options of "Repair or Remove", so I should
really have unchecked that box in the main setup. Since I was
already down this far, I decided to simply Repair rather than risk
a Cancel (Cancel in setup from various vendors often triggers a
rollback. That probably wouldn't happen here, but I didn't want to
risk it)
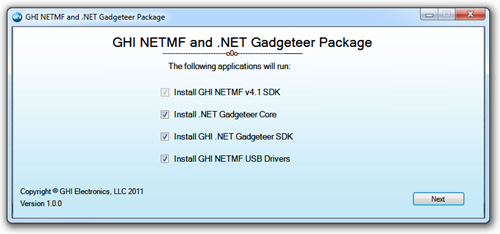
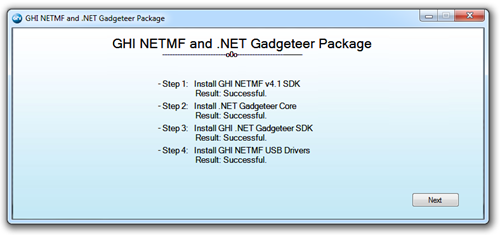
If everything completed, you should get a confirmation window
like this one:
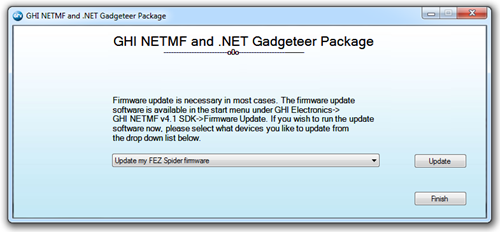
Click "Next" and you'll be prompted to update the firmware on
your device.
Firmware Update
Plug the Spider into an available USB port on your computer. The
power need to provide sufficient power for the board and its
modules, so make sure you're not already on an oversaturated bus on
an unpowered hub or something. If power is an issue, plug a DC
wall-wart into your spider, as recommended by GHI.
When you plug in the board, you should see the power board light
up, and Windows pop up a notification that the device is
installed.
Now, select "Update my FEZ Spider firmware" and click
"Update"
The firmware is the code that runs on the spider and enables you
to do things like load applications, debug from Visual Studio, and
more. It's possible you may already have the latest version but,
chances are, GHI has updated it since burnt to your Spider main
board.
The prompts are complete and helpful (including mentioning that
you need to remove the protective film on the DIP switches), so I
won't duplicate that here. I found that it was easiest to lift off
the film using the point of an exacto knife.
When hitting the rest button, you only need a quick press. A
long hold (like you would on a PC) will actually fail.
The update process will take a few minutes, and will then reboot
the Spider.
Apply SDK Updates/Fixes
There are some simple fixes that haven't (as of the time of this
writing) yet made it into the official SDK installer. The one we're
interested in is the button update as described in this thread. Go ahead and run that
updater to get the new button driver.
Verifying the Installation
Next, open up Visual Studio. Choose File | New -> Project and
look at the Installed Templates list. You should see a Micro
Framework folder with several FEZ items. It may look something like
this:

You won't actually use those, I'm showing it simply to verify
installation of the GHI-specific SDK. You'll also see a folder
named "Gadgeteer" with a single project template ".NET Gadgeteer
Application"
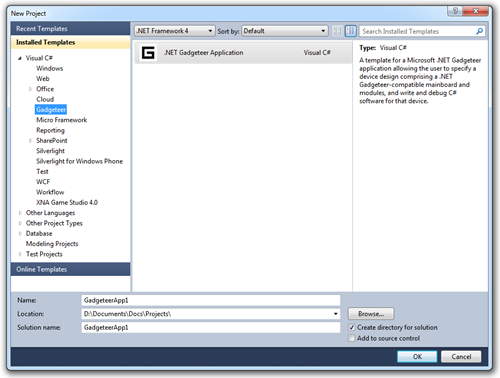
Go ahead and select this project type, naming the project
"GadgeteerHelloWorld".
Gadgeteer Hello World Program
My first .NET Micro Framework program, written
just over a year ago, was one which flashed the LED on the
board.
For another cool Hello World, with a bit more complexity (video
*and* display) check out Andrew Duthie's blog post with the unboxing
video and walkthrough.
If you get this warning:
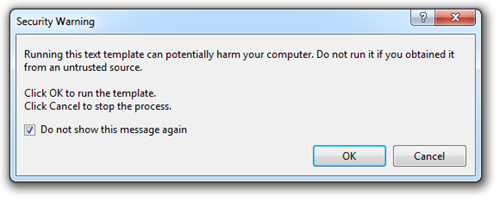
Just ignore it. The templates here are safe :)
The Design Surface
The first thing the Gadgeteer project will throw you into is the
design surface. One of the cool things about the Gadgeteer standard
is that module developers need to provide a design-time experience
(easier than it sounds) for their modules. That enables you to
allow the tools to help you correctly connect and configure your
modules.
In my case, I added to the design surface a MulticolorLed, a
Button, and the UsbClientDP (the red power module). Here's what
that looked like on the design surface.
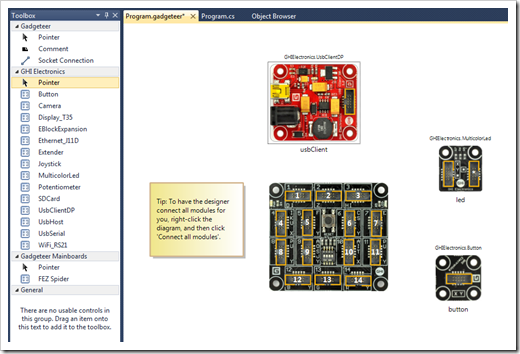
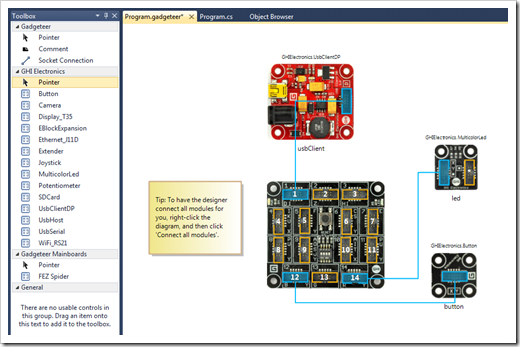
I then, as mentioned in the tip, right-clicked the diagram and
selected "Connect all modules". This option used the socket
information for each device to figure out the best (or a working
way, anyway) way to connect the modules together. Not all sockets
are created equal - you need to match up socket types with socket
requirements using the letters. For example, socket X or Y are the
most basic kinds, and power needs to be plugged into the "D"
socket.
When connecting the modules, notice how the cable is configured.
If the connection seems awkward or upside down, swapping the ends
of the cable will often help
If you don't like the names given to the components, you are
free to change them. I decided to leave them at the default
"usbClient" "led" and "button" for this example, although it pains
me not to see underscores in front of those class-level variable
names.
The generated code ends up in the Program.generated.cs file.
Here's what mine contained after connecting all the modules:
//------------------------------------------------------------------------------

// <auto-generated>

//     This code was generated by the Gadgeteer Designer.

//

//     Changes to this file may cause incorrect behavior and will be lost if

//     the code is regenerated.

// </auto-generated>

//------------------------------------------------------------------------------


using Gadgeteer;

using GTM = Gadgeteer.Modules;


namespace GadgeteerHelloWorld

{

    public partial class Program : Gadgeteer.Program

    {

        // GTM.Module defintions

        Gadgeteer.Modules.GHIElectronics.MulticolorLed led;

        Gadgeteer.Modules.GHIElectronics.Button button;

        Gadgeteer.Modules.GHIElectronics.UsbClientDP usbClient;


        public static void Main()

        {

            //Important to initialize the Mainboard first

            Mainboard = new GHIElectronics.Gadgeteer.FEZSpider();


            Program program = new Program();

            program.InitializeModules();

            program.ProgramStarted();

            program.Run(); // Starts Dispatcher

        }


        private void InitializeModules()

        {

            // Initialize GTM.Modules and event handlers here.

            usbClient = new GTM.GHIElectronics.UsbClientDP(1);


            button = new GTM.GHIElectronics.Button(12);


            led = new GTM.GHIElectronics.MulticolorLed(14);


        }

    }

}
You can see that all the code does is create some member
variables and initialize them with their port numbers. Of course,
using the design surface is completely optional. It makes it easier
for people to visualize their solutions and for people new to NETMF
to wire things up, but it's certainly not a requirement.
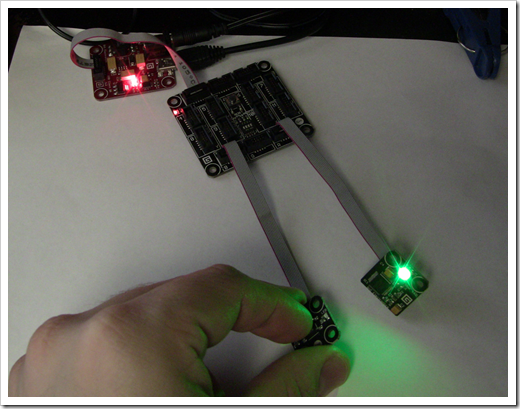
Making the LED Blink
For this first program, I'm going to make the LED blink when you
press the button, pretty much like I did with my first Netduino
program. The LED included with the FEZ kit is a nice RGB LED, so it
can do most any color you'd want. I chose Blue.
NOTE: Some of the LED modules have errors in their firmware.
This is mentioned in this thread. I happen to have at
least one of those where the blue and green are swapped. GHI
is working on a fix for that. In my case, If I enter "purple" as a
color, I get a yellowish color instead. When I use the code below,
my LED lights green. I bring this up in case you run into the
problem and think it's something wrong with your code.
using System;

using Microsoft.SPOT;

using Microsoft.SPOT.Presentation;

using Microsoft.SPOT.Presentation.Controls;

using Microsoft.SPOT.Presentation.Media;


using GT = Gadgeteer;

using GTM = Gadgeteer.Modules;

using Gadgeteer.Modules.GHIElectronics;


namespace GadgeteerHelloWorld

{

    public partial class Program

    {

        void ProgramStarted()

        {

            /******************************************************************************************

            Access modules defined in the designer by typing their name:


            e.g.  button

                  camera1


            Initialize event handlers here.

            e.g. button.ButtonPressed += new GTM.MSR.Button.ButtonEventHandler(button_ButtonPressed);

            ***************************************************************************************** */


            // Do one-time tasks here

            Debug.Print("Program Started");


            button.ButtonPressed += (s, ea) =>

                {

                    led.BlinkOnce(GT.Color.Blue);

                };

        }


    }

}
Deploying and Running the Program
Remember how we set those DIP switches to enable the firmware
update? Now we need to set them back so that we can deploy and
debug over USB. The Spider comes with a little reference card that
tells you what the various DIP settings mean. In our case, just set
them all to "Off" (so they are pointed towards the little
button).
If your deployment fails, check the DIP switches. They should
all be up (Off). If it still fails, run MF Deploy from the NETMF
folder (on my machine: C:\Program Files (x86)\Microsoft .NET Micro
Framework\v4.1\Tools )and see if it sees your device as a USB
device. A ping there should bring back a response. If you get
nothing, try a different USB port. Also try plugging a 9v or so
power supply directly to the board. Finally, try plugging the USB
cable directly to your PC, avoiding any hubs.
I had some issues with the initial recognition on my machine,
probably related to USB power during the firmware upgrade. Gus
from GHI helped me figure it out. The steps I went through and
the resolution may be helpful to you.
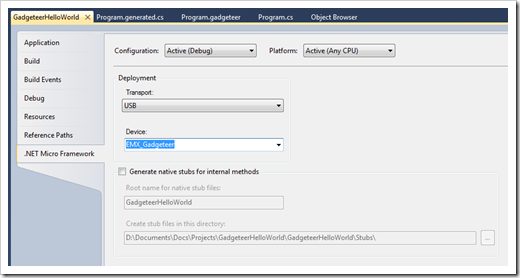
Just as we had to with other NETMF boards, we need to make sure
the project is set to deploy to the Gadgeteer. Double-check the
project properties .NET Micro Framework tab and ensure the
transport is USB and the device is the Gadgeteer.
Then, you can build the solution and deploy it, or simply run it
with Debug | Start Debugging to have the build and deploy happen
automatically.
Press the button. Did it work? If not, make sure you updated
your button DLL as described in the earlier installation section.
If you do that now, you'll need to remove and re-add the reference.
The DLL is located in your Program Files (x86) folder, under GHI
Electronics.
Modifying the Program
Go ahead and change the LED color passed into the BlinkOnce
function, recompile, and run it again. Cool, eh? Change the
function call to use the FadeOnce function as shown here:
button.ButtonPressed += (s, ea) =>

    {

        led.FadeOnce(GT.Color.Blue, new TimeSpan(0,0,1), GT.Color.Red);

    };
Now run it again and press the button. Experiment with the
timespan (set at one second in the above) and the from and to
colors. Fun :) Don't be afraid to experiment; the Gadgeteer
platform is a robust one, and your code is very unlikely to let out
any magic blue smoke. The nature of the modules also makes it
difficult to toast anything there as well.
Taking it Away
Once you have something you like, disconnect it from your
computer and bring it and your power supply upstairs. Don't have a
power supply? You can rig up one with a 9v battery and a barrel
adapter you can order online or get at your local Radio Shack.
Suddenly, the Spider is portable. Show your friends. Show your
family.
More Information
I'll have more blog posts on the Gadgeteer as I build out
additional projects and samples. I have a number of things I plan
to try out. In the mean time, I encourage you to check out the
other Gadgeteer resources on the web.
Oh, and yes, the Gadgeteer supports a subset of XAML, so you bet
I'm going to try that out for the UI :) (I'll also try out "Glide"
which I understand has better performance on NETMF)