I keep a backlog of project/blog/video ideas on my machine here.
One that I've had sitting there for a bit, and something that
really interests me, is how to create a simple screen capture
(still image) program using WPF.
I use a ton of screen shots in my applications. Before I joined
Microsoft (when I was an MVP), I used Snag-it for just about
everything. On this new machine, I haven't installed any screen
capture apps at all. However, tools like Rooler by Pete
Blois and Cropper up on CodePlex would be good
candidates.
Of course, I want to build one myself anyway to learn how it's
done. So, let's have at it.
Capturing a Region
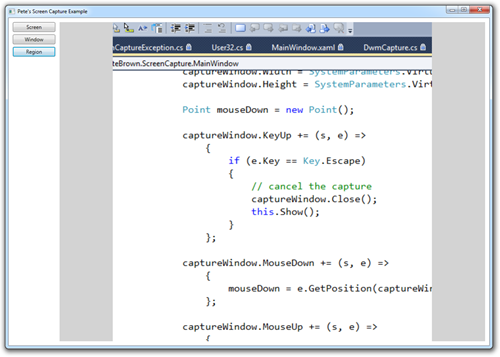
The first task I decided to tackle is that of snap-shotting a
region of the screen. Here's an example of a region which includes
part of Visual Studio.
I wanted to keep it simple, so I didn't implement rubber-band
selection or anything. A real app, of course, would need that.
Instead, I decided just to hard-code the rectangle and test out the
rest of the code from there.
There are three buttons, an Image and a Border in the Xaml. The
one button we're concerned with for this example is the
CaptureRegion button. It and the image are defined as follows:
<Button Content="Region"

        Height="23"

        HorizontalAlignment="Left"

        Margin="10,68,0,0"

        x:Name="CaptureRegion"

        VerticalAlignment="Top"

        Width="100"

        Click="CaptureRegionButton_Click" />


<Border Background="LightGray"

        BorderBrush="Black"

        Grid.Column="1"

        Margin="10">

    <Image x:Name="CapturedImage"

            RenderOptions.BitmapScalingMode="Fant"

            Stretch="Uniform" />

</Border>
Note the RenderOptions.BitmapScalingMode setting on the Image.
When displaying we're typically resizing an image by far more than
50%, so you want a more aggressive smoothing algorithm. See more on
my posts about image resizing in WPF 4 here and here.
For this example, I implemented the call in code-behind.
private void CaptureRegionButton_Click(object sender, RoutedEventArgs e)

{

    CapturedImage.Source = ScreenCapture.CaptureRegion(100, 100, 500, 500, true);

}
You can see that we're capturing a region starting at 100x100
with a size of 500,500. The last parameter says to copy to the
clipboard -- more on that later.
Now for the important part. Capturing the region. This involves
grabbing the desktop window, since a region may overlap windows,
and rendering a portion of that to a bitmap. While much of it is
Win32 API gunk (I'll leave out the Win32 API declarations; you can
see them in the source code attached to this post), there's one
really nice helper from WPF: the Imaging interop class.
// capture a region of a the screen, defined by the hWnd

public static BitmapSource CaptureRegion(

    IntPtr hWnd, int x, int y, int width, int height, bool addToClipboard)

{

    IntPtr sourceDC = IntPtr.Zero;

    IntPtr targetDC = IntPtr.Zero;

    IntPtr compatibleBitmapHandle = IntPtr.Zero;

    BitmapSource bitmap = null;


    try

    {

        // gets the main desktop and all open windows

        sourceDC = User32.GetDC(User32.GetDesktopWindow());

        //sourceDC = User32.GetDC(hWnd);

        targetDC = Gdi32.CreateCompatibleDC(sourceDC);


        // create a bitmap compatible with our target DC

        compatibleBitmapHandle = Gdi32.CreateCompatibleBitmap(sourceDC, width, height);


        // gets the bitmap into the target device context

        Gdi32.SelectObject(targetDC, compatibleBitmapHandle);


        // copy from source to destination

        Gdi32.BitBlt(targetDC, 0, 0, width, height, sourceDC, x, y, Gdi32.SRCCOPY);


        // Here's the WPF glue to make it all work. It converts from an

        // hBitmap to a BitmapSource. Love the WPF interop functions

        bitmap = System.Windows.Interop.Imaging.CreateBitmapSourceFromHBitmap(

            compatibleBitmapHandle, IntPtr.Zero, Int32Rect.Empty,

            BitmapSizeOptions.FromEmptyOptions());


    }

    catch (Exception ex)

    {

        throw new ScreenCaptureException(string.Format("Error capturing region {0},{1},{2},{3}", x, y, width, height), ex);

    }

    finally

    {

        Gdi32.DeleteObject(compatibleBitmapHandle);


        User32.ReleaseDC(IntPtr.Zero, sourceDC);

        User32.ReleaseDC(IntPtr.Zero, targetDC);

    }


    return bitmap;

}
We use the Imaging interop class to create a WPF-compatible
BitmapSource from a Windows hBitmap. Note that I'm not doing
anything with the Clipboard parameter in this code. The clipboard
portion is not yet working, but is included in the source code.
That's all there is to capturing a region. It's super simple
once you realize there's this great helper functionality included
in the WPF interop namespace.
Next, we'll expand this to capture the entire screen.
Capturing the Entire Screen
The second thing I decided to do is implement a simple
Print-Screen function which snapshots the entire virtual screen
space. Here's an example of a screen shot from this machine:
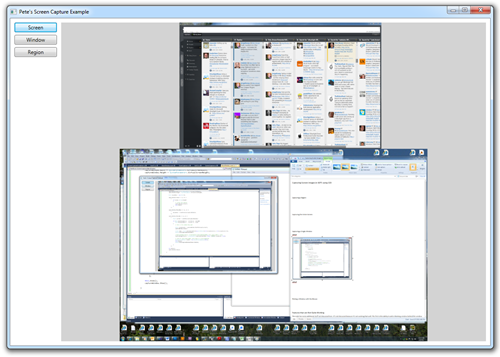
You can see from the above screenshot that I have two displays
stacked on each other. Windows does a good job of providing both
images, with appropriate transparency where no display occupies
that space.
The nice part about this is it uses the existing CaptureRegion
function to do all the heavy lifting:
public static BitmapSource CaptureFullScreen(bool addToClipboard)

{

    return CaptureRegion(

        User32.GetDesktopWindow(),

        (int)SystemParameters.VirtualScreenLeft,

        (int)SystemParameters.VirtualScreenTop,

        (int)SystemParameters.VirtualScreenWidth,

        (int)SystemParameters.VirtualScreenHeight,

        addToClipboard);

}
The key thing to note in this chunk of code is the
SystemParameters object which provides the size of the full
screen.
The next task is to capture a single window. This is where
things start getting hairy.
Capturing a Single Window
I'm not a fan of Alt-PrtScn to capture a single window. When you
do that, you lose the nice shadow effect from Windows 7 and Vista,
and get an ugly chopped image with dark corners (since it leave the
shadow there, but doesn't mask the rounded corners). Here's an
example:
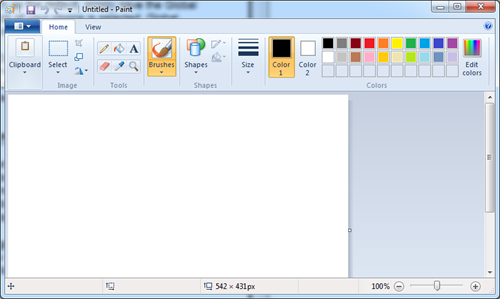
Not only do we have the corner problem, but due to aero glass,
background content shows through. On a full desktop, that content
adds context, but in a screenshot, it just looks messy. Screenshots
like that just look unprofessional. I did my best to make sure they
don't show up in my books or on my blog.
The attached source code has the start of a blanking approach: I
stick a blank window behind the target window before doing the
screen shot. It's not stable and suffers from a race condition, so
I'll not include that code in this blog post. However, I will show
you how to capture the full window including the shadow.
Warning: Lark's Vomit!
(that was a Big Red Label. Look it up <g>)
Ok, seriously. This code has magic numbers. I hate magic
numbers. There is likely a nice systemic way to retrieve
the exact dimensions I need, including shadows and whatnot.
However, it eludes me at the moment. Use the code if you
want, but realize you're inheriting disease. Don't blame me if you
implement a mission critical print-screen hospital patient
monitoring system and someone gets +/- 5% dosage or something
;)
First, the main window capture function (with blanking window
code removed):
public static BitmapSource CaptureWindow(IntPtr hWnd, bool recolorBackground, Color substituteBackgroundColor, bool addToClipboard)

{

    Int32Rect rect = GetWindowActualRect(hWnd);


    Window blankingWindow = null;


    if (recolorBackground)

    {

        // ... blanking window gunk ...

    }


    // bring the to-be-captured window to capture to the foreground

    // there's a race condition here where the blanking window

    // sometimes comes to the top. Hate those. There is surely

    // a non-WPF native solution to the blanking window which likely

    // involves drawing directly on the desktop or the target window


    User32.SetForegroundWindow(hWnd);


    BitmapSource captured = CaptureRegion(

        hWnd,

        rect.X,

        rect.Y,

        rect.Width,

        rect.Height,

        true);


    if (blankingWindow != null)

        blankingWindow.Close();


    return captured;

}
One function in there deserves calling-out: GetWindowActualRect.
This is where the majority of fudging happens
// this accounts for the border and shadow. Serious fudgery here.

private static Int32Rect GetWindowActualRect(IntPtr hWnd)

{

    Win32Rect windowRect = new Win32Rect();

    Win32Rect clientRect = new Win32Rect();


    User32.GetWindowRect(hWnd, out windowRect);

    User32.GetClientRect(hWnd, out clientRect);


    int sideBorder = (windowRect.Width - clientRect.Width)/2 + 1;


    // sooo, yeah.

    const int hackToAccountForShadow = 4;


    Win32Point topLeftPoint = new Win32Point(windowRect.Left - sideBorder, windowRect.Top - sideBorder);


    //User32.ClientToScreen(hWnd, ref topLeftPoint);


    Int32Rect actualRect = new Int32Rect(

        topLeftPoint.X,

        topLeftPoint.Y,

        windowRect.Width + sideBorder * 2 + hackToAccountForShadow,

        windowRect.Height + sideBorder * 2 + hackToAccountForShadow);


    return actualRect;

}
There are a couple problems related to the magic numbers:
- You can incorrect results with maximized windows. I can check
for this and handle it in code.
- Some windows just don't cooperate with this. Again, Windows
Live Writer is one that throws me. Most of the other Windows all
behave nicely, but the WLW window ends up shifted over a few
pixels.
- This hasn't been tested on Aero Basic
- When you click on child hWnds (like the web page inside the
browser, or the editor inside Visual Studio) the fudge numbers no
longer make sense.
Other than that, it does a decent job of capturing the window
itself, including its aero borders and shadows.
Once we have the actual bounds of the window (including
shadows), the code simply calls the same CaptureRegion code from
before. Here's an example of capturing the Visual Studio
window.
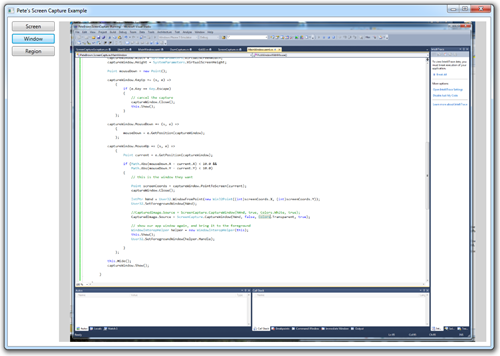
Without the white blanking window in the background, it looks
ugly, I know. That is a solvable problem and
will be dealt with.
But wait, how did I go about picking that particular window for
capture? Ahh, that's the next part :)
Picking a Window with the Mouse
I didn't want this to be a completely academic exercise, so I
figured I had better put in some realistic functionality. That
comes in the form of using the mouse to select the window you want
to capture.
private void CaptureWindowWithBackgroundButton_Click(object sender, RoutedEventArgs e)

{

    PickWindowWithMouse();

}


private void PickWindowWithMouse()

{

    Window captureWindow = new Window();


    captureWindow.WindowStyle = WindowStyle.None;

    captureWindow.Title = string.Empty;

    captureWindow.ShowInTaskbar = false;

    captureWindow.AllowsTransparency = true;

    captureWindow.Background = new SolidColorBrush(Color.FromArgb(0x01, 0x00, 0x00, 0x00));

    captureWindow.Topmost = true;


    captureWindow.Left = SystemParameters.VirtualScreenLeft;

    captureWindow.Top = SystemParameters.VirtualScreenTop;

    captureWindow.Width = SystemParameters.VirtualScreenWidth;

    captureWindow.Height = SystemParameters.VirtualScreenHeight;


    Point mouseDown = new Point();


    captureWindow.KeyUp += (s, e) =>

        {

            if (e.Key == Key.Escape)

            {

                // cancel the capture

                captureWindow.Close();

                this.Show();

            }

        };


    captureWindow.MouseDown += (s, e) =>

        {

            mouseDown = e.GetPosition(captureWindow);

        };


    captureWindow.MouseUp += (s, e) =>

        {

            Point current = e.GetPosition(captureWindow);


            if (Math.Abs(mouseDown.X - current.X) < 10.0 &&

                Math.Abs(mouseDown.Y - current.Y) < 10.0)

            {

                // this is the window they want


                Point screenCoords = captureWindow.PointToScreen(current);

                captureWindow.Close();


                IntPtr hWnd = User32.WindowFromPoint(new Win32Point((int)screenCoords.X, (int)screenCoords.Y));

                User32.SetForegroundWindow(hWnd);


                //CapturedImage.Source = ScreenCapture.CaptureWindow(hWnd, true, Colors.White, true);

                CapturedImage.Source = ScreenCapture.CaptureWindow(hWnd, false, Colors.Transparent, true);


                // show our app window again, and bring it to the foreground

                WindowInteropHelper helper = new WindowInteropHelper(this);

                this.Show();

                User32.SetForegroundWindow(helper.Handle);


            }

        };


    this.Hide();

    captureWindow.Show();


}
To handle this, I create a full-screen WPF window and use it to
capture the click. Windows don't have a click event, so I check to
see if the MouseUp event is raised within 10 pixels of the
MouseDown event. The window covers the entire screen, so I don't
bother with capturing the mouse.
I then use the Win32 API to map that click to a hWnd in Windows.
That hWnd doesn't always resolve to a top-level application. For
example, IE8: if I click in the web page, the only part that is
captured is the rendered web page (the portion viewable on-screen).
I have to click in the title bar or tool bar to get the full IE
window.
So, in a nutshell:
- Hide this app window
- Show the capture window
- Capture the mouse click
- Hide the capture window
- Map the mouse click to an app
- Bring that app to the front (so whole window is visible)
- Capture the image
- Show my app's window again
- Bring my app's window to the front
The user can press escape at any time to close the capture
window.
The full-screen WPF window is not the only available option.
However, I'll want to have that available for rubber band selection
and other possible enhancements in the future, so using it here
imposes no hard tax.
Features that are Not Quite Working
As mentioned, the code has some additional stuff not shown here.
It's not shown because it's not working that well. The first is the
ability to add a blanking window behind the window being captured.
This is good for getting nice clean screenshots, typically on a
white background. When taking normal screen shots using
Print-Screen, I manually do this by hovering the window over
notepad when using print screen. Crude, but works. I want a better
solution.
The second bit is the clipboard. I wrestled with the clipboard
tonight but couldn't get it to put a good default format in that
was recognized by Windows Live Writer. As written, it will paste
into MS Word and even MS Paint. WLW, on the other hand, doesn't
recognize what's there. Obviously something's amiss.
So, expect a follow-up should I come up with decent solutions
for these issues. Feel free to tinker with the code on your own as
well.