We recently released a new version of the Visual Studio Productivity Power Tools. If you
spend most of your day in Visual Studio like most of us do, you'll
really appreciate some of the features this kit offers.
Installation
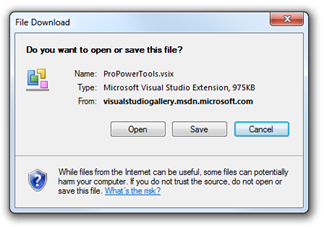
To install the power tools, visit the Gallery Page and click
download to grab the .vsix installer. Make sure Visual Studio
instances are closed, then open the vsix.
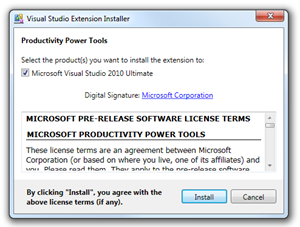
Once installed, open up Visual Studio and create a new project
(I created a WPF Windows project). The first thing we'll
look at is what I consider one of the most useful features: a new
"Add Reference" dialog.
New Add Reference Dialog
The power tools include a replacement "Add Reference" dialog.
Yay!
The first time you open this dialog, it'll take a bit longer
than the stock, as it is refreshing references. (Hint: I bet a fast
drive helps here). The title bar shows the project you're working
with (helpful in large solutions), the area to the left lets you
pick the type of reference you want, the area under the title bar
tells you the current filter as well as provides options for sort
and searching, and finally, the area to the right gives you
information on the selected reference.
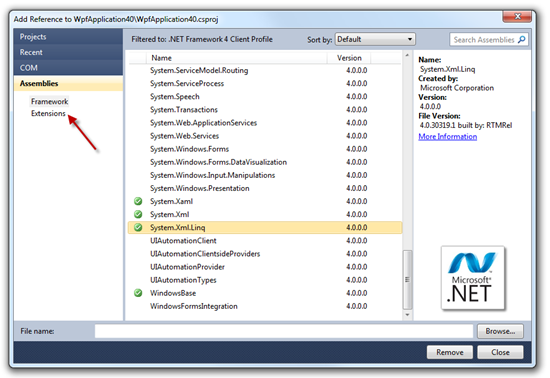
The arrow points to the two classifications. If you choose
"Framework" you get the .NET framework (typically System.*)
assemblies. If you select "Extensions" you get SDKs and all the
other good stuff.
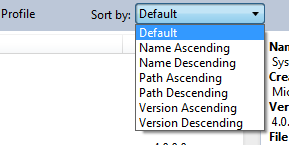
Oh, have tons of SDKs installed and trying to find the right
version? Sort based on version, or path… or name even.
Of course, if you know part of the name, you can just use the
search box on the right. In this case, I typed "xml" and got all
the assemblies with that in their name.
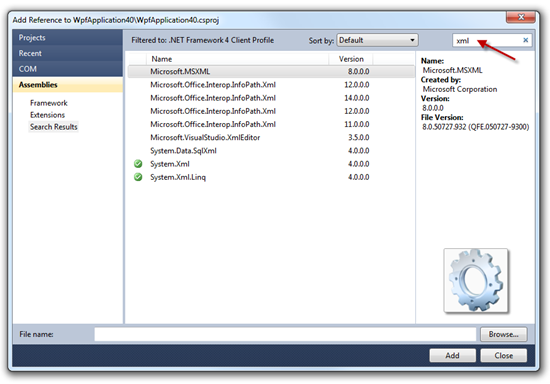
Note also how you get a helpful green checkmark if you already
have a reference to that assembly.
This is great. The only oversight with the implementation is
that it should play this sound every time it opens.
Options
What if you really like the old "Add Reference" dialog, but want
to keep other parts of the power tools? Simple, under Tools ->
Options, select "Productivity Power Tools" and enable or disable
specific features.
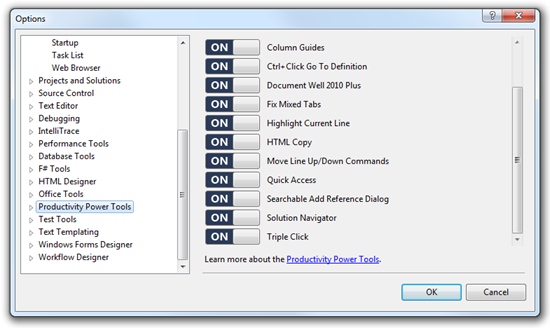
Being able to pick and choose features is always a good thing
for personalization.
Current Line Highlighting
This is helpful, but time will tell if I decide to keep it on.
The current line with the cursor is displayed with a highlight so
you can easily find your way in code. For me, this is a flashback
to the editor I used on either VMS or Unix back in 1990, as I
recall it did per-line highlighting. If you have a theme that makes
the cursor difficult to find, you'll definitely find this
helpful.
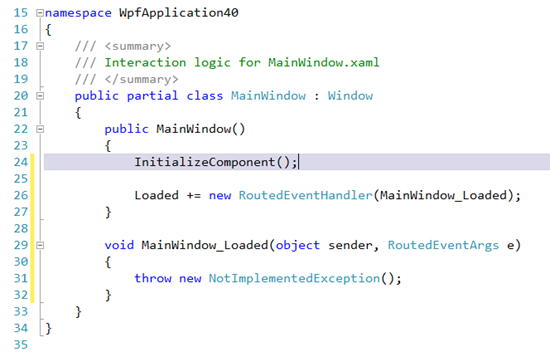
Cool if you have lots of code or a huge display and tend to lose
your cursor, if only for a moment.
Solution Navigator
The Solution Navigator is a new tab in the solution pane. It
enables you to drill down beyond the file or class level, and into
individual methods and parameters.
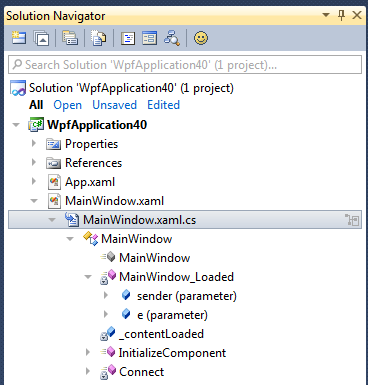
The little icon to the right of the selection lets you promote
that item to the root to make navigation easier and unclutter the
screen. The buttons at the top let you do things like view code,
view properties, view designer etc.
Auto Brace Completion
Another great feature to help your typing. Much like the
automatic closing brace in XAML took me a while to get used to in
VS2010 (muscle memory can be a pain sometimes), it's taking me a
bit to get used to this. However, having automatic closing
parentheses, braces etc. can be a nice keystroke saver. Here's the
feature list from the gallery:
Automatic Brace Completion improves the productivity of writing
code by automatically inserting the closing code construct when the
opening construct is typed for VB & C#. More
specifically, this extension:
- Supports the following constructs: (), {}, [], <>, "",
and ''.
- Allows you to press <TAB> to navigate past the next
enclosing brace
- Allows you to automatically complete a statement in C# by
inserting the closing semi-colon and moving you to the next line
with SHIFT + ENTER
Tab Enhancements
You'll notice that the tabs at the top of your project look a
little different now.

The little red dot indicates the file needs to be saved.
If you right-click on the tab well and choose "Customize" (or
use Tools -> Options), you'll see all the new options available
for controlling how the tabs look and behave.
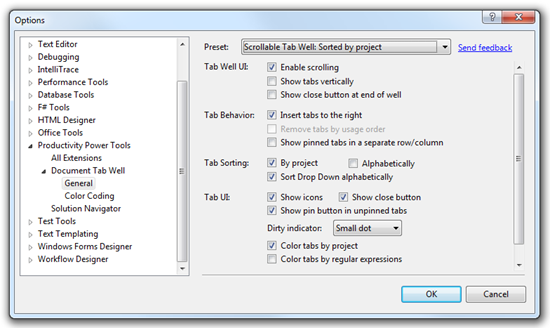
That little dot as a dirty indicator? You can change it to a few
different types of display. Want to pin certain files and have them
show up in a different row to make them available no matter how
many tabs you have open? Easy to do:

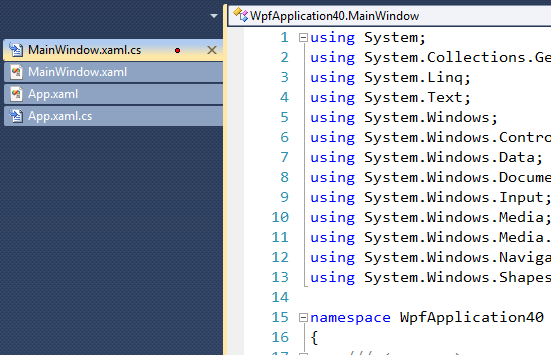
Want tabs on the left, and still support all the same features?
Yep
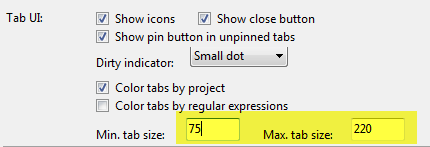
You can even set the minimum and maximum tab sizes to make the
most of your layout. It's entirely up to you.
More
There are many more features I haven't listed here including
HTML copy, assignment aligning, column guides, and others. Be sure
to download the new power tools.
Oh, while you're in the gallery, go ahead and grab PowerCommands 10.0 as well.