Have you ever copied a large number of files, or downloaded
something big using IE? If so, you've probably seen the taskbar
download progress indicator. This is a green progress bar that
fills the area behind the application icon in the taskbar.
You can achieve the same effect in Windows 7 using .NET 4, with
very little code. Let's run through how.
Project Setup
I created a simple WPF application in Visual Studio 2010. Nothing
fancy, I kept the original MainWindow and simply worked with that.
I named the project "Win7ProgressBar".
Next I added an icon to the project. I have a C64 logo icon I
created for my Silverlight C64 emulator handy, so I used
that.
MainWindow
I resized the main window to be a little smaller, gave it the
title "Long Task" and assigned the icon to it. The resulting
opening tag looks like this:
<Window x:Class="Win7ProgressBar.MainWindow"
        xmlns="http://schemas.microsoft.com/winfx/2006/xaml/presentation"
        xmlns:x="http://schemas.microsoft.com/winfx/2006/xaml"
        Title="Long Task" Height="241" Width="432"
        Icon="/Win7ProgressBar;component/AppIcon032.png">
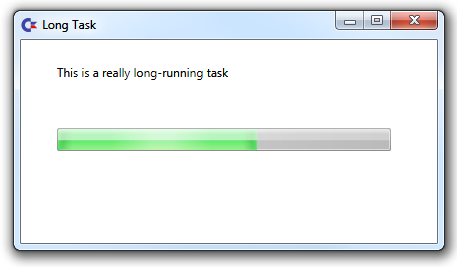
Next, I added a progress bar and a textblock to the window:
<Grid>
    <ProgressBar Height="23"
                 HorizontalAlignment="Left"
                 Margin="36,88,0,0"
                 Name="progressBar1"
                 VerticalAlignment="Top"
                 Width="334" />
    <TextBlock Height="23"
               HorizontalAlignment="Left"
               Margin="36,24,0,0"
               Name="textBlock1"
               Text="This is a really long-running task"
               VerticalAlignment="Top"
               Width="201" />
</Grid>
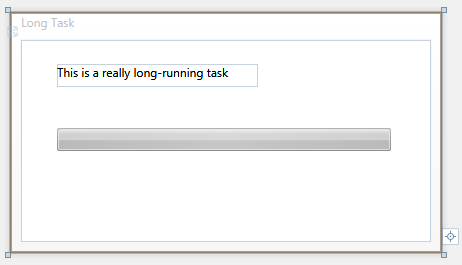
Here's how the window looks in the VS2010 designer.
So far so good. I have a window and a progress bar, but no
activity, and nothing that would as yet hook it up to the
taskbar.
Taskbar wireup isn't automatic; it's something you need to opt
into. You can do it in xaml, and you can do it in code. I used a
mixture of both for this example. Since we still have the window
xaml open, let's put that in there now.
Right after the opening tag for the window, and before the
opening grid tag, add in this snip:
<Window.TaskbarItemInfo>
    <TaskbarItemInfo />
</Window.TaskbarItemInfo>
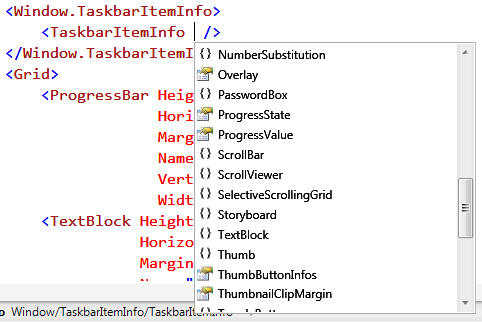
That simply news up a TasbarItemInfo class for us. If you look
at the TasbarItemInfo tag, you'll see there's quite a bit more you
can do right from within xaml. But I always do everything in xaml,
so let's try some code instead :)
An aside on ClearType
The rather ugly font in the drop down is due to the settings on
the monitor on which I took this shot (I have three displays). I
need to readjust my cleartype settings for that display. If you
have crappy-looking fonts in apps, you can simply go to Control
Panel -> Fonts and then select the option to adjust the
cleartype settings on your monitor.
Run through the wizard and answer the questions for which one
looks best. You're better off not thinking and simply acting. The
more you think about the answer, the less accurate you'll be. Go
with your first impressions.
By way of comparison, here's the same thing, only snapped from
my primary monitor, with good cleartype settings:
Notice the massive difference in the drop-down list? If not,
scroll back up and look again.
Now, most people won't have to go through that wizard unless
they get a drastically different display from what they started
with. I needed to simply because I tested a special build of SL3
before it went live, and was specifically asked to look at the
cleartype rendering. I played with the wizard and forgot to go back
and fix it :)
Back to the TaskBar
Now that we have all the xaml in place, let's take a look at the
code. I'm going to simulate a long-running activity simply by
throwing in a background worker and having it run a tight loop with
a bunch of thread sleeps in there.
Wire up the loaded event handler for the window, and let the IDE
help you wire up the events for DoWork, ProgressChanged,
RunWorkerCompleted.
Next, be sure to set the worker.WorkerReportsProgress to true,
and then call the RunWorkerAsync() method to kick off the process.
The resulting load event looks like this:
void MainWindow_Loaded(object sender, RoutedEventArgs e)
{
    BackgroundWorker worker = new BackgroundWorker();
    worker.DoWork += new DoWorkEventHandler(worker_DoWork);
    worker.ProgressChanged += new ProgressChangedEventHandler(worker_ProgressChanged);
    worker.RunWorkerCompleted += new RunWorkerCompletedEventHandler(worker_RunWorkerCompleted);
    worker.WorkerReportsProgress = true;
    worker.RunWorkerAsync();
}
Before we start reporting progress to the taskbar and the
progress bar, let's set the starting ProgressState for the taskbar.
You can set this multiple times throughout the life of the process
to control various states. Here's what the states look like:
Normal (green progress bar)

Indeterminate (pulsing green wave)

Paused (yellow progress bar)

Error (red progress bar)

So, let's start it off at Normal. You could do this in the
loaded event or in the constructor, or at any point during the
process. I initialized it in the constructor.
public MainWindow()
{
    InitializeComponent();

    TaskbarItemInfo.ProgressState = TaskbarItemProgressState.Normal;

    Loaded += new RoutedEventHandler(MainWindow_Loaded);
}
Next, we need to handle reported background thread process status
and use it to update both the progress bar in the window and the
taskbar. That's really simple to do. Note, however, that the
TaskbarItemInfo.ProgressValue is a double between 0 and 1 while the
progressBar value is an integer between two numbers supplied by you
(typically 0 and 100), so we'll need to adjust when we report
progress.
void worker_ProgressChanged(object sender, ProgressChangedEventArgs e)
{
    progressBar1.Value = e.ProgressPercentage;
    TaskbarItemInfo.ProgressValue = (double)e.ProgressPercentage/100;
}

void worker_RunWorkerCompleted(object sender, RunWorkerCompletedEventArgs e)
{
    progressBar1.Value = 100;
    TaskbarItemInfo.ProgressValue = 1.0;
}
Finally, we need our worker itself. This is where you'd be doing
something real, and time-consuming. Instead, I'll just do something
really time-consuming :) It sleeps one second per iteration and
then reports the current progress.
void worker_DoWork(object sender, DoWorkEventArgs e)
{
    for (int i = 0; i < 100; i += 10)
    {
        Thread.Sleep(1000);
        ((BackgroundWorker)sender).ReportProgress(i);
    }
}
Runtime
When you run the app, you'll see both the window and the taskbar
update.

That was really easy. There are other things you can do with
TaskbarItemInfo, such as changing your thumbnail and adding overlay
icons. We'll look at those in an upcoming post.
A Word on Use
Be judicious with how you use progress reporting on Windows 7.
You should only use it when the progress status will be meaningful
to a user when running other applications. Consider the scenario of
your app doing something that the user will typically alt-tab away
from. If the app is doing something that the user will want to know
when it has completed so they can take an action (like opening a
downloaded zip) then the taskbar progress reporting will be good.
If, however, you are doing something which will have other progress
indicators (like playing a video, where it's obvious when the video
ends because the user can see/hear it) or which won't have the user
waiting with bated breath for it to finish, consider just using a
regular old progress bar, preferably a non-modal one.
A video version of those, with source code, will be available on
windowsclient.net I'll update this post with a
link once that is up.
Update 12/16/2009: The video and source code are located
here.
