I've had a number of folks request I provide a walkthrough and/or source code for the chat application demo I did at the CMAP Spring Code Camp, so I put together this two part series. This is essentially the same demo I do live. Total time it takes me when presenting live is about 1 hour, assuming the sockets code is mostly pre-built. If you're new to Expression Design or Expression Blend, it will take you a bit longer.
Part 1 covers the design and animation of the chat balloon while Part 2 focuses on building the main window and developing the code to make the chat application work, including the chat server and the local client sockets code.
Project
I like to start my projects in Visual Studio. Some folks like to start them in Expression Blend. Either will typically work.
Create a standard C# Silverlight 2 application. If you are unsure as to how to do this, please visit the Get Started section of Silverlight.net to get the tools, and then and look through some of the tutorials in the Learn section.
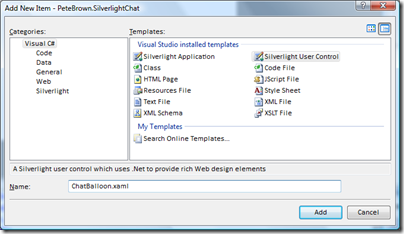
ChatBalloon Control
While in Visual Studio, add a Silverlight UserControl and name it "ChatBalloon". You can also create the control in Blend if you prefer (and take advantage of the d:DesignXyz properties), but I'm most comfortable with doing all my project/file management in Visual Studio and using Blend just to work on files I've already created.
Next edit the Xaml in this control to have a height or 75, width of 300 and transparent background
<UserControl x:Class="PeteBrown.SilverlightChat.ChatBalloon"
    xmlns="http://schemas.microsoft.com/client/2007"
    xmlns:x="http://schemas.microsoft.com/winfx/2006/xaml"
    Width="300" Height="75">
    <Grid x:Name="LayoutRoot" Background="Transparent">

    </Grid>
</UserControl>
User Interface
Creating the Chat Balloon in Expression Design
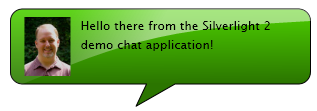
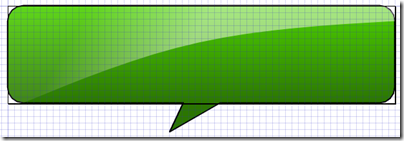
For the chat balloon, we want to end up with a shape that looks something like this:
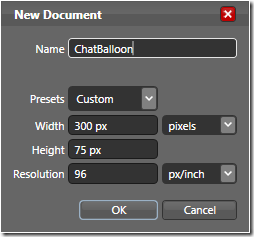
Open up Expression Design 2 Beta and create a new file sized around 300x75 pixels
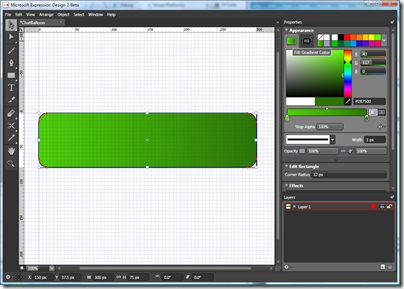
Basic Shape
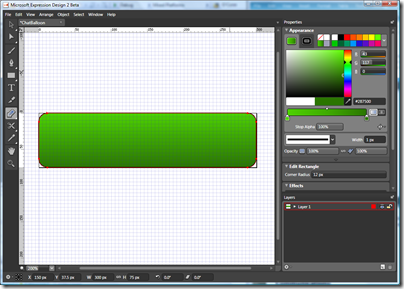
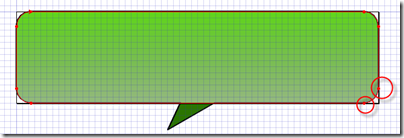
Next, create a rectangle that takes up the entire available canvas. For the fill in that rectangle, select a gradient between two shades of the same color. Finally, set the corner radius of the rectangle to 12. You should end up with something that looks like this:
Next, we want to transform the gradient so it is vertical rather than horizontal. To do that, select the gradient transform tool (or press the "G" key) and click the top of the rectangle and drag to the bottom.
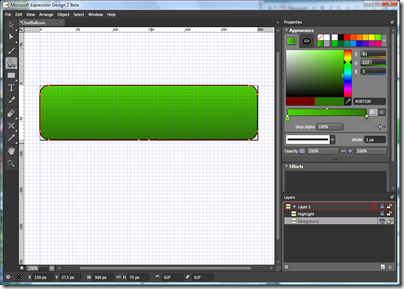
The next step is to duplicate the shape to create the "glass effect" overlay. Select the whole shape then hit Edit->Copy then Edit->Paste In Front. Check your layers to see that you now have two identical shapes.
Select the top-most shape and name it "Highlight". Select the bottom shape and name it "Background"
We'll come back to the Highlight shape in a moment.
Callout
Next, we're going to edit the Background shape to create the little callout point.
Select the Background shape and choose the "Add Anchor Point" tool (or press the "=" key)
Next add three anchor points at the bottom in roughly the center of the shape. You should end up with something like this:
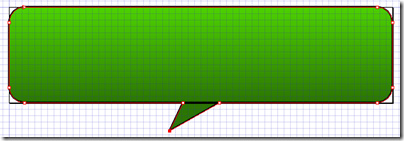
Next, click the "Direct Selection" tool (or press the "A" key). We're going to drag the center point out to create a call-out for the chat balloon. You should see something like this
Now that we're done with the basic shape, we're going to create the glass effect
Glass Effect
Select the Highlight shape in the layers pane
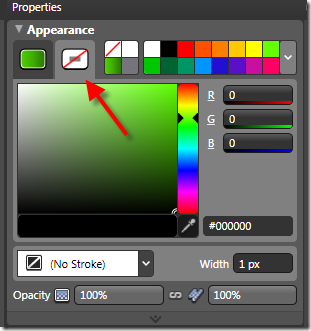
Clear the stroke of that shape by selecting the stroke tab in the appearance pane and selecting "none" (the white box with the red line through it)
Next we'll change the Highlight gradient to give us a subtle overlay. I like to use white to white to allow me to change the background color without messing with the gradient.
You can experiment with various opacity values for the two stops in the gradient. In this example, I'm using 10% and 50% as the two stops, with 50% being the bottom value.

Next we'll change the shape so we can have have a strong line between our highlight and background.
With Highlight selected, select the "Delete Anchor Point" tool (or press the "-" key)
Now remove these points by clicking on them:
You should end up with a shape that looks like this:
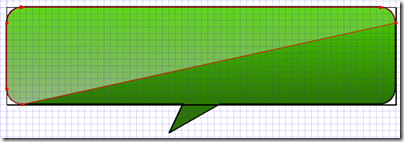
Now, that might work, but it isn't very interesting, so let's add a little curve to the dividing line.
Select the "Add Anchor Point" (or press the "=" key) and then click on the center of the dividing line to bisect that line.
Now click the "Convert Anchor Point" tool (or press Shift+C). and click the point you just added.
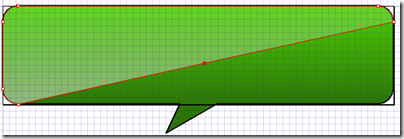
Go back to the Direct Selection tool (A) and drag the point up just a little. You should end up with something like this:
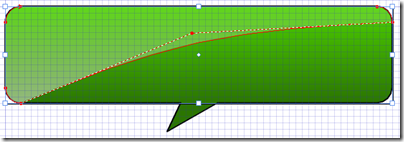
At this point, you can play with the gradient transform or the opacities until you get the effect you were looking for. This is what I ended up with:
Creating the UI in Expression Blend
Building up the Chat Balloon
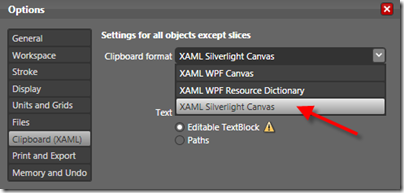
The first thing you'll want to do is export from Design the Xaml for the Chat Balloon. If you primarily work in Silverlight and not WPF, there's a quick trick to this. In the options for Design (Edit->Options->Clipboard (XAML)), select the option to use a Silverlight Canvas for the clipboard format.
Once you do that, you can simply select the object, then choose Edit->Copy Xaml to nab the Xaml from your designs.
Whichever way you prefer, nab the Xaml for the shape and paste it inside the LayoutRoot of our ChatBalloon control
Since the namespaces (xmlns and xmlns:x) are already defined, you can remove them from the canvas declaration that Design includes by default.
    <Grid x:Name="LayoutRoot" Background="Transparent">
        <Canvas x:Name="Layer_1" Width="300" Height="75" ...
            <Path x:Name="Background" Width="301" Height="98.25"  ...
                <Path.Fill>
                    <LinearGradientBrush StartPoint="0.485833,0" ...
                        <LinearGradientBrush.RelativeTransform>
...
I tend to edit xaml inside Visual Studio. You can also use Expression Blend for that task if you wish.
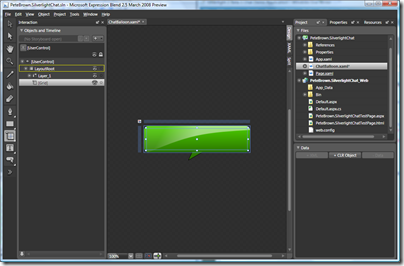
Now, save your solution and open it up in Expression Blend 2.5. Open up the ChatBalloon.xaml file in design mode.
The first thing we want to do is add a grid to the layout.
Make LayoutRoot the current container by double-clicking it in the Objects list.
Next, add a grid to the control. You should have something like this:
Next, double-click the newly-added grid in the object tree to make it our current container. Hover over the grid layout bar in the design view and create a column in the grid. You should have a roughly photo-sized column to the left (just shy of square) and a larger area on the right that will contain the text.

Next, we'll add an image control to the left and a textblock to the right.
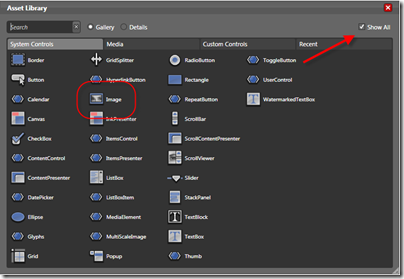
First, find the image control in the asset library. If it doesn't show up by default, make sure the "Show All" option is checked.
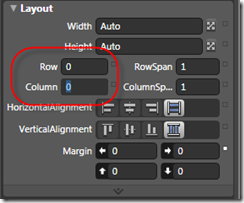
Create an image element in the left-most column. While not essential for this example, make sure that it is inside the grid you created and has a row and column of 0. You can double-check this by looking where it is in the object tree and by looking at the row and column properties in the layout pane.

Name the image ChatImage
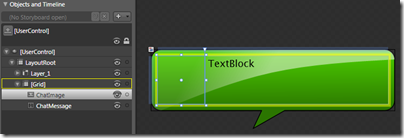
Now, add a TextBlock to the second column in the same way. Double check that its row is 0 and its column is 1.
Change the font size to 12 and name it ChatMessage
In the end, you should have something like this:
Now would be a good time to save your project in Blend.
Pop and Fade Animation
Next we're going to create an animation that will pop the chat balloon up from near the bottom of the screen, hold it in place for a couple seconds, and then fade it off into the background.
To do this, we're going to combine scale and translate transforms with an opacity animation.
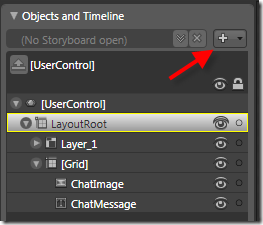
First, in the Objects and Timeline pane, click the button to add a new Storyboard
Name the storyboard PopAndFade.
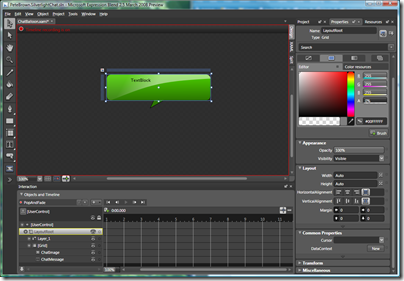
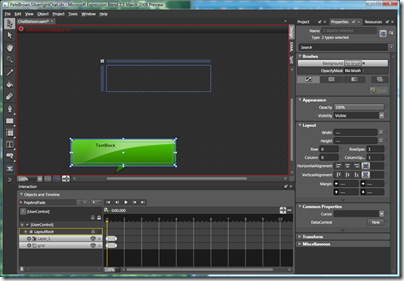
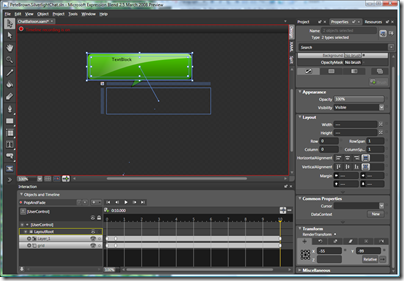
You'll notice your workspace get suddenly cramped as it is put into animation recording mode. Switch to the animation workspace by hitting F6 or selecting Window->Active Workspace->Animation Workspace. You should see something like this:
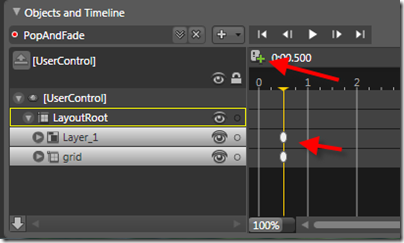
The next thing we want to do is record a keyframe at 1/2 second with everything in its current position. The way you do this is, with Layer_1 (the canvas generated from Design) and the two-column grid selected, move the mouse around the numbers in the timeline and notice the playhead position indicator move with you. When it is on 1/2 second, click the "Record Keyframe" button. You should see a little egg appear in the Layer1 and grid timelines indicating a recorded keyframe.
Next, move the playhead position back to 0 so we can reposition and resize our objects.
With Layer_1 and the grid still selected, move them down and to the left, like this:
The keyframe will be recorded for you automatically.
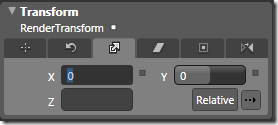
With the playhead still at the zero second mark, open the Transform pane and set the scale to 0 for both X and Y.
If you play your animation, you should see it change size and position, popping up from the bottom left to the actual position of the control. Our animation is halfway there!
Next, we want to adjust the curve to give it more of a pop. Select the 1/2 second keyframe "eggs" for both Layer_1 and grid (click one then shift-click the other) to see the keyframe properties. In the easing curve. Adjust the easing curve by manipulating the control points until you have something resembling an "S". Rewind and play your animation while you adjust so you can see the effect of the easing curve.
The effect you're trying to achieve is something more like a "pop" than a straight boring linear interpolation.
Next, we want to slowly fade the balloon into the background. For this, we'll vary size, position and opacity.
Move the playhead position to 10 seconds mark and select Layer_1 and the grid again. 10 seconds is going to be the end of the animation.
Next, move the elements to the top left, but not too far up. You should see something like this:
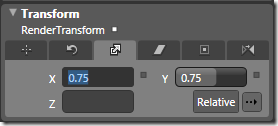
Next, while still at the same playhead position and with the same items still selected, change the scale to .75 for both X and Y
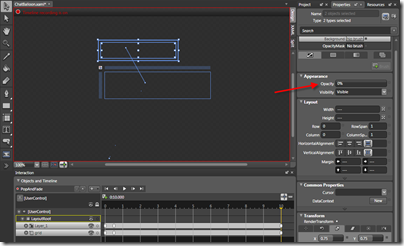
Continuing with the same items selected and the same point in the timeline, set the opacity to 0. The end result will look like this:
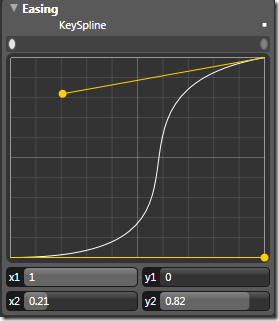
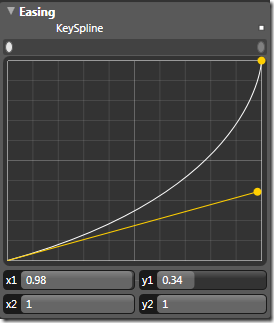
For the final part of this animation, we'll want to change the easing curves for the keyframes at the 10 second mark. The curve illustrated below will cause the animation to accelerate as it gets towards the end. For the fade and resize, I think this is appropriate. Feel free to change this curve to anything that you like, as long as you take into account the time required to read the message.
Our animation is done. To test it out, rewind the animation and play it from the start.
The animation and the majority of the design is now complete. Save your project at this point and stay tuned for Part 2.
In Part 2, we'll build the main UI and wire this up with some real communications and a socket server to make a functional demo chat application.
