(Written in October 2004)
If you have seen my
FrankenSaw page, you know that I had an opportunity to build up
a table saw in the summer/fall of 2004. Part of that build-up (I
don't want to say upgrade, see the page to find out why) included a
new fence. For the fence, I decided on the Incra LS Positioner
system.
In October 2004, I purchased the Incra TSLS Package Number 2
from Woodpeckers. My review of the package and the store are
below.
Please note: Sometime after this review was initial
written, Woodpeckers made some changes to their packages. The
"Package 2" that I purchased had the 32" fence with the 6' long
rails, and the single router table. No legs or right-side router
table was included.
Ordering and Delivery
Selection and Ordering
After much agonizing, I decided I wanted to get the Incra fence
for my table saw. The Incra Fence is the only fence out there that
speaks to the sense of accuracy I have gotten from working with
machine tools and HO-scale model building. It is also the fence
that had the very least amount of deflection in the various fence
reviews. I wanted the LS-positioner model because the leadscrew
appeals to me, and because the fine adjustment is up against the
fence, not over at the right of the saw. I wanted at least the
TSIIIa if not the LS because I wanted a machined, not simply
extruded, fence. While an extruded fence is likely very flat, I
appreciate the slight increase in accuracy that a machined face
represents.
I ordered from Woodpeckers because I have heard nothing but good
things from them. They also had the largest and most complete
selection of Incra products around.
The TSLS Package
Number 2 (Incra TS-LS Joinery System with router table and
insert) from Woodpeckers made me decide to go for the whole joinery
system in one pop. It looks expensive until you consider that not
only are you getting the best fence you can get, but also you are
getting an euqally accurate router table system. You get an
absolutely amazing amount of stuff in this one system. Here is the
run-down:
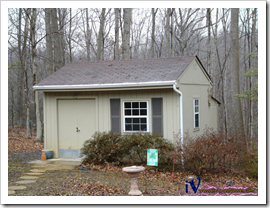
My Shop My tiny shed workshop as seen from the outside. Pete
Brown, March, 2004
- 32" Lead-Screw Positioning System including
- 36" Machined Rip Fence
- Lead-Screw positioner with fine steps
- 32" Rip capacity (larger available)
- 28"x21" Left-Side Router Table
- Ringed Phenolic Router Table Insert (upgraded to aluminum)
- WonderFence Joinery System Including:
- WonderFence
- 10" Right Angle Fixture
- Huge Master Reference Guide (lists all templates and how to use
them for the various types of joinery)
- 50 Joinery Templates (these are slide-in ruler replacements for
the LS)
- Tips and Tricks Video
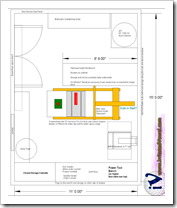
My Shop I used my CAD software to see if the Incra TSLS would fit.
Pete Brown, September, 2004
In addition, I opted to upgrade the router table insert to the
aluminum version, and to purchase the project book. Since my
craftsman router (to be replaced by a Milwaukee, soon, I hope!) is
not one that Woodpeckers would drill for, I ordered the undrilled
router plate.
While the fence does take up a significant amount of room to the
right of the tablesaw (just under 32"), I appreciate having the
router table built in. My small shop means I will not be able to
get the full rip width using this system unless I put a hole in the
wall to the right of my saw (something I may very well do).
However, I am willing to make that trade for the accuracy I will
achieve, helped by the TSLS. In the future, if I build a larger
shop, I can order even larger rails for the sytem that will give me
an even larger rip capacity.
Before I purchased the system, I inserted the known dimensions
of the TSLS package into my CAD software (AutoDesk 9) to see if it
would be workable or not. While you can see that the new fence does
not leave an awful lot of room for movement in there, it does it.
In order to free up some additional room to the left of the saw,
and to allow for a longer rip to the right, I may cut a hole in the
right wall and box it in from the outside. That might seem like an
extreme measure to take just for a fence, but this fence system is
just that good.
In the mean-time, I plan to keep the fence base mount closer to
the blade as I will need it there for the router table anyway. I'll
see how well that works with the templates, and post the
information under the usage section below.
Delivery
The system arrived in two separate shipments within a few days
of my order placement. The first shipment, which came from
Woodpeckers in three boxes, included the router table, the
supports, the router insert, video, and an extra book I ordered.
The second shipment arrived the next day, and included several more
large boxes. One long box contained the rails, another the
LS-positioner mounting assembly, and another large box had the rest
of the items.
The shipping was very quick, and the cost of shipping was quite
reasonable given the number and weight of the various boxes. One
thing Incra really deserves credit for is how well they pack their
boxes. Everything was well-protected from shipping damage, and from
scraping against other parts. The Woodpeckers items were equally
well packed.
Post-Sale Support from Woodpeckers
Shortly after the sale, I received an email offering that week's
member special which for free shipping on orders over $200. I
emailed Woodpeckers about that, fully expecting to be told to go
pound sand. I regret that I even took a bit of a negative tone in
that email, just based on my past experience. However, I promptly
received a reply from Marla telling me that it was absolutely no
problem, and that I could either receive a refund for the $42 or so
for the shipping, or a store credit of $50. I was amazed that I was
dealing with a store that would show some flexibility! Like many
folks, I am used to the draconian shipping, promotion, and return
policies of other online stores. I opted for the store credit, as I
was (and still am) sure to do more business with these great
folks.
They won me over as a future repeat customer just with
that one gesture, but they didn't stop there. Read on.
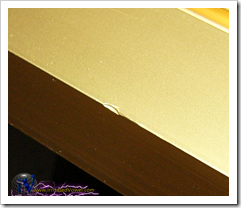
Fence Defect. Minor, but still not what I would settle for.
Pete Brown, October, 2004
A few days later, during the installation, I noticed a machining
defect in the lower edge of the front, machined face of the fence.
The defect was about 1/4" long, and was done prior to the gold
anodization. While it would have been quite possible to live with
this (the defect would only cause problems with the thinnest of
wood), I would not have been happy looking at it each time I used
the saw. It's little things like that that tend to get under my
skin over time. However, had it not been on the machined face, I
likely would have just lived with it.
A quick email to Marla again got me a response from Justin and
Marla at woodpeckers. I was asked in the email for my address so
they could send me out a replacement fence ASAP. No questions -
just many apologies from the folks at Woodpeckers! Not only that,
whether or not I would need to return the old fence was left up to
Incra. If I did need to return the old fence, they would send me a
return tag in the package. Again, that is real service on both
Incra and Woodpeckers' part. Defects will happen,
it is how the merchant and the manufacturer handle those defects
that really matter.
To put this in perspective, I have a HP 2335 wide-screen LCD
monitor on my computer (I'll do a review of these sometime in the
future, it's a beautiful monitor for graphics and development
work). The first one I purchased died within a few hours, and had
numerous dead pixels. In order to get a new one, I had to fill out
an RMA form, package up the old one and send it back to the
warehouse at my own (considerable!) expense. If they decided the
return was not necessary, or was my fault, they would charge a 15%
restocking fee. In addition, only after it was received and
inspected was I to be delivered a new monitor. I have had similar
experiences with other items from other vendors, so I expected that
to be the case with Incra/Woodpeckers. It's pretty standard
faceless-store policy. However, Incra and Woodpeckers bucked that
trend and gave me great post-sales support, especially
Woodpeckers.
Thanks again Justin and Marla from Woodpeckers, and the folks at
Incra. I absolutely would not hesitate to do business with them
again. Good prices, fast shipping, and excellent customer service
with great folks. What more could a guy ask for?
Assembly and Installation
The TSLS assembly and installation is likely more involved than
any other table saw fence system you have previously installed.
However, it is also likely the most well documented tool you will
ever see.
For a variety of reasons, including the damaged fence, I spread
the install out over a couple days. However, there is no reason why
a person could not accomplish this all in a single afternoon.
Just make sure you actually read all of the
directions!
Pre-installation Saw Tune-Up
Now is a good time to clean and tune-up your saw. I had not
previously done any alignment on this saw as I was building it
concurrently with the fence installation.
The most important alignment you can do prior to the fence
installation is to align your blade to your miter slots. As it came
from the store, the blade was out of alignment about .020" on each
end. Yikes! How did I know that? I used the Master Plate and the
Miter Bar that I picked up from Woodcraft. Once I spent some time
aligning the arbor, I was under .001" on each end. Most folks
consider anything up to .005" acceptable, but since I am installing
a precision system, I wanted as close to perfect alignment as I
could get. This does not, of course, account for any blade runout.
I'll deal with that on a blade-by-blade basis.
I'll put information on the alignment process online soon. It is
actually quite easy once you have the trunnion loosened from the
cast iron top.
Assembly - Saw Fence and Positioner
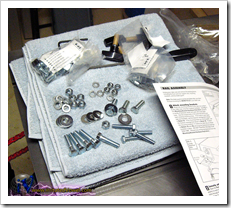
Parts Bags All parts were packaged by step. Pete Brown,
October, 2004
The assembly follows these basic steps:
- Install rails
- Install positioner base
- Install and pre-square positioner mount
- Install fence and positioner
- Square fence to miter slots and blades
- Install Router table
- Install WonderFence
- Cut wood
Parts and Manuals
The first thing you'll notice when you get your system is the
overwhelming number of boxes, parts, and manuals. The second thing
you'll notice is how well packed these various parts are. The
indivual parts bags are all referenced by number in the
instructions. In addition, Incra did not skimp on quality hardware.
You will not find yourself having to make a trip to Home Depot
because the failed to include the bolt you need for your particular
saw. Instead, you will find yourself with extra parts at the end.
These days, too many companies skimp on a couple washers or bolts
in their assemblies - not Incra.
In the photo you can see the parts bag for the fence rail
assembly. Most of those parts will be discarded, as Incra made sure
to provide appropriate bolts for all major saws.
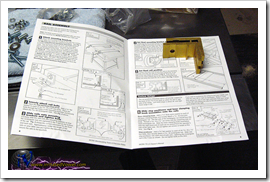
Excellent Manuals I wish all manuals were this good. Pete
Brown, October, 2004
The Incra manuals are equally well organized. Each step has an
associated professionally-drawn illustration with clear indicators
as to which part A connects to which part B. Nothing is left up to
chance, and you will not need to guess as to any of the
manufacturer's intentions.
This is a refreshing change from most manuals which often have
ambiguous text, poorly reproducted photographs, or missing or
simply unclear steps.
The packages I received included manuals or instruction sheets
for the TS-LS, The TS-III (not used), the WonderFence, the Router
Table, the Right Angle Fixture, and a couple other unused
manuals.
Rail Installation
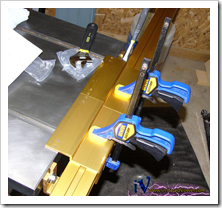
Rail Installation Rail installation was easy. Pete Brown,
October, 2004
The installation of the rails is very easy. First you install
the brackets to the cast iron top, using the bolts appropriate for
your specific saw. Two extra brackets are included in case you need
to split the rear rail to accommodate a traditional contractor's
saw-style splitter assembly. Since I plan to use an aftermarket
splitter such as the Biesemeyer, I did not cut the rail.
You then slide the rails into the saw brackets. This took some
real shuffling in my tiny shop, as I had barely enough room for the
rails when mounted. In order to get them on the saw, I had to slide
it diagonally, and then slide the rails in part-way before I could
straighten the saw out and provide the needed right-side room to
slide them in the rest of the way.
Setting the height is even easier. You use the included brackets
(before you attach the skid pads), and a couple clamps to set the
height as seen in the photo above. You then just tighten the bolts
and you're done.
Please ignore the rust in the miter slots undercut. I didn't
realize it was there until I took this flash photo. Time for me to
take some grit to that. If you want to see what the saw looked like
when I purchased it (rusty!), check out my
FrankenSaw page.
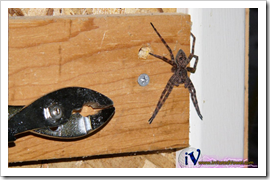
Spider That's a 1x4 he's on. He's (She's?) harmless though.
Pete Brown, October, 2004
One thing I do plan to do is to machine or cut something to
block the open extrusion "hole" on each end of the fence rails.
Unfortunately my shop, being out in the woods, is constantly full
of spiders. Even since I found the black widow on my patio, I try
to minimize the number of inviting places for them to stay in my
tools. I can deal with the giant wolf spiders and huntsmen, but the
widows are a bit much for me.
In any case, it isn't so much the spiders as it is the webs. The
zillions of tiny house spiders in there tend to put webs over
everything that hasn't been used in the past 24 hours. Those webs
(because I don't have a dust collection system yet) collect saw
dust, and it just makes the whole place look like a pit.
Of course my wife, ever the pragmatist, told me to "just stuff a
rag in the ends and be done with it". LOL.
Fence Installation and Squaring
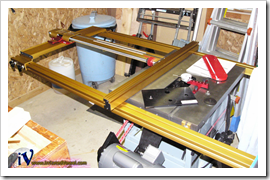
Squaring Up I squared up the blade at this point. I suggest doing
it earlier. Pete Brown, October, 2004
Here the rails are installed, and I am squaring up the blade.
Normally you would handle your blade adjustments in a
pre-installation step, but I waited until this point. Forever a
procrastinator :-)
It isn't readily apparent from this photo, but one concern with
my particular saw ended up being the clearance betwen the motor
wire housing and the fence rail. The Baldor motor has a large
rectangular housing within which you do all of the wiring. With the
blade up all the way, I cannot tilt the blade the full 45 degrees
without this housing hitting the bottom of the rail. I would have
had this problem with any fence system with a rear-rail.
Luckily, this housing is removable. I intend to replace it with
something a bit smaller and lower once I do the 220v wiring for
this saw. If you do something similar, it is imperative that you
retain both the dust sealing characteristics as well as the motor
chassis grounding screw.
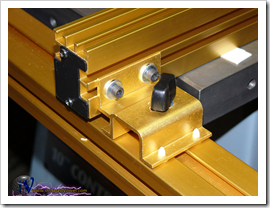
Fence Glides The fence glides were the only hitch in the install.
Read on. Pete Brown, October, 2004
For some reason (perhaps the late hour!) the fence glides were
the one thing that gave me fits during installation. When I
approached them again after the new fence arrived, I realized what
I was doing. You must tighten the glides to the fence rails before
you tighten them to the fence itself. I was doing it in the reverse
order, resulting in the fence being pulled down onto the table when
I tighten the guides to the rail. Now that I have them installed
correctly, they glide pretty smoothly.
In the photo, you can see the white cardboard strip under the
fence. This is supplied by Incra to set the correct table to fence
spacing during installation.
The Fence glides and lock downs are there for extra stability
when sawing heavy sheet goods. While the it is recommended that you
always tighten the front lock down, the rear one is optional except
in those heavy sheet good circumstances.
Assembly - Router Table
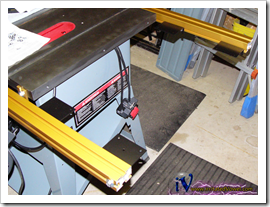
Mounts The router table mounts, loosely in place. Pete Brown,
October, 2004
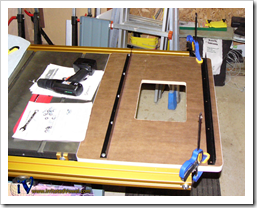
Stiffeners Table stiffeners in place. Pete Brown, October,
2004
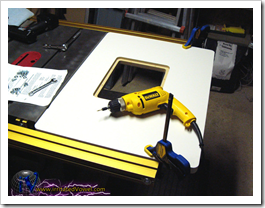
Mounting the Table Almost done! Pete Brown, October,
2004
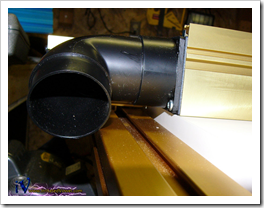
Clearance Problem An extra inch or two would have done it. Pete
Brown, October, 2004
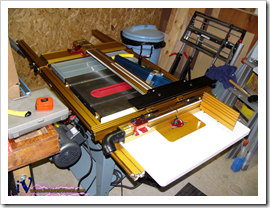
The Whole Thing Everything installed. Pete Brown, October,
2004