This article was written in 2004. This was one of my first
woodworking projects, and it shows in a number of spots. :)
The idea for entertainment center came about because of the pile
of video game consoles my wife and I have in the corner beside our
television. The set itself is too big to sit on any type of
shelving, and the drop ceiling in our basement TV room is low
enough that an entertainment center that goes over and around the
TV would look too cluttered.
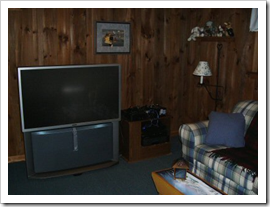
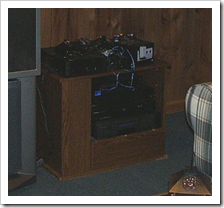
Here's the corner that needs some help. Notice the cheap
chipboard tv stand that has everything piled on it. I've had that
stand since I bought my old TV when I lived at my parents' house in
Connecticut over ten years ago. It is the very last piece of
chipboard furniture we own. It is time for it to go :-)
At the end of 2003 I started working on this entertainment
center plan. I started construction in January 2004. Originally I
built the carcass first, and then was planning on building the face
frame afterwards. One thing that stopped me in my tracks was
cutting the curves. I don't have a bandsaw and I've had horrible
luck using a jigsaw on red oak.
During the winter I picked up a book on cabinet building and
that completely turned around what I was doing. I bought a pocket
hole jig and figured out also how to cut the curves in the stiles.
Read on to see how I managed to get the curves and face frame
problems sorted out. This project has been great for finding new
tools and techniques :-)
Plans
Here is part of the cad drawing. If you want the full drawing
(including the cut list), you can download it from
here. Since I do not yet have a jointer or planer, and my
tablesaw is crap, I sized everything to use pretty standard Home
Depot/Lowes stock red oak. I will eventually get some better tools
(I'm saving for a Mini Max MM16 Bandsaw, a Powermatic 66 tablesaw
and some other goodies), as spending days on end picking through
warped wood at the store is pretty frustrating.
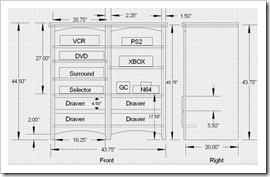
I designed the entertainment center in this plan to match an oak
telephone/light table we have in the same room, and to be large
enough to handle everything we have, plus a surround sound decoder
I hope to get sometime soon..
One incorrect dimensions on this drawing is the center rail. It
is actually 2.5" because of the stock width. If you can rip some
wood down to 2.25", however, you'll make the rest of the project
easier. In addition, I later changed the way I did the edging
around the top so that it is a 1x2 on edge instead of on its
face.
Tools Used
- Delta 10" compound miter saw
- Jet 12" disk sander
- Kreg Pocket Hole System
- Craftsman Router with flush trim and panel raising bits
- Skil jigsaw
- Skil circular saw
- Craftsman 14.6 volt cordless drill
- Drwalt 3/8" corded reversing drill
- Various clamps
I also have a Craftsman 10" table saw, but I did not use that
for this project. You really get what you pay for with that
inexpensive saw. For one thing, the miter gauge is terrible, and
the slot is proprietary so you can't replace it. The proprietary
design of the slot with its stamped protrusions also makes it
impossible to use a shop-made crosscut sled. Combine those with the
extreme difficulty in getting the blade to run true to the fence,
and you can see why I barely use the saw for any projects. It was
the first real woodworking tool I got, and it has been the one that
has taught me the most about the importance of tool quality.
Because I don't believe in baby steps, my next saw is going to be a
Powermatic 66 :-)
I originally had planned for a stabilizing half-shelf under the
bottom drawers, but that have proved unnecessary.
Inspiration
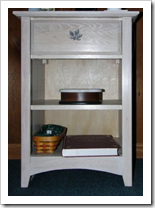
Here is the phone table that I designed this entertainment
center to match. We bought this oak bedside-table at the unfinished
furniture store. It is perfect to hold a reading lamp, telephone
etc. next to my comfy TV chair.
Melissa stained it with a white stain to help brighten up this
otherwise very dark room. Normally I like to let the wood show
through, but the TV room is paneled and edged in dark-stained pine
boards already. More natural-colored wood would just be too busy.
We will stain the entertainment center the same color.
Construction
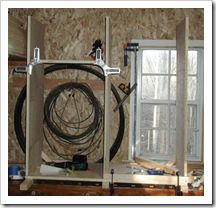
The carcass under construction. I used dowels and L-brackets to
assembl it as I had not yet discovered pocket holes when I started
this project. I drilled all the shelf pin holes using a jig I made
from a piece of 1/4" masonite peg board. In this first photo, you
can see the corner clamps I used. I have since started using some
much nicer JET spring corner clamps. They don't pull things out of
alignment.
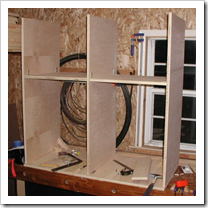
Here you can see the shelf pin holes (if you look closely) as
well as the l-brackets on the underside of the fixed shelf. These
will be hidden in the drawer area.
Keep in mind that on my next project, the carcass will be
assembled after the face frame. This is something I would recommend
for your cabinetry projects as well
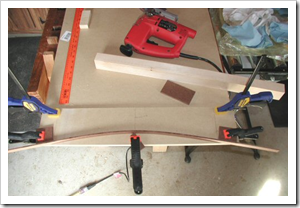
To cut the curves in the face frame stiles, I first picked up
some 1/2" MDF at Home Depot. This MDF would be used as a template.
At the same time, I picked up a 1/2" shank flush trim bit from
Woodcraft up in Towsen, MD.
To lay out the curve on the MDF template, I used a strip of 1/8"
masonite I ripped on my tablesaw. Masonite is excellent for this as
it has no grain that would interfere with the curve shape. I used
clamped pieces of 1/4" masonite to hold both ends of the curve and
the center of the curve in place.
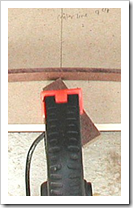
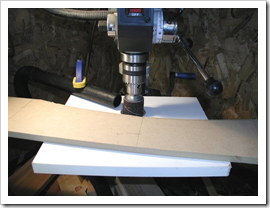
I traced the inside of the template lightly with several passes
with a sharp pencil. Then I cut the MDF with my jig saw just inside
the curve line. I used a sanding drum on my drill press to complete
the curve shape. Final sanding by hand made the template fairly
smooth.
It was very slightly wavy to the touch (but not to sight), but
that is from my inexperience with sanding drums.
Notice the shop vac hose clamped to the table. This worked
extremely well (almost perfectly) at picking up all the dust from
what could have been a very messy floating cloud of irritating MDF
particles.
I then used the template to trace the curve onto pieces of oak.
Before tracing, I mounted the template to the oak with screws.
To make cutting the oak easier with my inexpensive jigsaw, I
kerfed inside the curve. This helped ensure the jigsaw blade didn't
bend and deflect - something that ruined my first piece of oak. Be
sure to cut no closer to the line than 1/8". Also be sure to leave
scrap on both ends of the oak to allow for mounting.
The oak in this photo is the larger bottom stile.
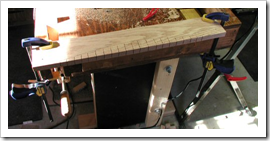
The next step was to mount the template to the cut oak. I used
the same screw holes to ensure that the template lined back up
easily. The oak in this photo is the smaller top stile.

Underside of the template. Note the extra oak block to keep
everything from rocking around. The shot of the template above does
not have the oak block yet. The block is simply screwed down from
the top. I did not glue it so that I might reposition it or remove
it for larger stock.

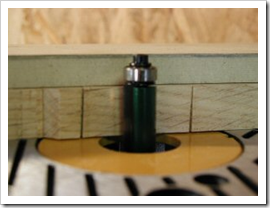
This photo (sorry for the blur) shows how the router bit bearing
rides against the template when cutting out the curve. I took
several shallow cuts to reduce tearout before taking the final
finishing cuts with the bearing riding against the template.
Cutting the curve this way worked extremely well, better than I
thought it would. I will almost certainly follow this same or a
similar approach on other projects.
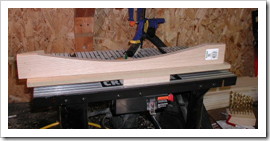
Here is the stile ready to be sanded then trimmed with my miter
saw. Notice the shop-vac hose clamped to the back of the router
table. This was fairly good at picking up the shavings. This was
long before I got my jointer and planer, so what you see is a stock
board from big box store, label and all.
Next I cut the vertical rails to size and then added the taper.
I put the taper on the ends of the rails the dusty way - I just
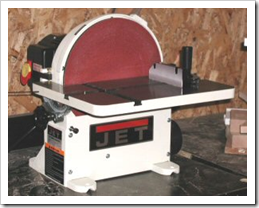
shaped them on my 12" Jet disc sander after drawing them on the oak
with a pencil.
This sander is great and really heavy. I
purchased this guy through Amazon.com Tool Crib and had free
shipping. In fact, the fedex delivery man brought the very heavy
box out back behind my house to the shed door when no one was home.
Now that is service!
This little sander can chew through oak like nothing I've seen.
You have to be very carefuly and use a light touch, or else you
might sand away 1/8" or more before you know it.
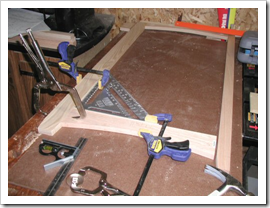
To assemble the face frame, I used the Kreg
Pocket Hole Jig. and a regular carpenter's square. I have since
purchased a
square from Rockler that is better suited for keeping face
frames clamped square. I can't say enough about how easy pocket
holes make assembly. I don't think I'll ever try to use dowels
again. I might try traditional joinery for a showpiece or two, but
not for something utilitarian like cabinets or this piece of
furniture. One important thing about these pocket hole jigs - get a
regular corded power drill. My nice cordless ate batteries like
crazy with this jig. I have since picked up a Dewalt corded drill
that is much better suited to drilling these large holes with the
big 3/8" stepped bit. I can't believe how much faster it plows
those holes through the oak. It's absolutely no contest.
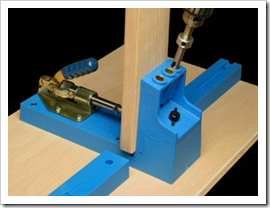
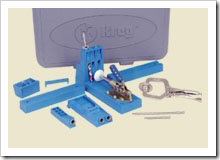
Here is what the Kreg K2000 pocket hole jig looks like. Photos
are from the Kreg
Tool site. I purchased my Kreg Jig through Amazon.com Tool
Crib. However, Lowes typically has everything but the angle vise
clamp you see in the photo above, and Woodcraft typically carries
the entire line.
Here is the assembled face frame. It still needs the cross
stiles that go above and between the drawers. While not strictly
necessary, I did glue the joints. You can just barely see the blue
pocket hole jig in the background mounted to some 3/4" plywood.
Once fully assembled, I will sand the frame with my random orbit
sander.
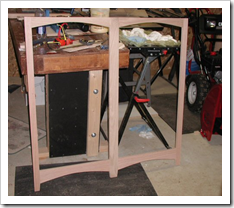
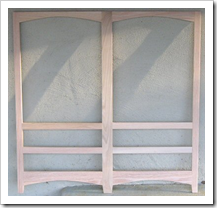
On March 7, it was beautiful out, so I had a chance to work some
more in my shop. Here's the completed face frame, sanded and ready
to go. It was assembled entirely with yellow wood glue and the Kreg
Pocket Hole System. The pocket holes are all on the back side of
the face frame, out of site.
I took this photo on my back patio.
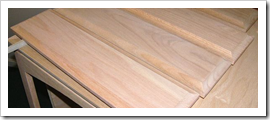
Also on March 7 I routed the fronts of the drawers using a panel
raising / deep cove bit. The drawer fronts are simply 1x6 red oak.
The cove is a bit unusual for a drawer front (a roundover or
chamfer would be more typical), but I like the way it came out. I
used a Woodcraft 1/2" shank bit for this. I've found them to be
excellent bits for the money. The large bit threw chips all over
the shop - the poor shop vac didn't have a chance of keeping up.
Time for me to get a real dust collection system :-)
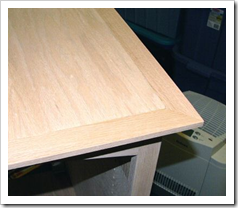
After seeing the drawer fronts, I figured that profile might
look nice on the top of the unit as well. Most of the middle of
March was bitterly cold here in Maryland. However, on March 25 it
was again a nice day, so I routed some edging for the top and
assembled it using pocket holes and glue. In order to attach the
edging with glue and pocket holes, I removed the brackets that
supported the top, knocked it loose and worked on it while detached
from the rest of the carcass. I then reassembled the top to the
carcass using pocket holes. The edging is 1x2 oak routed with a
panel raising bit to give it a nice profile.
One mistake a made which I will endeavor to not make again is
the way I clamped the edging down when assembling it. I clamped it
to the top using the face frame Kreg clamp and some one-hand
clamps, but that did not keep the edging flush with the top. The
pocket hole screws pulled the edging down a bit leaving about 1mm
of the plywood proud of the edging on top. I considered taking it
apart to redo it, but my wife said it is fine the way it is (thanks
for understanding spouses! <g>). Next time, I'll clamp the
edging and top upside down to a flat surface and make sure there is
a lot of clamping pressure in place. I lightly sanded to edges of
the plywood to cut some of the obvious proudness from it, but you
can only sand veneered ply so much :-)
On the plus side, I'm very pleased with how the mitered corners
came out. I trued them up using my Jet disc sander instead of just
relying on the cut from my miter saw.
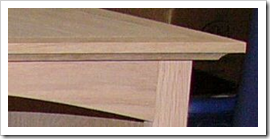
Here is the face frame sitting against the carcass. The routed
and sanded drawer fronts are sitting on two strips of homasote on
the top of the unit. Why homasote? I had a bunch of scraps lying
around from my model railroad work.
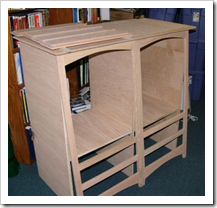
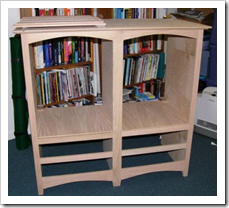
Here you can see the edging on the top as well as the drawer
fronts lying flat on the homasote strips. You can also see why
assembling the carcass after the frame is very important - because
I didn't, the fixed shelves are about 1/8" proud of the tops of the
stiles. I'll fix this next, likely by taking a bit off the top of
the frame, as it is about 1/8" too tall for the carcass anyway.
I took this photo in the laundry room, which also doubles as my
storage area for all my technical books, and railroad
books/magazines. More bookcases are definitely on the list for an
upcoming project.
I ended up lowering the fixed shelves by about an eight of an
inch, and shaving a small bit off the top of the face frame.
Nothing is quite square on this center (it is close, though) due to
the store cuts and my bad cuts, but it still went together
reasonably well. No one but me can see really where it is lacking
:-)
The shelves are simply plywood with a fancy half-round piece of
molding glued to the front of each one. To ensure the shelves are
easy to install, I also rounded the back corners on my disc sander,
and did a very slight round-over on the back and side edges with my
random orbit sander.
Melissa did a great job on the stain and polyurethane for this
center. She used a white water-based wipe-off gel stain.
Even though the drawers are not yet in place (I will cut them
after I get the new fence for my saw - see FrankenSaw),
we have already put the entertainment center to use. The slight
tilt to the left is caused by a high spot in the floor near that
corner. It seems the slab itself is angled up on that side, perhaps
for drainage.
The old chipboard stand is at the dump :-)
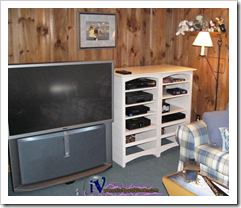
In Use No drawers yet, but we're using the center finally.
October 3, 2004
Current Status
I eventually ordered drawer boxes from the same place that I
used for my kitchen remodel (see my blog for all the details on the
kitchen remodel, including the custom cabinets I built), and simply
applied faces to them. That finished up the entertainment
center.
I intend to build a new one some time in the future - something
in cherry perhaps that will go with the eventual basement remodel.
The purchase of a jointer and planer, a bandsaw, and a spindle
sander have all made working with rough stock a real dream.
While I have made some mistakes building this, I had a lot of
fun and I learned a lot that I can use to make future projects that
much better. In addition, I feel that this piece, mistakes and all,
is still better than much of the furniture I've seen in the stores
- especially the department store stuff :-)