
In early September 2004 on a Friday afternoon of a vacation day,
I paid a visit to Lowes to pick up some plumbing supplies to fix
the kitchen sink. As always, I wandered over to the tool department
to ogle over the wares - something made much easier now that they
opened the tool department up rather than keeping it walled-in.
While in there, I saw a neglected-looking Delta contractor's saw
marked at $280. I noticed that the top had some minor rusting and
scratches, and the fence was broken. I wrote down the model and
serial number, quickly went home and did some research. Then I
fixed the sink. My priorities were, of course, in good order
:-)
The tablesaw, model 36-430, turned out in the reviews to be the
Lowes version of the 36-440 and 36-444. The reviews were pretty
good, with the only negative comments being the occasional beef
about the fence not being as good as a Biesemeyer, and the motor
not being as powerful as a UniSaw. Given that it is a $700 (in
2000) contractor's saw, comments like that were to be expected.
I figured I'd sleep on it and visit Lowes again in the morning,
but I thought better of it after a little bit; Saturday morning at
the local Lowes or Home Depot is never fun. So with less than an
hour until closing, I picked up a trusty straight-edge to check the
table, and some tools for disassembly, and rushed back to Lowes to
check on the saw.
When I got there, after checking the cast iron for flatness (it
was as flat as I could measure) I took a much closer look, and
realized that the motor was missing! I asked the nice older
gentleman there if the "as is" price meant no motor. He thought the
motor was in the unit, but I showed him where it would normally
attach on the back of the saw. He called over another older
gentleman who said "What, no motor? Put $100 on it". I then pointed
out that the fence had no handle and was cracked, and that there
was a handwheel missing from the side. He said to the other
gentleman "Ok. put $50 on it, and make sure it says 'Frame Only'".
I told him for $50, I'd take it right then!
So I ended up with basically a saw body, trunion and guts, and a
cast iron table top for $50. To see what I did with that, read
on.
The saw I really want is a Mini-Max 8' sliding table saw
(such as the SC-4W
8' or the SC-315WS).
However, In order to get one I'll need to build a larger workshop.
As that isn't happening any time soon, this little saw project
saved me from having to worry about it for a bit. I have a Mini-Max
16" bandsaw coming in January 2005, and I can't wait for that. In
fact, that bandsaw is what drove me to get going wiring the shed
workshop for 240v service. As an aside, this is the jointer/planer
I intend to get before I get another saw: MiniMax FS
350
If you find the information on this page useful or interesting,
please take a moment to sign my
guestbook. Thanks!
1. Cleanup and Inspection
Overview
I took the saw apart in the parking lot at Lowes so that I could
get it in my wife's CRV (she had mine on a trip to the West
Virginia/Ohio border to get some native plants
from a friend. The tinted windows were necessary to keep the plants
from getting toasted)
One thing I can tell you about this saw - it was really dusty.
No one dusts the equipment in the tool department at Lowes. It's a
shame that no one takes care of anything there, but I guess that's
what is to be expected. When I want to see clean tools in a nice
setting, I take a trip up to Woodcraft.
The saw included the following:
- Base with dust "ramp"
- Splitter and blade guard (typically something the owner
replaces in short order)
- Standard steel saw insert
- A broken fence
- A serviceable but unfriendly miter gauge
- Two pressed-steep extension wings
- Front aluminum split fence rail
- Back steel split L-angle fence rail
- Power switch assembly
- Trunion, arbor, pulleys and related pieces
- Cast iron top
- Blade angle handwheel assembly
- Inexpensive Delta steel blade
Importantly, it was missing the following
- Motor
- Motor mount
- Motor pulley and pulley guard
- Drive belt
- Blade height handwheel assembly
- Wrenches
- Owner's Manual
The following was supplied, but broken
All in all, I think it was worth $50, if not more. I had already
made up my mind that I would probably not keep that fence, and
definitely wouldn't keep the miter slider. The missing motor and
belt would give me an opportunity to upgrade some items that I
probably would have left alone.
I wasn't concerned about the missing wrenches or manual. The
manual was easily found on Delta's web site. The wrenches happen to
be the same as those used on my Delta compound miter saw.
I wasn't aware of the missing motor mount util I got home and
started going through the online parts list. I had originally
assumed that the motor just clipped onto the pins on the back of
the saw using a mount similar to the UniSaw.
The extension wings had duct tape or some other strange tape on
them. Since I hope to have a router table and regular extension
table attached to the saw, I was also not concerned about the
condition of those tables.
Oh, and just for proof, here's the shot with the price:
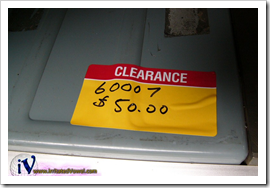
Cheap! Decent price for a half a saw. Pete Brown, September 5,
2004
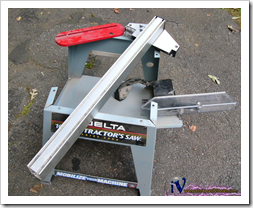
Dusty Parts The base, blade guard and splitter, insert and fence.
Pete Brown, September 5, 2004
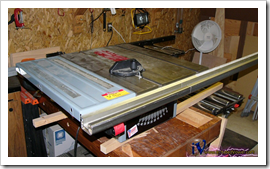
Saw The top, miter gauge and one of the two extensions included.
Notice the split fence rail. Pete Brown, September 5,
2004
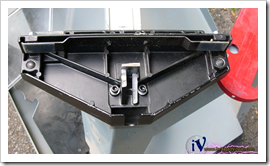
Fence Broken fence cam and handle. Pete Brown, September 5,
2004
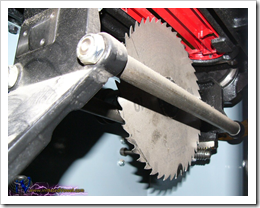
Dusty Blade Dust everywhere! That blade has never seen the light of
day or the bite of wood. Pete Brown, September 5, 2004
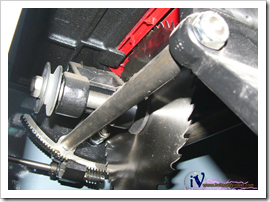
Pulley and Arbor The standard two-piece split and cast arbor
pulley. Pete Brown, September 5, 2004
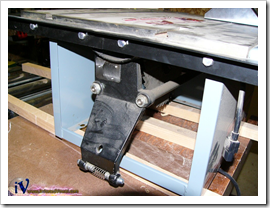
Energy Efficient! Missing motor mount and motor. Pete Brown,
September 5, 2004
Reconditioning the Top
One of the first things I worked on with this saw was the top. I
hate to see a dusty, gummy, rusty cast iron top on a tool. Given
the humidity of the area, any rust on it was only going to get
worse, so I had to clean it up and protect it sooner rather than
later.
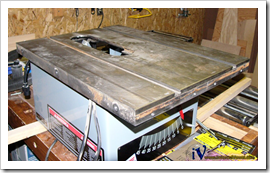
Before The cast iron top before any work was performed on it.
Notice the rust where the iron was attached to the fence and
wings.Pete Brown, September 5, 2004
The top of the saw had some scratches, some rust, and a decent
amount of pre-rust oxidation and grime. Luckily, the only real
areas where the rust took hold were on the sides of the table and
in the miter gauge slots. The scratches were from the crummy old
miter gauge and the fence, neither of which ran on any type of
stand-off. The miter gauge in particular had a worn spot on the
bottom of the cast iron from everyone and their brother walking
past the saw in the store and moving the gauge back and forth.
Nevertheless, the scratches were almost entirely cosmetic. Once
I cleaned up the table and waxed it, it was very smooth. There are
a two or so little nicks near the edge of the table, but nothing
that would make me want to return it. hehe.
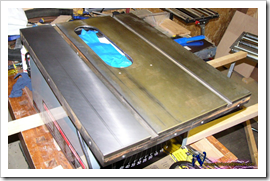
Left Side Done Note the taped-in paper used to protect the interior
from the top cleaning. Pete Brown, September 5, 2004
To clean the table I started off by using the Boeshield products
I have. I have found, however, that those tend to leave a bit of a
stain (more like a dull spot) on the surface if you don't clean
them off right away. I think the stain is from the acid in the
product eating into the cast iron top. My wife said the product
smells just like the grout cleaner she uses around the house -
maybe it is the same stuff. In the end, I had better results by
soaking the table top with WD-40 and then wet-sanding it with fine
grit wet/dry sandpaper. To get into the miter slots, I used a
rubber molding sander (made for sanding curves on convex routed
edges), wrapped the wet/dry around that and slide it in the slot
until they were free of rust. It wasn't the best solution, but it
was something I had, and it worked fairly well.
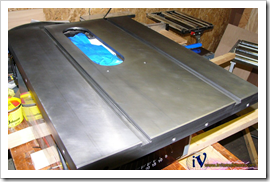
Almost Done The top cleaned but not yet waxed. What an improvement!
Pete Brown, September 5, 2004
Once the table was clean and dry, I applied a few coats of
Johnson paste wax to the top. This helped to fill in any remaining
nicks, and left the surface shiny and smooth. Once everything is
assembled, I'll add another coat or two for good measure.
To protect the saw's new top, I keep a soft dry old bath towel
on the top when the saw is not in use. This keeps dust off, but
more importantly, also keeps the moisture from settling on it.
2. Replacement Parts
I went to the Delta Woodworking parts and owner's manuals site
and found the parts list for the table saw. I looked the saw over
and decided that I would need the following replacement parts:
- 1086491 - Handwheel Assembly
- 422-19-138-0003 - Knob for Handwheel
- 49-034 - Belt (not purchased)
- 926-01-041-9366 - Motor Pulley (2 1/4" OD) including set screw
(not purchased)
- 422-02-089-0005 - Motor Mounting Plate
- 34-965 - Belt & Pulley Guard including all pieces and
hardware
- ?? - 120v Motor Pigtail
I quickly found out that Delta replacement parts are absolutely
not cheap. I already had the wrenches I'd need (one of which came
with my Delta miter saw), so I didn't bother spending another $25
on those.
I then spent several days trying to find suppliers of parts on
the net. While there were many listed on the Delta site, the
majority did not list or carry replacement parts. In the end, I
found only two sites that sold Delta replacement parts: Ace Tool
Repair and Tool Parts Direct.
Of the two, I ended up going with Ace Tool Repair as they had
a better selection, and despite being located in Canada, were
cheaper even with the more expensive shipping. I think the
$0.77/1.00 currency conversion rate helped a bit. The people at Ace
Tool Repair were also a pleasure to work with.
The parts shipped out to me around 9/17/2004 and arrived prior
to the end of the month. That was actually quicker than I thought
it would be.
3. Belt and Pulley Upgrade
Rather than waste $40 on the Delta cast iron motor pulley and
drive v-belt, I hopped up to the semi-local Woodcraft and bought
their Contractor's Saw Upgrade Kit for $54. That kit included two
machined pulleys, and a nice quiet link belt. Many people upgrade
their saws with these parts anyway. Since I needed the part, I
decided to go with the best I could find, just as I did with the
motor itself.
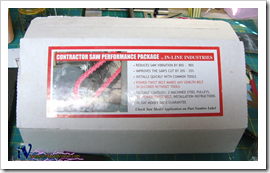
Picture Info Pete Brown, September 11, 2004
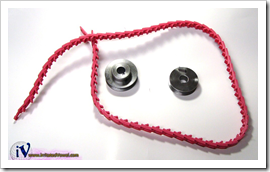
Picture Info Pete Brown, September 11, 2004
Price paid $54 in-store, plus tax.
4. Motor Upgrade - Baldor L3515M
Delivery
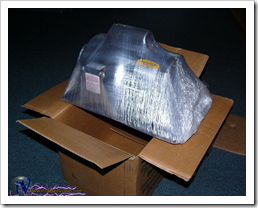
Cocoon The new motor as-delivered. The plastic caused a little of
the paint to flake off. Pete Brown, September 11, 2004
I ordered the replacement motor from Amazon.com Toolcrib.
Toolcrib had the best deal - the price was right to begin with,
then they took $25 off for the order being over $199, then the
shipping was free. The shipping is what will kill you with most
other stores, considering the package weighs over 50 pounds. This
is not the kind of item you're likely to find in any local stores;
at least I couldn't find anyone who carried it.
A little aside on various stores. Amazon Toolcrib has been very
good to me. I've shopped around a lot, and for the types of
products you might get at Lowes or Home Depot, plus some of the
more specialized products, they can't be beat. They certainly don't
list everything, and I find myself hitting up Woodcraft (the local store in
Towson), Rockler or WoodPeckers, but when they do,
they generally have the best deal, especially when shipping is
factored in. I ordered my Jet 12" disc sander from them a while
back, and it too had free shipping. The thing must have weighed 100
pounds! Woodcraft has a decent selection, but they are almost
always priced way above anyone else. They're good on sales, and for
in-person browsing of the store. Rockler has a lot of specialty
items, but I've found that getting things from them at a
woodworking show will be the best deal by far. WoodPeckers is great
for Incra items and other things a person upgrading their saw might
be interested in.
If there were more woodworking stores near me, I'd definitely
patronize them. Unfortunately, Woodcraft is about it. As much as I
like browsing their store, and picking up items, I just can't
justify the big purchases with them unless they're having a great
sale. Often times I do buy things from them and pay more than I
would at toolcrib because I appreciate that they have a store I can
browse and get that instant gratification of the purchase.
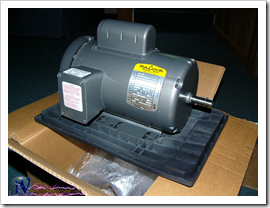
Unwrapped The motor unwrapped. Notice the mounting hole pattern.
Pete Brown, September 11, 2004
Baldor motors are recognized as being some of the best in the
industry. The Baldor L3515M has the correct mounting flange, the
correct arbor size and HP within the range I wanted. The stock
Marathon motor originally included with the saw was 1.5HP at 115
and 2HP at 230V. The new Baldor motor is 2HP, and will also work at
both voltages. I do intend to run it only at 230, however, once I
get the wiring completed.
Price paid : $254, no tax or shipping.
Installation
I installed the motor on the saw on October 2, 2004. The
roughest part about mounting the motor is holding it up while you
try and attach the plate to the rest of the saw. The motor is
pretty heavy. I found that propping it up with a 2x2 of appropriate
height made things easier.
Rather than pay $1.00 to $2.00 each for the "Delta" bolts, I
just went down to the local Lowes with my Delta parts sheet and
paid around $0.06 each for the correct types of bolts, nuts and
washers.
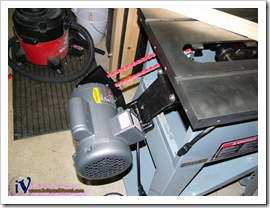
Installed The motor installed on the back of the saw. You can also
see the new link belt and the motor pulley cover. Pete Brown,
October 3, 2004
One of the difficulties with this motor comes about due to the
flexible mounting holes. The motor does not automatically square to
the mounting base like it would if it had simple round holes. This
additional flexibility is definitely a plus, but it also makes it a
bit more work to square up. Of course, you should mount the motor
to the plate itself on a flat surface, not while it is attached to
the saw.
Lacking any better ideas, I squared the motor to the mounting
plate itself by mounting it as far back as possible. I will
resquare this shortly, as I have noticed that it is not 100%
correct. The stress from the belt torqued it just a bit.
One other thing I noticed is that the link belt is just couple
links too long. When the blade is at mid height, the motor rests
all the way down on the mounting arm so that the mounting plate is
actually contacting the arm. This causes too much slack, and
therefore vibration, in the belt. I'll tighten this up when I do my
final squaring.
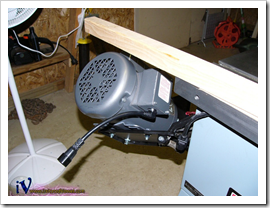
Clearance Check It is important that the saw not stick up above the
table top when the arbor is at 45 degrees. There is about 3/4"
clearance here. Pete Brown, October 3, 2004
A note on wiring: the motor must be wired (per instructions) in
reverse due to the way it is mounted on right-tilt Delta
contractor's saws. Happily, this is a very easy thing to do. It may
be tempting to plug the motor in and try it with no load. From
experience, I recommend not doing that. With no load at all (no
belt or arbor pulley), the saw drew enough amps to put the lights
out in my shed (about 20 amps) briefly while it spun up. It did not
pop the breaker, however. Once I have the shop wired for 240v
service and more amps this fall/winter, I'll rewire the motor. In
the mean time, I'll be careful not to stress it with any difficult
or long cuts.
After I mounted the motor, I checked the clearance with the top
of the table. It is important that the motor not protrude above the
top of the table. If it does, you will not be able to properly
clear any sheet goods or wide stock when ripping or cross cutting
45% bevels. It is also important that the motor clear the fence
rails. Since I do not yet have my fence in (it will arrive the week
of October 4th), I could not check that.
Note that I will need to re-check the clearance once I remove
the couple links from the link belt. Also note one bad thing about
contractor's saws: the motor location effectively limits what types
of outfeed support you can have. Any outfeed tables need to either
stop short of the left of the saw, or be thin enough in at least
that part of the table that they will not be hit by the motor.
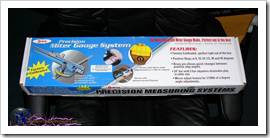
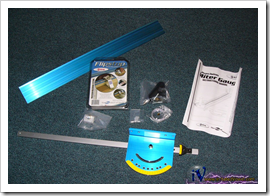
5. Miter Gauge Upgrade - Kreg Precision Miter Gauge
Picture Info Pete Brown, September 11, 2004
Picture Info Pete Brown, September 11, 2004
Price paid: $135.99 plus tax at the Woodcraft bag sale (anything
you could fit in their bag at least 50% was discounted 15%)
6. Fence Upgrade - Incra TSLS from Woodpeckers
The price of a new fence head from Delta is over $120 just for
the basic fence that the saw was delivered with - that doesn't
include the handle and other hardware. I wasn't in love with the
fence to begin with, and that price made me definitely decide to
write it off. So now I have a good excuse to look at some nice
replacement fences.
The current leader in the fence race is the Incra LS Joinery
Package. I have to take some measurements, however, to see if
that will even remotely fit in my workshop. The LS-Positioner has
an arm that extends out roughly 42" from the fence position. If you
have the fence all the way to the right, that means you need
another 36" (roughly) of clearance to the right of the end of the
rails.
The Incra has several things going for it:
- Best accuracy in the industry
- Perfect (within tolerance) repeatability of settings
- Attachments for additional jigs and fixtures (this is very
appealing to me)
- Ability to easily use with an attached router table (included
in the package)
Another option is the Incra
TS-IIIa (TS-III reviewed, the "a" model has a machined, not
extruded, fence.). That is far less expensive than the full Joinery
system, and can use the router
Incra WonderFence to make it almost the same as the LS Joinery
System. The main difference, however, is the way in which the fine
adjustments are made. I can always get the LS without the full
joinery system. I am not yet sure which one is best. I think the LS
(lead screw) version would be better, and more precise. I will be
looking into it soon.
For economic reasons, what I will likely end up doing is getting
the TS-LS basic system and then later adding on a WonderFence and
router table. It will cost a bit more in the long-run, but it
allows me to use my saw earlier.
A Biesemeyer wouldn't be a bad alternative. However, the Incra
really is what I want. In fact, I have my workshop in the old CAD
program to see how to fit it all in. :-)
Decision
In the end, I decided to get the full 32" Incra TSLS system from
Woodpeckers. This package includes everything a guy could want,
including the LS Positioner tablesaw system, a router table for the
left wing on the saw, a router insert plate, the Incra WonderFence
and Joinery system, including templates. I upgraded to the aluminum
router insert, and also picked up a project book at the same
time.
I did not order any right router table, as that would be
difficult to use in my small shop. Instead, I plan to build an
extension there with storage underneath. I do not plan to use the
steel wings that came with the saw. I have one installed only
temporarily.
I ordered the package on September 30, 2004 in the morning. All
the boxes shipped the same day and arrived in just a few days. To
see my review of this system, visit my
Incra TSLS Review Page
7. Guard and Splitter Upgrade - Undecided
Having seen the European riving knives in action, anything less
is just a compromise. Since you can't put a real riving knife on an
American saw (due to the way the blade rotates when it is lifted),
I'll have to find the next best thing. Due to my selection of
fence, I can't use the included splitter without cutting the rear
Incra fence rail. There's no way I'd do that just for the nasty
stock splitter!
For the splitter, I am currently leaning towards the Biesemeyer
splitter. At $107, it's awfully expensive for what it does,
however, and also does not support thin-kerf blades. In the mean
time, I'll likely just slice up the splitter that came with the
saw.
For the guard, I'm looking mainly at overarm guards with and
without built-in dust collection ports. The Delta
Unigard ($270), while lacking dust collection ports, is a nice
unit with over-table power and tool storage. As a bonus, it
includes a servicable splitter. Between the larger motor and the
rear rail of the Incra fence, however, I don't think there would be
room for something like the Unigard. Once I have the fence
assembled, I will take another look. Other guards include the
Excalibur and the Exaktor. The Excalibur support arm might
interfere with the LS positioner on the Incra fence. TBD.
Update March 2007: I eventually ended up purchasing the
Excalibur guard and use the MJ-splitter from Micro-Jig. The plastic
MJ splitter is ok. A metal one would be better. I had the plastic
one fail and had a nasty kickback incident. The Excalibur guard is
nice, but suffers from not having brushes or something to surround
the blade. I will attach a soft-bodied baffle around the bottom
made either from brushes or leather or similar.
8. Bottom Line
| Item |
36-444*
Delta Contractor's Saw |
36-507X
X5 Delta Contractor's Saw |
The Frankensaw |
| Base American-Made Contractor's Saw |
700 |
975 |
50 |
| Replacement Parts |
0 |
0 |
120 |
| Motor Upgrade |
0 |
0 |
250 |
| Pulley and Belt Upgrade |
55 |
55 |
55 |
| Incra Fence and Router Table Upgrade |
850 |
850 |
850 |
| Kreg Miter Gauge Upgrade |
136 |
136 |
136 |
| Total |
$1,741 |
$2,016 |
$1,461 |
|
* The Frankensaw is based on the 36-430. This is basically the
36-444 as sold by Lowes. The manual has both model numbers listed.
The cost of the normal Delta saw goes up if the Delta saw owner
had replaced the motor. Since many owners do not do this, however,
I decided to leave that out on that side. The Current X5 comes with
a better fence than the 36-444 (a Biesemeyer). However, I still
find the Incra fence to be in a class of its own.
Also please note that you can get a Delta made overseas
(36-680), with a Biesemeyer-like fence a smaller cabinet and a
chute-less stand, for about $600. The same saw with a UniFence
(36-681) runs about $800. These prices were current at Amazon.com
in September/October 2004.
In the end, for about $300 less than the original saw, and
around $550 less than a currently available saw, I was able to put
together a saw with a more robust motor, all upgraded parts, and an
incredible fence. I did not save as much money as I thought I
might. In particular, the replacement parts were more expensive
than I thought. However, I ended up with a very accurate and
fine-tuned saw that I know inside and out, and which is made up of
some of the best parts I could find.