In August 2002, on my vacation, Melissa and I built a stone
wall. Melissa laid most of the courses of stone, I laid most of the
gravel and handled all of the demolition and digging. We
decided that we wanted a wall that looked more natural than many of
the newer walls, so we shied away from the squared-off stone and
the fabricated bricks. This did a few things for us
- It looks more "natural". This is something Melissa really
wanted.
- The wall has lots of little nooks where toads and skinks can
live (we get a lot of toads in the driveway and skinks around the
house in the summer)
- It saved us a ton of money. The squared-off and common
thickness stones are much more expensive than the rough multi-sized
ones we picked up
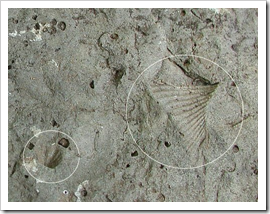
- We found some shell fossils in the stones :-)
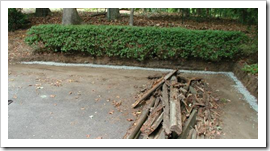
Here is a photo of the wall as it existed when we bought the
house. It was built using standard pressure-treated garden
timbers held down by large spikes.
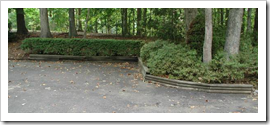
You would never have guessed from the photo above that the
garden timbers were completely rotten and infested with about the
largest colony of carpenter ants I have ever seen! The inside
of the timbers were completely disintegrated. Since the timbers
were pressure-treated, it was important to dispose of them
properly. Our local landfill collection area has special bins
for pressure-treated lumber. You should never dispose of
pressure-treated wood by treating it like you would normal
wood. Pressure-treated wood has hazardous chemicals in it
that kill wildlife as well as pollute the ground water.
Always wear gloves when handling pressure-treated wood, and a
breath mask if you care cutting it.

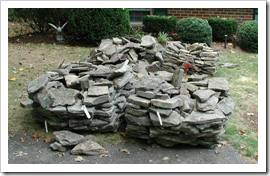
Here's the load of wallstone that it took to complete this
wall
Here's a couple fossil imprints we found in one of the
stones
All the timbers have been removed, and a small base of 1/2" blue
stone gravel has been put down in a shallow undercut to help with
drainage, weeds and freezing damage. The earth was also
angled up and away from the wall as best as I could without
damaging any of the nearby plants.
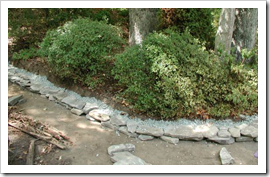
Here the second course of stones has been laid, and the area
behind them backfilled with the 1/2" blue-stone gravel The
gravel helps seat the wall stones, but more importantly, provides a
barrier against erosion and water damage.
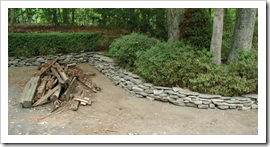
Here the wall is complete in the corner, barring some touch-up
later on. The highest point of the wall is in the 90 degree inside
corner in the left third of the photo. It tapers off in both
directions from there.
Here is an evening picture of about 3/4 of the wall. The
completed wall used four half-pallets of flat stones and one ton of
blue stone 1/2" gravel.
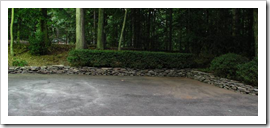
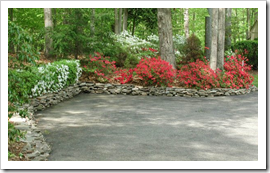
Here is a nice photo of the wall from April 2003, right after
Melissa used the leaf blower to clean off the driveway of all the
tree pollen and other debris. The wall extends further on
towards the camera. The stones have weathered a pretty severe
winter quite well, and any that did fall (due to overly aggressive
shoveling or plowing, heh) were very easy to reseat due to the
complete lack of any mortar. We've already noticed some skinks and
toads living inside the pockets between the stones :-)